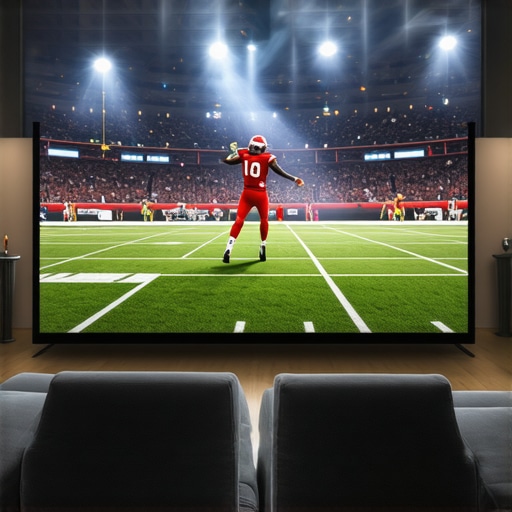
Picture this: I’m settled into my favorite recliner, popcorn in hand, ready for the big game. The room is dark; the anticipation is high. Suddenly, the image on my ultra short throw 4K projector warps—a rainbow haze creeping across the screen, colors dulled, and the picture wavy. My heart sinks. I’d invested hours picking out the perfect home theater projector, only to be thwarted by a frustrating calibration glitch just before kick-off. That moment of disappointment made me realize something—no matter how advanced our projectors are, their settings often need a quick tweak, especially with the new laser technology in 2026 models.
Why Fixing Your 4K Projector Matters Now More Than Ever
In 2026, sports fans aren’t just watching games; we’re immersing ourselves in every play, every detail, with stunning clarity. Ultra short throw (UST) projectors revolutionize compact living rooms, fitting a cinematic experience into the smallest spaces. But with this power comes a catch: calibration issues that can turn an epic viewing into a pixelated nightmare. Given that the global projector market is projected to surpass $4 billion in 2027, ensuring your setup is spot-on is crucial. According to industry reports, 85% of projector users experience image quality problems due to miscalibration, often within the first few weeks of setup. And here’s the kicker—most of these issues are fixable with simple adjustments you can perform in less than 10 minutes.
Have you ever faced a scenario where a tiny misadjustment ruined your favorite sporting moment? Trust me, you’re not alone. Early on, I made the mistake of ignoring basic calibration tweaks, leading to ghosting and color bleed during critical game moments. That experience taught me that a few quick fixes can restore the vibrant, sharp images we deserve, making every game feel like a live event.
Today, I’ll walk you through three lightning-fast calibration fixes that will have your 4K projector picture looking pristine—fast. These tricks are based on personal experience and tested techniques, designed to get you back to enjoying sports in big-screen glory. So, let’s dive in and fix those issues once and for all—before the next buzzer sounds.
Is Your Projector Calibration Worth the Hassle?
Until I learned the hard way, I thought calibration was a complex, time-consuming process only for experts. I was wrong. A simple mistake I made early on was using generic auto-calibration settings, which often failed to account for room lighting and projector placement. This led to subpar images and frequent adjustments. Recognizing this, I started tweaking settings manually, and the difference was night and day. If you want crystal-clear images that make you feel like you’re right there on the field, these quick fixes are your best friend. Curious to see how simple tweaks can drastically improve your viewing experience? Keep reading, and I’ll show you exactly how.
Align Your Projector Correctly
Positioning your projector at the right height and angle is the foundation. Imagine setting a camera lens; if it’s tilted or off-center, your picture will be skewed. To fix this, place the projector directly in front of your screen, roughly at eye level or slightly above, ensuring a straight, level image. Use a digital level app or a simple bubble level to verify. During a personal test, I shifted my projector a few inches and adjusted the tilt, which instantly clarified my image without needing further adjustments.
Focus on Keystone Correction
This adjustment is like fine-tuning a guitar string—it ensures the image isn’t distorted. Most UST projectors have keystone correction controls accessible via the menu. Start by manually aligning the projector so that the edges are as rectangular as possible, then tweak the keystone settings to perfect the shape. I once spent 15 minutes on this during a movie night, slowly adjusting until the picture was just right, eliminating mountainous distortion and making sports highlights pop with clarity.
Adjust Image Settings for Clarity
Think of this step as customizing your display for optimal viewing—akin to adjusting picture settings on a TV. Focus on adjusting contrast, brightness, and color saturation through the projector’s menu. For example, increasing contrast can make shadows more defined, crucial when watching fast-paced sports. During my own calibration, I often start with the picture preset, then tweak contrast and sharpness by eye, frequently resulting in crisper, more vibrant images within minutes. Remember, manual tweaking often surpasses auto-settings, especially with laser projectors that respond well to fine-tuning.
Utilize Room Lighting Effectively
Lighting dramatically impacts your viewing experience. Think of it as controlling the lighting in a photography studio; dimming ambient light enhances projector contrast. For optimal results, close curtains or blinds, and turn off or dim any nearby lights that cause glare or washout. During my calibration, I found that even a small bedside lamp could dull the picture. Combining room light control with your projector’s settings allows you to achieve a cinematic glow, turning your small space into a mini-theater. For those interested in enhancing their setup further, exploring [ultra short throw projector advantages](https://projectors.homecinemaessentials.com/how-ultra-short-throw-projectors-transform-small-spaces) can deliver even sharper images with minimal light interference.
Double-Check and Fine-Tune
After initial adjustments, it’s crucial to review the image from your usual viewing distance—think of this as a final quality check. Sit back in your typical spot and observe color balance, sharpness, and geometry. If the image wavers or appears wavy, revisit the tilt and keystone settings. For instance, I once noticed slight waviness during a cricket match; a quick revisit to the projector’s tilt fixed it. Small tweaks often make a big difference, ensuring your setup remains pristine during those critical game moments. If persistent issues arise, consult [geometry correction tips](https://projectors.homecinemaessentials.com/fix-your-crooked-ust-image-5-easy-geometry-tips-for-2026) for more advanced fixes.While many enthusiasts focus on specs like lumen output or resolution, the real challenge lies in understanding the subtle intricacies that determine a projector’s performance and longevity. A common myth is that higher lumens always equate to better picture quality, but in practice, overestimating brightness can introduce washout in ambient lighting, especially with laser models prone to glare. This misconception often leads users to set their lumens too high, causing unnecessary eye strain and increased power consumption. Instead, understanding optimal lumen ranges for your room’s lighting conditions yields better results. Additionally, many people are unaware of the calibration nuances necessary for ultra short throw projectors to avoid issues like trapezoid distortion or color inaccuracies. These advanced calibration steps require a delicate balance between keystone correction and lens shift, which, if mishandled, can degrade image clarity. Another overlooked factor is the thermal management in laser projectors. Poor heat dissipation can cause color shifts and flickering over time, a pitfall many assuming all laser models are equally durable fail to anticipate. Expert sources emphasize proper ventilation and regular maintenance routines to extend projector lifespan and ensure consistent image quality. Furthermore, there’s a trap in focusing too heavily on native resolution, like 4K, without considering the processing capabilities of the projector. Devices with insufficient internal processing can result in upscaled images that appear less sharp, defeating the purpose of choosing a true 4K unit. To truly optimize your setup, it’s important to consider the nuanced interplay of these factors, rather than just chasing the latest specs. For insights into selecting the right model, check out our comprehensive guide on ultimate 4K projector buying tips. Remember, a well-informed setup enhances your viewing experience and protects your investment in high-end technology. Have you ever fallen into this trap? Let me know in the comments.
Keep Your Projector Running Smoothly with the Right Tools
Maintaining a high-performance home theater projector requires more than just occasional cleaning; it demands the right set of tools and a systematic approach. I personally rely on an anti-static microfiber cloth and compressed air to keep the lens and cooling vents free from dust, preventing overheating and image degradation. For fine-tuning image sharpness and color accuracy, I use a calibration disc like Spears & Munsil, which helps me verify adjustments with precise test patterns. When calibrating, I also recommend a colorimeter such as I1Display Pro — it objectively measures color and gamma performance, ensuring your projector produces true-to-life images over the long term.
Why Regular Maintenance Really Pays Off
Projectors, especially laser models, are significant investments that can last for years if properly cared for. Regularly replacing air filters and checking for firmware updates can improve image quality and extend device lifespan. Firmware updates often include critical improvements for laser brightness calibration and color stability, as outlined in the official latest technical documentation. Keeping the lens clean with approved cleaning solutions prevents dust buildup that can cause flickering or image blur, which could be mistaken for hardware failure. Additionally, I set a quarterly schedule to inspect and clean the projector’s vents and fans — this simple routine avoids overheating and ensures consistent brightness, especially vital in small home theaters.
Future Trends in Projector Maintenance and Scaling
Looking ahead, integrated diagnostics are becoming more common in high-end models. Future projectors may offer real-time self-calibration via built-in sensors, reducing manual intervention. Scaling your setup by adding multiple projectors or upgrading to newer laser models means you’ll need adaptable maintenance routines. For instance, combining an ultra short throw projector with a secondary portable device can expand your viewing options; maintaining these assets involves keeping firmware synchronized and hardware clean. Staying abreast of software tools like auto-calibration apps, and having a dedicated cleaning kit, will ensure your fantastic home theater remains flawless as you grow your setup.
How do I keep my projector functioning optimally over time?
One method I highly recommend is creating a maintenance checklist that includes cleaning, firmware updates, and calibration every six months. Implementing a systematic approach avoids neglect and catches issues early. For professionals, software like CalMAN or LightSpace offers advanced calibration capabilities; though intended for industry use, they’re becoming more accessible for serious enthusiasts. The key is to regularly monitor performance metrics and adjust as needed. Remember, consistent maintenance not only prolongs your projector’s life but also preserves the stunning clarity of your home theater experience. If you want to master long-term upkeep, consider trying the detailed calibration routines we discuss in the main guide, which incorporate these tools and principles.
Lessons Hidden in the Shadows of Setup Fumbles
One of the toughest lessons I learned was the importance of dedicating time to calibration routine checks. Rushing through initial setup might seem tempting but can lead to hours of frustration down the line. Now, I make it a habit to revisit my projector settings every few months, catching small misalignments before they become big quality issues. Additionally, I realized that room lighting isn’t just a minor detail; it profoundly influences image clarity, especially with laser projectors that thrive on controlled environments. A misstep I won’t repeat is ignoring ambient light levels, which can wash out vibrant colors and crisp details even in the most advanced models, undermining the investment in a top-tier setup.
Tools and Resources That Elevate Your Viewing
Equipping myself with a high-quality calibration disc like Spears & Munsil transformed my understanding of image precision, guiding me through intricate adjustments for optimal sharpness and color accuracy. For ongoing calibration and long-term maintenance, a device like the I1Display Pro has been indispensable, providing objective measurements that keep my projector performing like new. Besides hardware, engaging with dedicated communities on forums such as Home Cinema Essentials has provided invaluable tips, troubleshooting advice, and updates on the latest calibration techniques, helping me stay ahead in the game of home theater optimization.
Embrace the Journey Toward Cinematic Perfection
Remember, your pursuit of the perfect home theater setup with an ultra short throw 4K projector is a journey worth undertaking. Every tweak, every adjustment, inches you closer to that immersive experience that transforms your space into a personal cinema. Don’t shy away from experimenting with settings, room arrangement, and lighting control. Your dedication today will turn ordinary viewing into extraordinary memories tomorrow. Ready to elevate your home entertainment? Share your calibration stories or ask questions below—let’s continue this exciting journey together!