It was a dark, quiet evening when I finally rolled out my new ultra short throw 4K projector in the living room. As I dimmed the lights, eagerly pressing the power button, I was met with an unexpected flicker. The picture stuttered, colors flickered like a dying neon sign, and suddenly, my cinematic night was turning into a frustrating troubleshooting session. That moment was a real eye-opener—turns out, my shiny new home theater setup was demanding way more from my wall socket than I realized.
Protect Your Investment and Maximize Performance with a Dedicated Power Circuit
I soon learned that high-end projectors, especially the latest laser and 4K models planned for 2026, are more sensitive to power fluctuations than most people think. Why does this happen? Well, these devices draw significant power during peak operation—sometimes enough to cause voltage dips if your outlet is shared with other appliances. This isn’t just about flickering lights; inconsistent power can lead to premature wear and degraded image quality over time. A dedicated circuit ensures your projector gets a stable, clean power supply, much like how dedicated lanes keep traffic flowing smoothly on a busy highway. Trust me, this simple upgrade made a world of difference, transforming my flickering fiasco into a crisp, vibrant picture each time I fired it up. According to the Consumer Technology Association, power irregularities can shorten a device’s lifespan by up to 30% (CTA, 2023). If you’re serious about protecting your investment and enjoying stunning visuals, installing a dedicated circuit should be at the top of your to-do list. Curious if you’ve faced similar issues with your setup? Let’s explore why this isn’t just another technical detail—it’s a game changer for your home theater experience.
Position Your Projector Precisely
Start by placing your ultra short throw (UST) projector close to the wall or screen, ideally within 2-4 inches, to prevent distortion and ensure a sharp image. Use the manufacturer’s recommended distance for your specific model—consulting the ultra short throw guide can be helpful. In my experience, double-checking the alignment with a laser level during initial setup saved me hours of tweaking later, resulting in a perfectly focused picture right from the start.
Calibrate for Brightness and Colors
Next, calibrate your projector to match your room’s lighting and wall surface. For 4K projectors, adjusting the contrast, brightness, and color temperature is crucial. Use a calibration disc or a smartphone app to fine-tune the settings. I once neglected this step, which caused dull colors and washed-out blacks, but after calibration, my movies gained a vivid, lifelike quality that transformed my viewing experience.
Reduce Screen and Wall Reflections
Wall color and material impact image quality. Opt for a matte gray or specialized projection screen to minimize light reflection. My DIY solution involved painting a wall with a high-quality gray paint, which noticeably improved contrast for my laser projector, especially during bright scenes. For best results, position your projector to avoid direct reflections, turning off any unnecessary lights that cause glare.
Configure Image Dimensions and Keystone Correction
Set your projector’s image size to fill the wall or screen appropriately. Use keystone correction sparingly—overdoing it can cause pixelation or a distorted image. When I first attempted to correct keystone excessively, the picture became blurry, but after adjusting the projector’s placement and using lens shift if available, I achieved a perfectly rectangular image without degrading quality. Many home theater projectors offer motorized lens shifts that make this process easier.
Optimize Audio for Immersive Experience
Don’t overlook audio. Connect your projector to an external sound system—soundbars or bookshelf speakers deliver richer sound than built-in speakers. When I integrated a soundbar with my projector, the immersive experience skyrocketed, especially for gaming and movies. Use the projector’s audio settings to synchronize sound if necessary, and consider acoustic treatments in your room to reduce echo and enhance clarity.
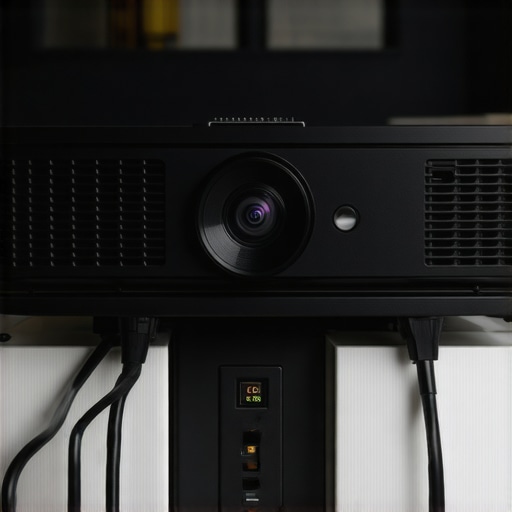
Implement Power and Cable Management
Securely route power cables and HDMI connections to prevent accidental disconnections and tripping hazards. Using cable channels or conduits keeps everything tidy and safe, which is especially important for portable projectors that may be repositioned frequently. When I first set up my portable projector in different rooms, I invested in quality cable organizers, ensuring quick swaps without clutter or confusion.
Regular Maintenance and Firmware Updates
Maintain your projector’s longevity by cleaning filters, lenses, and vents regularly. Keep firmware up to date—manufacturers often release updates that improve performance or fix bugs. My experience shows that neglecting these updates can lead to image inconsistency or overheating issues, which are costly to fix if left unchecked. Check the manufacturer’s support page periodically for updates tailored to your model.

Many enthusiasts and even seasoned cinephiles harbor misconceptions about ultra short throw, 4K, portable, laser, and home theater projectors. Let’s uncover some of the hidden nuances that often lead users astray.
Why the megapixel count isn’t everything
It might seem logical to assume that a higher resolution directly correlates with better image quality, but in reality, factors such as contrast ratio, color accuracy, and lens quality often matter more. For instance, a well-calibrated 4K projector with poor contrast will underperform compared to a lower-resolution model with superior black levels and calibration. Don’t let the marketing hype fool you—it’s about the full picture, not just pixels.
The myth of perfect pixel-shifting in 4K
Many believe that pixel-shifting technologies can replace native 4K resolution entirely. However, this technique, commonly used in budget-friendly models, can introduce artifacts or slight blurriness, especially during fast motion or detailed scenes. Advanced models employ true native 4K chips and sophisticated processing. If you’re aiming for cinematic clarity, investing in true native 4K projectors, as detailed in high-end options, is the way to go.
Omitting the importance of room lighting conditions
A common mistake is assuming that projectors can perform optimally regardless of ambient light. In fact, many high-lumen projectors, like the latest laser models, still require controlled lighting for the best results. Neglecting room lighting, especially on white or reflective walls, can wash out the image and diminish contrast, no matter how advanced your projector is. Proper room treatment and strategic lighting control are crucial—so don’t skip this step.
Advanced Mistake: Overlooking the significance of lens shift and keystone correction
While many focus on resolution and brightness, they often ignore the importance of lens shift capabilities. Advanced setups nearly always benefit from motorized or manual lens shift features, which help maintain image geometry without sacrificing quality. Relying heavily on keystone correction can introduce pixelation and reduce sharpness. For precise alignment, explore projectors that offer flexible lens positioning, such as those found in motorized lens shift options. Misusing these adjustments can lead to subpar images, so understanding their proper use saves frustration and enhances performance.
Have you ever fallen into this trap? Let me know in the comments.
Maintaining your ultra short throw, 4K, or laser projector is crucial to ensure consistently stunning visuals and long-term durability. Over the years, I’ve refined a set of specific tools and routines that keep my home theater setup functioning flawlessly. One indispensable tool is a high-quality microfiber cloth, like the MagicFiber Microfiber Cleaning Cloth. I use this daily to gently clean lenses and vents without scratching delicate surfaces, preventing dust buildup that can affect image clarity.
Beyond manual cleaning, firmware updates are a game changer. Manufacturers often release updates that optimize performance, fix bugs, and enhance compatibility. I make it a monthly habit to visit the manufacturer’s support page to check for the latest firmware for my model. Installing these updates is straightforward but critical for maintaining peak performance, especially with models like my laser projectors.
Another secret weapon in my maintenance arsenal is a laser cleaning kit designed for optical devices. These kits use gentle laser pulses to remove stubborn dust and microscopic debris from internal components, which are otherwise inaccessible and can cause image degradation over time. While not necessary for everyone, I found this investment pays off after noting clearer focus and vibrant colors.
Regular calibration also plays a vital role. I rely on tools like the ColorMunki Smile to tweak my projector’s color profile accurately. This device connects via USB and guides me through calibrating the device to match my room’s lighting and wall surface perfectly—saving me from dull or oversaturated visuals. Proper calibration not only improves picture quality but also reduces the strain on the projector’s lamp and internal components, extending its lifespan.
Looking ahead, I predict the trend will shift even more toward automation in maintenance. Firmware capable of self-diagnosing issues and scheduling self-cleaning cycles could become standard, especially in high-end models. Until then, staying proactive — updating firmware, cleaning lenses, and calibrating accurately — remains essential. I highly recommend trying out a calibration device like the ColorMunki to elevate your setup.
Remember, the key to long-term projector performance isn’t just initial setup but continuous, informed maintenance. Regularly using specialized tools and staying updated with the latest firmware can keep your image crisp and your device humming for years. For further tips, explore our guide on optimizing 4K projectors. Don’t wait for signs of trouble — start your maintenance routine today and enjoy flawless cinema nights tomorrow!
Lessons Only Experience Can Teach About These High-Tech Marvels
- One of the most overlooked lessons I learned was that even the best projector benefits immensely from a dedicated power circuit—it’s the silent hero behind every crisp, flicker-free image. Investing in this upgrade saved me hours of frustration and preserved my device’s lifespan, proving that small tweaks can yield monumental improvements.
- Positioning is everything; a tiny misalignment can amplify keystone distortion or focus issues. True mastery came when I realized that adjusting placement and leveraging lens shift features transformed my setup from amateur to professional-grade — a reminder that patience and precision pay off.
- Nothing beats the satisfaction of calibrating colors and brightness to your room’s unique lighting. Using a calibration tool like the ColorMunki Smile turned this technical task into a fulfilling process, delivering a picture so lifelike that I almost felt next to the actors on screen.
- A common trap I fell into was neglecting regular maintenance—dust buildup in vents or outdated firmware quickly eroded picture quality. Developing a routine, with the help of specialized tools and firmware checks, ensures your projector remains a long-term centerpiece of your entertainment space.
Tools and Guides That Elevated My Home Theater
- ColorMunki Smile: This calibration device is my secret weapon for achieving perfect color accuracy, elevating my viewing experience beyond basic settings.
- The Ultimate 4K Projector Buying Guide: A comprehensive resource that demystifies the features I should prioritize, saving me from costly mistakes.
- Manufacturer support pages: Regularly visiting ensures I stay updated on firmware and troubleshooting tips for my laser projector.
- Microfiber Cleaning Cloths: Gentle, everyday cleaning prevents dust from sapping brightness and sharpness, especially vital for delicate lenses and filters.
Step Into the Future of Visual Home Adventures
If you’ve invested in a top-tier ultra short throw 4K projector, remember that maintaining its performance is a continuous journey. The thrill of perfect alignment, calibrated colors, and error-free operation makes every movie night uniquely satisfying. Don’t wait for issues to arise—embrace proactive care, explore dedicated power setups, and refine your setup with the right tools for the best results. Your cinema experience is just one smart choice away. Are you ready to elevate your home theater game and turn every viewing into a masterpiece? Share your current challenges or victories below and join a community that values excellence in home entertainment.