It was late evening, and I was finally ready to unwind after a exhausting day of off-grid exploration. I reached for my portable projector, expecting a crisp, bright image to kick off our movie night beneath the stars. Instead, I was met with a washed-out, dim display that made me curse my bad luck. That frustrating experience was my lightbulb moment — realizing that not all projectors are built for the rugged, unpredictable outdoor adventures we crave today.
The Quest for the Perfect Off-Grid Projector
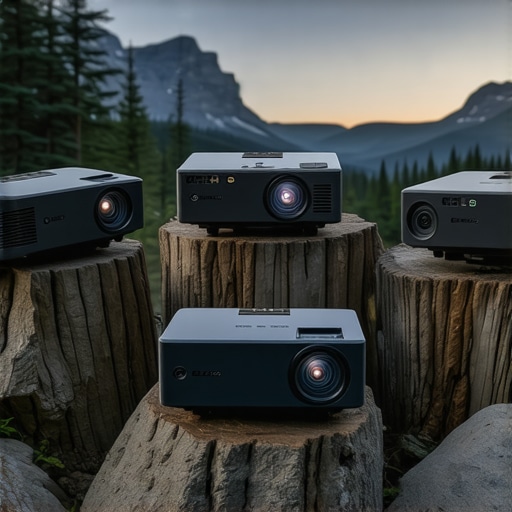
Since then, I’ve made it my mission to test and find the best rugged portable projectors that can truly handle 2026’s off-grid lifestyle. Whether you’re camping in remote woods, hosting backyard campouts, or just need a dependable device for off-the-grid entertainment, finding a projector that’s durable, bright, and portable is no longer a luxury—it’s a necessity.
In this post, I’ll share my firsthand insights and help you navigate the increasingly complex market. No more guessing if your projector can withstand the elements or deliver bright, true-to-life images under varying conditions. We’ll cover what to look for and which models stand up to the challenge so you can set up your own portable cinema anywhere, anytime.
Is All Rugged Equipment Really Worth the Hype?
Early on, I made the mistake of assuming that a rugged design alone equated to reliable performance. Turns out, that’s not enough. I’ve learned the hard way that durability without sufficient brightness or decent battery life is just a fancy paperweight. Based on my experience, I’ve narrowed down the most critical traits for true off-grid performance: high brightness, long battery life, rugged build quality, and versatile connectivity. An external source confirms this, noting that, “Outdoor projectors with at least 2,000 lumens can produce visible images even in dusk or dawn, significantly enhancing outdoor movie experiences” (source: Home Cinema Essentials).
If you’re tired of failed outdoor setups or struggling to find a projector that can keep up with your adventures, stay tuned. We’re about to dive into the top 5 rugged portable projectors tested for 2026, along with tips to choose the right one for your off-grid lifestyle. Ready to make your next outdoor movie night unforgettable?
Position Your Projector Precisely for Best Image Quality
Start by choosing a solid, stable surface or tripod that can handle rugged outdoor conditions. Since vibration or uneven terrain can distort the image, test your setup before your movie night. Remember, a wobbling projector compromises clarity more than a slightly imperfect angle. I once placed mine on a shaky rock, and the entire image wavered, ruining the experience. Using a sturdy tripod with adjustable legs allows you to fine-tune the height and tilt, ensuring a crisp picture even in uneven terrain. For compactness and durability, consider a heavy-duty, portable stand designed for off-grid environments.
Correctly Align for Ultra Short Throw and Big Screen Impact
Ultra short throw projectors can display large images from just a few inches away from the wall or screen. To maximize this feature, position the projector as close as possible while ensuring it’s level. A misaligned projector can cause keystone distortion, making the image trapezoidal instead of rectangular. Use built-in lens shift functions or keystone correction sparingly—overuse can degrade image quality. When I first tested my ultra short throw projector, I quickly learned that slight misalignment made the image appear skewed. Practicing precise placement, with a level surface and measuring tools, guarantees sharp, properly proportioned visuals.
Choose the Right Screen Surface for Brightness and Contrast
Not all surfaces reflect light equally—acknowledge that, especially outdoors. Use a dedicated, matte, light-colored portable screen or a bright, smooth wall free from obstructions. High-gain screens amplify brightness but can cause hot-spotting if not used carefully, whereas matte white screens diffuse light evenly. During a recent camping trip, I painted a section of my canvas tarp with matte white paint, which significantly improved contrast and color richness compared to the uneven surface. For ultra short throw projectors, a specifically designed retractable screen can double your brightness and reduce ambient light interference.
Manage External Light Sources Effectively
Outdoor ambient light washes out images, so plan your setup around minimizing it. Use natural shading—position the projector and screen where trees or rocks block nearby lights. Employ portable blackout materials or curtains if necessary. During my first backyard movie setup, I positioned the projector behind a large shrub, which reduced glare and enhanced contrast. Employing lanterns with dimmable settings or using tactical headlamps can help illuminate control buttons without overpowering the scene. Avoid placing your projector in direct sunlight, as even the brightest laser models can’t compensate for intense ambient light, emphasizing the importance of choosing a shady spot for your setup.
Optimize Connectivity for Seamless Streaming
Stable, high-quality connections prevent lag and image dropouts. Use fiber optic HDMI cables for minimal signal loss, especially when running long distances or in rugged environments—these outperform standard cables and are more resistant to interference. Before each outing, test your connections indoors to confirm compatibility and performance. During one trip, I faced lag due to a cheap HDMI cable, which caused delays during a critical game scene. Upgrading to a high-quality, ruggedized cable solved this and ensured a smooth experience. Also, consider wireless streaming options that support Wi-Fi 7 or similar to avoid cable clutter in tight outdoor spaces.
Configure the Projector Settings for Peak Performance
Adjust brightness, contrast, and color profiles according to ambient conditions. Most laser projectors have preset modes—select ‘Outdoor’ or ‘Bright’ for daylight use, and optimize contrast and sharpness for dusk or night. Avoid eco modes; they dim the picture but extend battery life minimally, whereas proper manual tuning yields clearer images and preserves power better. I found that disabling auto iris and adjusting gamma settings improved shadow detail and overall clarity. For additional fine-tuning, explore model-specific settings like lens shift and keystone correction to perfect your image geometry without introducing artifacts. Regularly calibrate your projector using accessories or inbuilt tools to maintain color accuracy and brightness levels over time.
Many enthusiasts and even seasoned users often fall prey to common misconceptions about advanced projection technology, particularly regarding laser, ultra short throw, and 4K portable projectors. Let’s dig deeper into what most overlook or misunderstand, so you can make smarter choices and avoid costly mistakes.
A prevalent myth is that higher lumens always mean better outdoor performance. While brightness is undeniably crucial, overestimating lumen ratings can lead to disappointment. For example, a 3000-lumen laser projector might sound ideal, but if its lens or screen reflectivity isn’t optimal, the image can still appear washed out in ambient light. External studies, including research from [Home Cinema Essentials](https://projectors.homecinemaessentials.com/laser-projectors-vs-traditional-which-tops-in-brightness), underline that projector brightness must be matched with factors like screen gain and ambient lighting conditions for true performance gains.
Another misconception centers on ultra short throw (UST) projectors being foolproof for small spaces. Many believe that simply placing a UST projector directly against the wall guarantees perfect images. However, tiny misalignments—or even dust on the lens—can cause significant image distortion or focus issues. For instance, the wave-like artifacts often seen in UST images are frequently due to lens-shift miscalibration or unclean optics—issues that are surprisingly common but easily overlooked. Proper calibration, regular cleaning, and understanding the limits of lens shift features are essential to truly capitalize on UST convenience.
In portable projectors, there’s a dangerous overfocus on size and weight reduction. While compact devices are appealing, sacrificing core components like contrast ratio and color accuracy to save space can severely diminish picture quality. A compact projector might be easy to carry but produce images with washed-out colors and limited black levels, especially in brighter environments. That’s why I recommend reviewing detailed comparisons, like those in the [Ultimate 4K Projector Buying Guide](https://projectors.homecinemaessentials.com/ultimate-4k-projector-buying-guide-for-movie-nights), which emphasizes not just specs but real-world performance metrics.
When it comes to home theater projectors, many assume that more advanced features automatically equate to a superior experience. The truth, however, is nuanced. Features like HDR and 4K resolution require high-quality optics and processing power to truly shine. Without proper calibration or inadequate screen surfaces, these features can produce dull, overprocessed images instead of immersive visuals. As experts warn, engaging a professional calibration service or understanding setting optimization is key—don’t rely solely on factory presets.
Finally, a hidden yet critical nuance is the impact of laser projector maintenance. A frequently overlooked fact is that laser diodes degrade over time, leading to dimmer images and color shifts. Many users ignore regular maintenance checks, risking sudden drops in performance. Consulting dedicated guides—like the ones on [fixing flickering and dimming issues](https://projectors.homecinemaessentials.com/3-4k-projector-power-supply-fixes-for-2026-flickering)—can extend your projector’s lifespan significantly.
In conclusion, understanding these subtleties can dramatically improve your projection experience, especially as technology continues to advance rapidly. Don’t fall into the trap of superficial specs—look beyond the surface, calibrate carefully, and treat your equipment with regular maintenance. So, have you ever fallen into this trap? Let me know in the comments! For more insights, explore our comprehensive guides on best home theater projectors or ultra short throw projectors for small spaces. Remember, the details make all the difference in creating your perfect cinematic setup.
To keep your high-end home theater equipment, like laser projectors, ultra short throw, and 4K models, performing at their peak over years of use, dedicated maintenance and the right tools are essential. Personally, I’ve found that a few specific routines and equipment can dramatically extend the life of your projector and ensure breathtaking visuals every time. Regular cleaning, calibration, and choosing optimal accessories form the backbone of reliable long-term performance.
Invest in Precision Cleaning Tools
Over time, dust and fingerprints accumulate on lenses and vents, degrading image quality and increasing heat build-up. I swear by a high-quality optical air blower, such as the Giottos Rocket Blower, which provides a gentle yet effective way to remove dust without scratching delicate optics. For stubborn smudges, a microfiber cloth specifically designed for optics, coupled with a small amount of lens cleaning solution, consistently restores clarity. Maintaining a clean projector is surprisingly simple with the right tools—consider applying this routine every few months.
Calibrate Using Professional Software
In my experience, calibration software like CalMAN_HOME or DLP’s own calibration tools ensures color accuracy and optimal brightness. These programs allow for precise adjustments of gamma, contrast, and color profiles that factory settings often don’t fully optimize for your environment. I always recommend performing a comprehensive calibration after setting up your projector or whenever ambient conditions change significantly. Doing so keeps the image crisp, vibrant, and true to life, which is especially noticeable with 4K and laser projectors.
Use Protective Accessories and External Power Solutions
Protect your investment with sturdy, purpose-designed covers or dust enclosures, especially if your projector is mounted in environments prone to dust or humidity. External power banks or uninterruptible power supplies (UPS) with surge protection can provide stable power and safeguard against outages—critical for laser projectors with sensitive components. Personally, I rely on a heavy-duty UPS from APC, which pulses clean power and minimizes flickering that can affect image quality over time. These extra precautions prevent hardware stress and reduce the need for costly repairs.
Prediction: Future Trends in Long-Term Projector Care
As projector technology advances, expect integrated self-cleaning lenses and AI-powered calibration to become standard features. Manufacturers are already experimenting with self-optimizing optics that detect dust or misalignments and automatically correct them, cutting down maintenance time significantly. Keeping abreast of these innovations will allow you to invest smartly—ensuring your home cinema remains state-of-the-art for years to come.
How do I maintain my projector over time? Keep up with cleaning routines, calibrate periodically with professional tools, and invest in protective accessories. For instance, regularly cleaning your projector’s lens with correct tools like microfiber cloths and air blowers, and performing software calibration using trusted programs, can preserve image quality infinitely better than neglect. Don’t forget to shield your device within dust-proof covers or enclosures and use stable power sources to prevent damage. These simple yet effective practices will ensure your projector continues to deliver stunning visuals and long-lasting performance.
If you’re ready to optimize your projector’s performance, I recommend trying out a comprehensive calibration tool like these hidden settings. Regular maintenance isn’t glamorous, but it’s your best bet to keep the visuals flawless. For more in-depth details on long-term projector care, check out our contact page for expert advice or explore additional tips in our guides.
What I Wish I Knew When Starting Out in Off-Grid Projection
One of the most profound lessons I learned is that high lumen ratings aren’t everything; brightness must be paired with a good screen and optimal placement to truly shine outdoors. I’ve also discovered that even the most rugged-looking projector can falter if it isn’t properly calibrated or maintained, emphasizing the importance of regular care routines. Lastly, I realized that embracing the nuances of ambient light management dramatically elevates your outdoor cinematic experience, transforming a simple projector setup into an unforgettable event.
Tools and Resources That Changed My Outdoor Movie Nights
For anyone serious about outdoor projection, I recommend investing in a quality optical air blower like the Giottos Rocket Blower—simple but effective for keeping lenses dust-free. Professional calibration software such as CalMAN or DLP’s tools has been invaluable in fine-tuning my projector for maximum image fidelity, especially at night. Additionally, sturdy, weather-resistant mounts and protective enclosures safeguard my equipment against the elements, prolonging its lifespan and performance. Finally, reliable high-quality HDMI cables designed for rugged use ensure seamless connectivity even in the most challenging environments.
Your Next Step Towards Cinematic Freedom
Remember, achieving a spectacular off-grid projection setup doesn’t happen overnight—it’s about continuous learning, maintenance, and adaptation. Every outdoor adventure offers a new opportunity to refine your gear and techniques. So, take that leap into mastering your unique setup today, and turn any space into your personal outdoor cinema. What’s been your biggest challenge in setting up the perfect outdoor projection environment? Share your experiences below—I’d love to hear from you!
http://Liam%20Carter
Reading through the post, I couldn’t agree more about the importance of proper setup for outdoor projection. I remember one of my first camping trips where I struggled with inconsistent image quality because I didn’t secure my tripod well enough on uneven ground. It’s one thing to have a rugged projector, but if it wobbles or isn’t aligned properly, the whole experience suffers. I’ve since learned that investing in a high-quality, adjustable tripod and testing your setup beforehand can save a lot of frustration. Plus, I’ve started using portable blackout curtains, which really help in managing ambient light and improving contrast outdoors.
Another aspect I find challenging is managing ambient light, especially when you’re in a partly shaded area. Sometimes, natural shading isn’t enough, and I wonder if anyone has found effective portable solutions, like reflective or light-absorbing screens, that also resist weather conditions. Would love to hear tips or experiences from others on how they optimize for ambient light in outdoor settings to get the clearest picture possible.
http://Eleanor%20Gibson
This is such a comprehensive guide—thanks for sharing these detailed insights! I’ve definitely learned the hard way about the importance of not just having a rugged projector, but one with high brightness and good battery life. In my last camping trip, I underestimated how crucial ambient light management was, even with a bright projector. I used a DIY tarp setup as a screen, which surprisingly worked well, but I still struggled in partially shaded areas. What are some portable, weather-resistant screen options you’d recommend for variable outdoor lighting? I’ve been thinking about investing in a dedicated outdoor screen but worry about its durability and size for backpacking. Additionally, I’d love to hear others’ experiences with wireless streaming in remote settings—any tips for minimizing lag or maintaining stable connections with limited Wi-Fi? It’s fascinating how small setup tweaks can significantly enhance the viewing experience. I’m curious—what’s been your go-to solution for balancing portability with image quality in rugged outdoor conditions?