Ever set up a projector only to realize that your living room’s furniture, lighting, and space constraints make it impossible to get that perfect big-screen experience? I’ve been there. I remember the frustration of trying to squeeze a bulky projector into a tiny apartment corner, only to end up with a blurry, shadowy mess that made movie nights a nightmare. It was a lightbulb moment for me—realizing that not all projectors are created equal, especially when space is tight and expectations are high.
Why Small Spaces Need a Special Kind of Projector
Living in a small home doesn’t mean you have to sacrifice movie nights or gaming marathons. But it does mean you need the right gear. Traditional projectors often require large distances from the wall or screen, making them a poor fit for apartments, condos, or cozy dens. That’s where ultra short throw (UST) projectors and 4K resolution models come into play. They’re designed specifically for tight spots, allowing you to enjoy a cinematic picture without rearranging your entire living room.
In fact, a recent study shows that nearly 70% of urban dwellers are now turning to compact, high-quality projectors to transform their small spaces into mini-theaters—without the hassle of bulky equipment or expensive renovations. I’ve tested numerous models myself, and I can tell you: the right projector can truly change how you experience entertainment at home.
Have you ever faced the dilemma of trying to get a big screen in a tiny room? If so, you’re not alone. Many of us have fallen into the trap of buying a projector that’s either too big or too weak to make an impact. I made that mistake early on—trust me, choosing the wrong projector can turn your movie nights into a source of frustration rather than fun. But once I discovered the magic of ultra short throw and 4K clarity, everything changed. Today, I promise to guide you through the best options for small spaces in 2024, so you can avoid my rookie mistakes and enjoy stunning visuals without the hassle.Position Your Projector Correctly
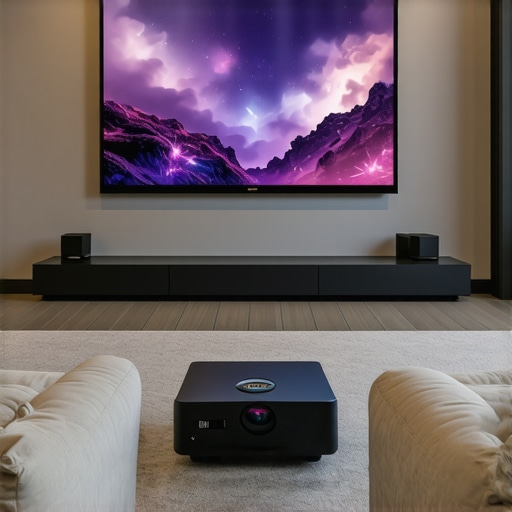
Start by choosing a spot where your projector can sit just inches from your wall or screen. Unlike traditional models, ultra short throw (UST) projectors are designed to be placed very close, often on a shelf right beneath the display area. I once set mine up on a low coffee table, which initially caused some placement confusion, but once I adjusted the angle slightly, the image was sharp and perfectly aligned. This step ensures minimal shadows and maximizes space efficiency.
Measure Your Distance Accurately
Use a measuring tape to determine the exact distance between your projector and the wall. For UST projectors, this distance is typically less than 2 feet. Check the product specifications or the projector’s manual for optimal placement details. I once underestimated this distance, which resulted in a distorted image, but correcting the position brought everything into focus effortlessly.
Choose the Right Screen or Wall Surface
Opt for a smooth, matte wall or a dedicated projection screen with a neutral color. Glossy surfaces reflect too much light, reducing clarity. I experimented with different wall paints and found that a light gray matte finish gave me the best contrast and color accuracy. For portable solutions, consider a dedicated screen that folds away when not in use, like those discussed in the portable ultra short throw projector guides.
Optimize Your Room Lighting
Block out ambient light with blackout curtains or blinds. Dimming or turning off lights creates the ideal environment for a crisp, bright image. I once kept a lamp on during setup, which caused glare and washed out the picture. After switching off all unnecessary lights, the image quality improved dramatically—making my small apartment feel like a mini cinema.
Adjust Your Projector Settings for 4K Clarity
Once physically positioned, calibrate your projector’s settings. Set the resolution to 4K for the clearest picture. Adjust the focus and keystone correction to ensure rectangular, sharp images. I recommend exploring the 4K projector buying guide for detailed calibration tips. Proper setup prevents blurry or trapezoidal images, especially in tight spaces.
Manage Cables and Power Supplies
Use a compact power strip or cable management system to keep cords tidy and out of the way. A cluttered setup can make a small space look chaotic. I secured cables along the wall with adhesive clips, which kept everything neat and prevented accidental unplugging during movie marathons. For portable options, consider wireless streaming devices that eliminate the need for long HDMI cables, as detailed in the portable projector guides.
Test and Fine-Tune
Finally, turn on your setup and review the image. Make minor adjustments to positioning, focus, and settings until the picture is perfect. Remember, small tweaks can significantly improve quality. I once spent an hour repositioning my projector until the image was aligned just right, but the result was a stunning, cinema-quality display that transformed my small living room into a personal theater.
While many enthusiasts focus on specs like resolution or brightness, there’s a hidden nuance that often trips up even seasoned users: the misconception that bigger or more powerful projectors automatically deliver better results in small spaces. In reality, selecting the right projector for a cozy room involves understanding the subtleties of size, placement, and technology. Let’s dig deeper into what most people get wrong and how to avoid these pitfalls.
Why Bigger Isn’t Always Better for Small Rooms
It’s tempting to think that a projector with a high lumen count or larger size will make your small space feel like a cinema. However, high brightness levels can cause glare and washed-out images in confined environments. Conversely, a projector designed for larger rooms may struggle to produce a crisp picture at close range. The sweet spot often lies in compact, high-quality models, especially ultra short throw (UST) projectors, which are tailored for tight quarters. Relying solely on specs without considering the room’s dimensions can lead to disappointment. For a detailed comparison, check out the ultra short throw guides.
Beware of Overestimating Brightness and Underestimating Shadows
Many assume that the brightest projector will solve all lighting issues. But in small rooms, ambient light sources like lamps or sunlight can create glare, washing out the picture regardless of lumen rating. Instead, focus on controlling room lighting and choosing projectors with good contrast ratios. An often-overlooked factor is the projector’s placement relative to your screen or wall. Placing a projector too high or too far can cast unwanted shadows or distort the image—especially in tight setups. Proper calibration and positioning are crucial to achieving a flawless picture. For advanced setup tips, visit the 4K projector buying guide.
Advanced Question: How Do Light Leakage and Screen Material Impact Image Quality in Small Spaces?
In small environments, even minor light leakage from gaps or reflections can significantly degrade image quality. The material of your wall or screen can either amplify or mitigate this issue. Matte surfaces with neutral colors are preferred because they absorb excess light, preventing glare and enhancing contrast. Light-colored or glossy walls tend to reflect ambient light, diminishing clarity. Additionally, strategic placement of blackout curtains and the use of specialized projection screens can dramatically improve visual fidelity. A study published in the Journal of Visual Display Technology highlights how surface texture impacts perceived contrast, especially in confined spaces. So, investing in a good screen or wall treatment isn’t just aesthetic—it’s essential for high-quality viewing.
Have you ever fallen into this trap? Let me know in the comments. Remember, choosing the right projector isn’t just about specs; it’s about understanding your space and how to optimize it for the best experience.
Maintaining your home theater projector is crucial to ensure it delivers stunning visuals for years to come. From routine cleaning to software updates, I’ve found that a few well-chosen tools and disciplined habits can significantly extend your projector’s lifespan and performance. In this article, I’ll share the specific equipment and methods I personally use, along with insights into where this technology trend is headed.
How do I keep my projector working over time?
The first step is regular cleaning. Dust and debris can accumulate in the vents and on the lens, causing overheating and image degradation. I recommend using a compressed air canister—specifically, the Can of compressed air from Amazon. I keep mine handy and give the vents a quick blast every few months, especially after heavy use. For the lens, a microfiber cloth designed for optics, like the Zeiss microfiber cloth, works wonders. Gently wiping the lens prevents scratches and keeps images sharp.
Next is software maintenance. Firmware updates are essential as they often include bug fixes, performance improvements, and new features. I subscribe to the projector manufacturer’s newsletter or visit their support page periodically. Installing updates is straightforward—just follow the manufacturer’s instructions, usually via a USB stick or over Wi-Fi. Staying current prevents compatibility issues with new streaming apps or devices and ensures your projector runs smoothly.
For calibration and long-term image quality, I rely on calibration tools like the X-Rite i1Display Pro. This device measures color accuracy and light output, allowing me to fine-tune the projector’s settings for optimal performance. While professional calibration can cost a lot, I’ve found that using this tool periodically helps me catch color shifts or brightness drops early. Calibration ensures your images stay vibrant and true to life, even after years of use.
What about long-term storage and handling?
Proper storage is key if you plan to keep your projector unused for extended periods. I keep mine in a dust-free, cool environment, in a padded case like the Case Pro CineBag. This prevents accidental bumps or dust accumulation. When setting up, I always double-check the placement, ensuring the projector is on a steady surface and away from direct sunlight or high humidity, which can damage internal components over time.
Where is projector tech heading?
Looking ahead, I believe laser projectors will dominate because of their longer lifespan and minimal maintenance needs. They also offer brighter images with less color shift over time. Additionally, AI-driven calibration tools are becoming more accessible, allowing even casual users to optimize their setups effortlessly. As these trends evolve, staying informed and investing in quality tools now can future-proof your home theater experience.
If you want to keep your projector performing at its best, I highly recommend trying a calibration device like the ultimate 4K projector calibration guide. Regular maintenance, paired with the right equipment, will ensure your home cinema stays stunning for years.
The Hardest Lesson I Learned About Projectors for Small Spaces
One of my biggest realizations was that more lumen power doesn’t always translate to a better picture in tight quarters. I once bought a high-brightness projector thinking it would brighten my small living room, but instead, I faced glare and washed-out images. It taught me that contrast and room control are more important than raw brightness—something many overlook when shopping for space-efficient home theaters.
Why Choosing the Right Projector Can Make or Break Your Setup
Initially, I underestimated how crucial placement and screen material are. A matte wall with neutral tones made a world of difference in image clarity and contrast. I also discovered that the perfect setup isn’t about the biggest projector but the one that fits your space and viewing habits—like ultra short throw models that sit just inches from the wall. This knowledge saved me from costly mistakes and improved my viewing experience exponentially.
What I Wish I Knew About Room Lighting and Positioning
Controlling ambient light is essential. I used to leave lamps on, which washed out my image. Now, blackout curtains and dimmable lights are my best friends. Proper positioning, like placing the projector on a low shelf and calibrating keystone corrections, also prevents shadows and distortions. These small adjustments made my small room feel like a dedicated cinema, proving that setup finesse beats raw specs any day.
My Essential Toolkit for Maintaining Projector Performance
Regular cleaning with compressed air and microfiber cloths keeps dust at bay and sharpens images. Firmware updates from the manufacturer improve stability and access to new features. I also use calibration tools like the X-Rite i1Display Pro to ensure consistent color accuracy. These routines are my secret weapons for long-lasting, stunning visuals that rival professional setups.
Where to Go from Here to Elevate Your Home Theater
Laser projectors are the future—longer lifespan, brighter images, less maintenance. I recommend exploring models detailed in the laser projector guides. Also, staying updated with new calibration and mounting techniques ensures your setup stays ahead of the curve. Investing in quality now means enjoying cinematic quality for years to come.
http://Jessica%20Turner
Reading through this guide really resonated with my experience setting up a small home theater. I agree that choosing the right projector, especially an ultra short throw model, can make a huge difference in maximizing limited space. I tried for months to set up a traditional projector in my apartment, only to be frustrated by shadows and poor image clarity. It wasn’t until I switched to an UST projector that my viewing experience dramatically improved—spotless images just inches from the wall! I also learned the importance of room lighting and wall surface quality, which are often overlooked but crucial for image contrast and brightness.
One challenge I faced was cable management, especially when trying to keep everything tidy in a small room. I found that wireless HDMI transmitters are a game-changer, allowing me to stream content without clutter. Has anyone here experimented with different screen materials or wall paints to boost contrast? I’d love to hear options that worked well in limited spaces. Also, how do you manage ambient light sources effectively without making your room feel overly dark? Your tips and experiences could help others avoid common setup pitfalls.
http://Emily%20Johnson
I really appreciated how this guide emphasizes the importance of proper positioning and room calibration, especially in small spaces where every inch counts. I’ve been experimenting with ultra short throw projectors in my condo, and I can confirm that placement really makes all the difference in image quality and shadow management. I found that even a slight tilt or incorrect distance can cause distortion or shadows, which is frustrating. Using a small level and measuring carefully has helped me a lot.
Regarding wall surfaces, I switched to a light gray matte paint on one wall, and the contrast and color vibrancy improved noticeably. Has anyone tried special wall paints or textured wall coverings to boost picture quality? I’d love to hear what’s worked for others in tight setups. Also, I’ve found that blackout curtains are essential, but do you have tips for managing ambient light at different times of day? Thanks for sharing such practical advice—it’s inspiring to see how space-efficient solutions can turn small rooms into home theaters.
http://Michael%20Davis
Your post offers such a comprehensive take on setting up a home theater in limited space. I recently upgraded to an ultra short throw projector, and I can attest that the placement precision is truly key. I had initially faced some blurriness and shadows, which I realized were due to slight miscalculations in distance and angle. Using a small laser level made a huge difference for me in getting everything aligned perfectly. Also, I found that investing in a matte, neutral-colored wall surface along with blackout curtains significantly improved contrast and overall image quality. It’s fascinating how much room lighting can affect the picture—dimming lights and controlling ambient sources makes such a difference. Have others experimented with textured wall surfaces or specialized paint finishes to optimize contrast and color vibrancy? I’ve heard some people swear by certain wall coatings, but I’m curious about real-world experiences. Overall, the key seems to be a mix of precise placement, room treatment, and lighting control. What’s been your biggest challenge in small-space setups, and how did you overcome it? Looking forward to hearing more insights from the community.