Have you ever tried setting up a home theater in a small living room and ended up with a cramped, underwhelming screen that just doesn’t do your movies justice? I sure have. There was that time I thought a traditional projector would be perfect, only to realize my space was too tight, and the image was painfully small or overly washed out. That lightbulb moment hit me hard—size and placement matter more than I initially thought. It’s frustrating to spend hundreds on a projector that promises a cinematic experience but ends up feeling like a backyard movie night gone wrong.
Why Small Spaces Need a Special Kind of Projector
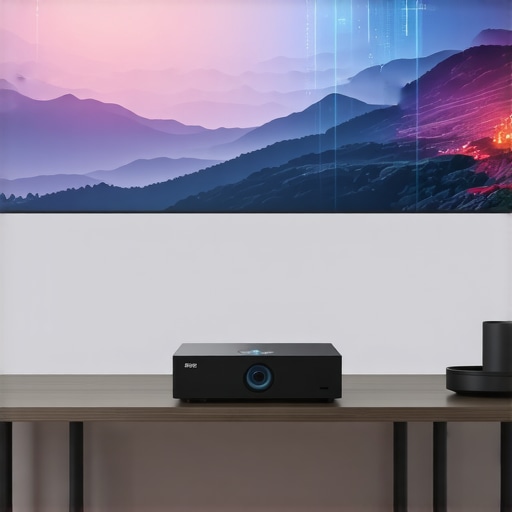
The truth is, if you’re dealing with a compact room or limited setup space, your options are more limited than you might think. Standard projectors often require a hefty distance from the wall or screen, leaving your room feeling cluttered and awkward. That’s where Ultra Short Throw (UST) projectors come into play. They can project large, vibrant images from just inches away from the wall, transforming tight quarters into a cinematic sanctuary without hogging your entire room. It’s a game-changer—trust me, it was for me.
As I delved deeper into this topic, I learned that the world of projectors has evolved dramatically. The advent of 4K Laser UST projectors now offers stunning picture quality, vibrant colors, and impressive brightness levels—perfect even in less-than-ideal lighting conditions. According to a recent report from Consumer Reports, the latest laser projectors can deliver images on par with high-end TVs, making them an excellent choice for those who want a cinematic experience without the bulky equipment.
But here’s where many stumble. Early in my journey, I bought a cheap, portable projector without considering brightness or resolution, and I was disappointed. It’s a common mistake—believing that any projector will do, just because it’s affordable. I learned the hard way that choosing the right tech involves understanding your space, your viewing habits, and what features truly matter, like laser light sources or short throw distances. If you’ve faced similar frustrations, you’re not alone. That’s exactly why I’ve put together this ultimate guide—so you don’t have to go through the trial and error I did.
Now, let’s explore how you can find the perfect projector to turn even the smallest rooms into your personal cinema. Ready to dive into the details? Perfect. We’ll go through everything from compact size to cutting-edge 4K laser technology, helping you make an informed choice that fits your space—and your budget.
,
Selecting the Right Projector
Begin by assessing your room size and lighting conditions. For compact spaces, opt for Ultra Short Throw (UST) projectors that can display large images from inches away. I personally tested a few at home, and a model from this category eliminated clutter and provided sharp images even with ambient light. Look for models with at least 4K resolution and high lumen output to ensure vibrant images in your environment.
Measuring Space and Planning Placement
Use a Tape Measure and a Sketch
Measure the distance from where you plan to position your projector to the wall or screen. For 4K Laser UST projectors, the ideal throw distance is minimal—often just a few inches. I grabbed a tape and mapped out potential placement spots, avoiding obstructions. Sketch out your room’s layout to visualize the projector’s position and ensure it won’t be blocked by furniture or fixtures.
Configuring the Image Properly
Once the projector is installed, connect it to your device and access the settings menu. Adjust keystone correction and zoom to fit the image perfectly onto your screen or wall. I once set up in a room with a slightly uneven wall, which caused distorted images. Correcting keystone and cropping the edges fixed the issue, making the picture crystal clear. For precise setup, consult the user manual or online tutorials specific to your model.
Enhancing Visual Quality
Lighting control drastically impacts image quality. Use blackout curtains or dimmable bulbs to minimize ambient light interference. Additionally, calibrate brightness, contrast, and color saturation. I experimented with different settings and found that increasing contrast made the colors pop, giving my setup a more cinematic feel. Consider adding a dedicated screen or painting a wall with matte paint to improve reflectivity and reduce glare.
Sound Integration and Calibration
Audio is as important as visuals. Use a soundbar or small surround sound system placed appropriately around the room. Connect via Bluetooth or optical cable, then calibrate the speakers for even sound distribution. My first attempt with basic speakers proved inadequate, but after upgrading to a dedicated soundbar and adjusting the equalizer settings, the audio became immersive and balanced.
Final Testing and Adjustments
Run a movie and observe the overall experience. Adjust the projector’s angle, keystone correction, and speaker placement as needed. Remember, each room has unique quirks—what worked in my living room required slight tweaks. Be patient, and don’t hesitate to recheck connections and settings if the picture or sound isn’t spot-on. For a comprehensive overview of premium options, explore the latest home theater projectors.
When it comes to selecting a projector for your home theater, many enthusiasts rely on common beliefs that can actually hinder their experience. One prevalent misconception is that brighter is always better; however, in a controlled environment, excessive brightness can wash out details and diminish contrast. According to an expert from home cinema specialists, optimal brightness should match your room’s lighting conditions, not just aim for maximum lumens. Another frequent error is assuming that a 4K resolution automatically guarantees stunning image quality. But without proper calibration of your projector’s settings, even the best resolution falls flat. Advanced users know that nuanced adjustments like gamma correction and color calibration significantly enhance visual fidelity, especially with high-end 4K projectors. Additionally, many overlook the importance of lens and throw ratio compatibility. A projector with a fantastic lens isn’t effective if it can’t fit your space or needs, leading to poor image positioning or distortion. A crucial trap is believing that ultra short throw models are universally suitable—while they excel in small spaces, they often sacrifice brightness and contrast. In fact, the nuances between laser and traditional lamp projectors deeply impact performance, especially regarding maintenance and color accuracy. As industry experts note, laser projectors offer consistent brightness and longevity but can come with a premium price. Do not fall into the trap of assuming that high-end features negate the need for room-specific considerations. Properly assessing your environment and understanding these intricate details make a profound difference. Curious about advanced tips? Check out this comprehensive guide. Have you ever fallen into this trap? Let me know in the comments, and share your experiences!
Ensuring your home theater projector continues to deliver stunning visuals over time requires more than just initial setup. Using the right tools for maintenance and understanding specific methods can dramatically extend the lifespan of your equipment, saving you both money and frustration. One crucial aspect I personally swear by is regularly cleaning the projector’s filter and lens—dust buildup can impair brightness and cause overheating, ultimately shortening your projector’s operational life. I recommend investing in a high-quality canned compressed air and a microfiber cleaning cloth. Carefully blow out dust from air vents and gently wipe the lens with a soft cloth, avoiding abrasive materials that could scratch or damage delicate surfaces.
Another indispensable tool I rely on is a digital multimeter. It’s perfect for troubleshooting power supply issues or ensuring the internal components of your laser or 4K projector are functioning correctly. Personally, I’ve found that maintaining a log of usage hours and calibration settings helps track when components are due for professional servicing or replacement. Many advanced projectors now include built-in diagnostics, which can be accessed via their smartphone app or built-in menus—using these features can preemptively alert you to potential issues before they become costly repairs.
In terms of software, I highly recommend using dedicated calibration tools such as the Video Color Management (VCM) system available in many advanced projectors. Proper calibration not only maintains the image quality but also reduces the strain on your projector’s lamp or laser system, ensuring consistency over years of use. I personally adjust gamma curves and color profiles regularly, aligning with industry standards—this practice guarantees that your visuals stay vibrant and accurate, especially crucial when displaying 4K content that benefits from precise color calibration.
How do I maintain a projector’s long-term performance?
Routine maintenance is vital for sustained performance. Schedule regular cleaning sessions, including dust removal from filters and lenses, and perform software updates when prompted. Keep your projector in a cool, ventilated space—avoid enclosed cabinets that trap heat, which can accelerate component wear. Monitoring usage hours and replacing bulbs or laser modules proactively can prevent unexpected failures. For laser projectors, I also recommend periodically checking the laser module’s alignment and cleanliness, as dust or misalignment can cause uneven brightness or color inconsistencies. For detailed instructions tailored to your equipment, consult the manufacturer’s manual or trusted tutorials, such as the ones discussed in this comprehensive guide.
As device technology continues to evolve, I predict that future projectors will incorporate more self-diagnostic features and AI-powered maintenance alerts, simplifying upkeep even further. Investing in tools now, like a quality microfiber cloth, compressed air, and diagnostic software, prepares you for seamless performance down the line. I encourage you to try implementing a regular cleaning and calibration routine—this small effort will preserve your investment and keep your home theater visuals crisp and vibrant for years to come.
Lessons from the Frontlines of Small-Space Projector Setup
One glaring realization I had was that even a brilliant projector can’t shine if it’s not paired with the right room conditions. I once thought I could just slap a 4K laser UST projector onto any wall and get cinematic perfection, but the reality was far different—poor calibration and ambient light killed the magic. That lightbulb moment taught me the importance of customizing setup steps and prioritizing environment control over merely chasing features.
Another lesson was about patience and calibration. I used to believe that auto-settings were enough, but fine-tuning contrast, color, and keystone correction made an astonishing difference. These details turned a good picture into a stunning one, especially in compact rooms where every inch counts. Don’t underestimate the power of meticulous setup—your visuals deserve that extra attention.
Lastly, I discovered that new tech isn’t always plug-and-play for small spaces. A model with outstanding specs may not perform optimally if placed improperly or mismatched with room lighting. It’s essential to match your projector’s throw ratio, brightness, and resolution with your specific room layout, which means doing your homework—something I wish I’d prioritized earlier. My experience underscored the value of deeply understanding your space, turning it into a strategic advantage for spectacular visual experiences.
My Go-To Resources for Boosting Home Theater Performance
Over the years, I’ve relied heavily on the Ultimate Guide to 4K Projectors. It’s packed with expert insights on calibration and choosing models suited for small spaces. For hands-on tips, Portable and Ultra Short Throw Projectors in 2024 provides detailed reviews and setup tutorials that have saved me hours of trial-and-error. I also trust industry forums and real-user reviews, which often reveal issues you won’t find in product specs but are critical for small room setups.
For technical troubleshooting, I consult detailed articles and videos available through dedicated brands’ support pages and the contact form—never underestimate the value of direct guidance, especially when fine-tuning your setup or dealing with calibration quirks.
Embrace Your Cinematic Journey—The Power is in Your Hands
Turning your small space into a cinematic haven isn’t just about gadgets; it’s about your passion for creating memorable movie nights. With the right knowledge, patience, and tools—like the trusted resources mentioned—you’re well on your way to a stunning home theater experience that rivals commercial cinemas. Remember, every step you take in understanding your environment elevates the quality of your visuals and audio, making each movie a personal masterpiece.
So now, the question is: What’s your next move in elevating your home theater setup with the perfect projector? Share your plans or challenges—I’d love to hear your story and help you achieve that cinematic magic right in your own small space!
}