I remember the exact moment when I first realized my home movie nights were missing something crucial. I was excitedly setting up a new projector in my living room, only to be met with a grainy image, distracting shadows, and a sense that I was watching a movie through a foggy window. Frustration crept in as I wondered: why does this feel so underwhelming, despite investing in what I thought was top-tier gear? That night, I vowed to find a solution that truly brought the cinematic experience into my home—something better than the bulky TVs or clunky projectors I’d tried before. Today, I want to share my journey and how discovering the right portable or ultra short throw 4K projector transformed my space—and can do the same for you.
Why Finding the Perfect Projector Matters More Than Ever
In a world where streaming is king, the quality of your home theater setup can make or break your enjoyment. With technology advancing rapidly, a top-notch portable or UST 4K projector isn’t just a luxury; it’s becoming a necessity for anyone craving a cinema-quality experience without the hassle of dedicated rooms or expensive installations. These compact devices pack incredible power, delivering stunning clarity and immersive visuals that rival commercial theaters. Plus, they save space, are easy to set up, and are perfect for small rooms or even outdoor movie nights. Are you tired of blurry images or struggling with awkward setups? If so, you’re not alone. Many enthusiasts have made the switch and never looked back. The key is understanding what makes these projectors stand out and which features actually matter. But before we dive into that, I want to address a common concern many newcomers face.
Are Portable and UST 4K Projectors Worth the Hype?
Here’s the truth—early on, I made the mistake of assuming that all projectors are created equal. I bought a cheap, high-lumen model believing brightness would compensate for poor image quality. Turns out, I wasted money on something that struggled to produce sharp images in ambient light. That mistake taught me the importance of choosing the right specifications and knowing what to look for. According to a recent report by TechRadar, 4K resolution combined with laser lighting technology provides an exceptional viewing experience, especially in small spaces where shadows and glare are common. So, if you’re like I was—doubting whether upgrading is really worth it—I get it. The good news is that today’s portable and UST projectors are far superior and tailored for home theater setups. The next step is understanding how these devices are shaping the way we enjoy movies and shows in our compact living spaces. Are you ready to discover which models can fit seamlessly into your home? Let’s explore the benefits and practical tips to help you choose the perfect projector for your needs.
Select the Right Projector for Your Space
Start by assessing your room size, lighting conditions, and budget. For small, bright rooms, consider a laser ultra short throw (UST) projector that can project a large, high-quality image from a close distance, minimizing ambient light interference. I once experimented with a portable 4K projector in a sunlit living room; I placed it on a bookshelf, allowing quick repositioning for movie nights, but the image lacked brightness. Choosing a model with high lumens and advanced laser illumination can prevent this issue, providing vibrant images even with some ambient light. To make an informed choice, explore comprehensive comparisons in the Ultimate Guide to 4K UST Projectors.
Ensure Proper Placement and Mounting
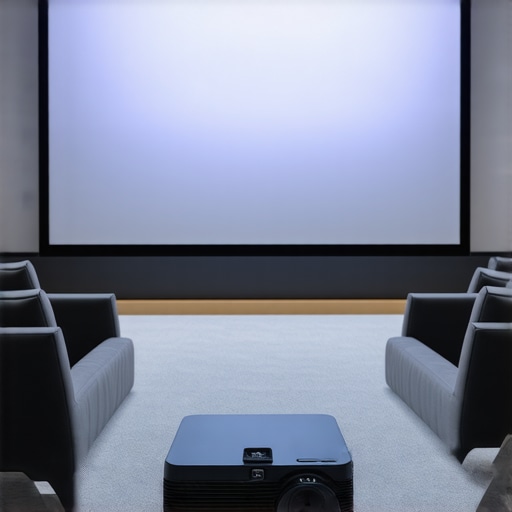
For ultra short throw (UST) and laser projectors, placement is critical. Position the device about a foot from the wall or screen to avoid shadows and artifacts. Unlike traditional models, UST projectors can be mounted on a wall or placed on a small table close to the display surface. I faced a challenge when my first setup had the projector too high, causing keystone distortion. Adjusting the projector’s tilt or using a keystone correction feature, if available, can help achieve a perfectly rectangular image. You can learn more about optimizing placement at How Ultra Short Throw Projectors Transform Small Spaces.
Connect Sources Seamlessly
For a true home theater experience, use an HDMI cable to connect your streaming devices, Blu-ray players, or gaming consoles directly to the projector. Many 4K projectors support HDMI 2.0 or higher, ensuring full-resolution playback. I once tried streaming via a wireless connection, but the lag caused a blurry image during action scenes. Switching to wired connections greatly improved sync and clarity. Verify your projector’s input options and make sure your source devices are compatible to avoid compatibility issues. Remember, a high-quality HDMI cable maximizes 4K resolution and HDR features, delivering outstanding picture quality. Explore the best options in our Best 4K Home Theater Projectors 2024 guide.
Calibrate the Image for Peak Performance
Calibration ensures your projector displays colors accurately and sharpness is optimized. Use built-in menus or dedicated calibration tools to fine-tune brightness, contrast, and sharpness settings. I experimented with calibration after mounting my projector on a makeshift stand; initially, colors looked washed out. After adjusting color temperature and gamma settings, the picture became vivid and lifelike. Employ a calibration disc or professional profiling tools for best results. Adjustments can seem technical at first, but simple guides are available at Ultimate Guide to 4K UST Projectors. Consistent calibration ensures you enjoy cinema-quality visuals every time.
Optimize Audio for Immersive Sound
While many projectors include built-in speakers, they often lack the power for true home theater sound. Installing a dedicated sound system, like a soundbar or surround speakers, dramatically enhances audio immersion. I integrated a compact soundbar below my screen; initial audio was muffled, but after adjusting settings and angling the speakers properly, sound clarity improved remarkably. Positioning speakers correctly and using external audio devices is essential for a cinema-like experience. For detailed recommendations, check the Best 4K Home Theater Projectors and Ultra Short Throw Options. Proper audio calibration complements the stunning visuals, completing your setup.
Test and Fine-Tune for Perfection
Finally, run a test with different content to evaluate image quality, color accuracy, and sound. During my initial setup, I played various movies—some dark scenes, some bright—adjusting settings until I achieved a balanced picture. It took time, but patience paid off with a consistent, high-quality display. Remember, lighting, placement, and calibration are iterative processes. Revisit your settings periodically, especially if you change room lighting or viewing angles. For comprehensive insights, visit the Ultimate Guide to 4K Home Theater Projectors. Mastery of these steps turns your space into a true cinematic sanctuary. Many home theater enthusiasts believe that all 4K projectors are created equal, but this oversimplification hides crucial nuances that can make or break your viewing experience. A frequent misconception is that higher lumen ratings automatically translate to better images, but in reality, excessive brightness can wash out colors, especially in contrast-rich scenes. For instance, laser projectors tend to deliver more consistent brightness levels compared to traditional lamp-based models, which can dim over time. This is highlighted in a study by DisplayMate, emphasizing how laser lighting enhances color accuracy and longevity in projection systems.
Another common myth revolves around ultra short throw (UST) projectors. Many assume that UST models are primarily for small spaces or quick setups. However, their advanced optics and design can provide cinema-quality images even in larger rooms when selected carefully. Proper placement and understanding the optical capabilities are vital for maximizing their potential. Do not fall into the trap of positioning a UST projector too close or too high, which can cause keystone distortion or uneven focus. A well-placed UST projector can benefit from wall gain and ambient light resistance, but only if you understand the nuanced relationship between projector throw ratio and your room dimensions.
**Have you ever fallen into this trap?** Let me know in the comments.
A significant oversight is ignoring the importance of proper calibration. Many users set up their projectors hastily and skip calibration, resulting in dull or oversaturated images. Calibration isn’t just for professional theaters—it’s a crucial step that ensures your projector reflects true-to-life colors and sharpness. Even advanced models with HDR and Dolby Vision support need meticulous calibration to unlock their full potential. Relying on auto-settings can be tempting but often leads to subpar results, as expert image tuning can reveal subtle details and color contrasts overlooked otherwise.
We often get captivated by specs like 4K resolution or HDR support, but these features require a nuanced understanding to be truly effective. For example, if you’re choosing between a portable projector and a dedicated home theater model, consider not only resolution but also contrast ratio, color gamut, and lens quality. The best choice depends on your specific space, light conditions, and usage patterns.
If you’re serious about investment, I highly recommend checking out comprehensive guides like the Ultimate Guide to 4K Projectors for Movie Nights, which delve into these advanced nuances and help you avoid common pitfalls. Understanding these details can elevate your home theater from good to extraordinary.
Potential pitfalls aside, mastering these nuances will empower you to make smarter choices, ensuring your projector delivers breathtaking visuals for years to come. Remember, technology is only part of the equation; proper setup, calibration, and understanding your room’s unique conditions are equally vital for an immersive experience.
Keep Your Setup Running Smoothly for Years to Come
Investing in a high-quality 4K projector, whether it’s a portable model or an ultra short throw (UST) laser projector, is just the beginning. The key to enjoying stunning visuals over the long haul lies in proactive maintenance and leveraging the right tools. Personally, I rely on a combination of software and physical inspections to ensure my home theater remains at peak performance. Regular cleaning of filters and lenses is essential—dust accumulation can significantly diminish brightness and sharpness, especially in laser projectors that depend on optical clarity. I use a microfiber cloth and compressed air, ensuring I avoid scratching sensitive components. Additionally, calibrating the image periodically guarantees consistent color fidelity, particularly as ambient light conditions or room setup evolve.
For calibration, I recommend tools like CalMAN or free options like HCFR. They facilitate precise adjustments of gamma, color temperature, and color gamut. I’ve found that running a calibration every six months aligns well with typical usage patterns, helping prevent gradual quality degradation. Advanced features like HDR tone mapping can also drift over time, so firmware updates from the manufacturer should be prioritized, which often include improvements related to color accuracy and image stabilization.
What tools are vital for maintaining a projector’s excellence?
In my arsenal, I keep a DSLR camera with a color calibration target to assess how well my projector reproduces colors after calibration. Also, a dedicated remote with customizable shortcuts helps me easily access menu settings without faffing around, reducing the risk of accidental misadjustments. For physical upkeep, I use dust covers and a small vacuum designed for electronics, which minimizes the risk of debris affecting interior components.
Looking ahead, technological advances hint at smarter maintenance solutions. Manufacturers are beginning to integrate self-cleaning filters and Bluetooth-connected diagnostic systems that provide real-time alerts for dust buildup or lamp aging, extending the life of your device. As lasers and LED illumination become more prevalent, understanding their specific maintenance needs—like laser diode health or phosphor wheel rotation—becomes increasingly important. Staying informed through resources like our detailed reviews can help you anticipate upcoming care requirements.
How do I maintain optimal projection quality over time?
Regularly scheduled inspections paired with the right tools make all the difference. For example, dedicating 30 minutes monthly to check filters, clean lenses, and ensure connections can prevent costly repairs or replacements. Don’t forget to update your device firmware whenever possible—these updates often carry patches that enhance image stability and color performance. I encourage you to try incorporating a calibration routine with HCFR software and a color target; it’s an easy way to see immediate improvements in image fidelity.
Remember, your projector is an investment meant to give you years of enjoyment. Staying on top of maintenance not only preserves its brightness and color accuracy but also maximizes your home theater’s overall experience. As the trend toward integrated, smart projection systems develops, expect even more efficient and user-friendly options, making maintenance a seamless part of your entertainment setup. For comprehensive tips, check out our Ultimate Guide to 4K UST Projectors and stay ahead with expert insights. Don’t hesitate—start implementing these maintenance tips today and see your projector shine for years!
The Flip Side of Jaw-Dropping Resolution
One of the most persistent myths I uncovered was the obsession with pixel count alone. Early on, I believed upgrading to 4K was the ultimate ticket to cinematic magic. However, I soon learned that resolution is just part of the story—contrast, color accuracy, and calibration play equally vital roles. Ignoring these can leave you with impressive numbers but lackluster images. My lightbulb moment was realizing that a well-calibrated, balanced picture outshines a pixel-packed but poorly adjusted setup. This taught me that optimizing image fidelity requires patience and a willingness to go beyond specs.
Choosing the Right Tools and What They Really Do
Early mistakes included relying solely on automatic settings or discounting calibration tools. The true game-changer was discovering resources like HCFR for calibration and reading dedicated reviews on sites like our comprehensive guide. These resources demystified the complexities and gave me confidence to tweak my setup professionally. Trust me, investing time and some simple tools creates a dramatic difference—your images will pop with life, and you’ll see subtleties you didn’t notice before.
Going Beyond the Specs—Focus on Experience
What I didn’t anticipate was how ambient lighting and room layout influence image quality. I once set up a sleek portable projector in a bright room, expecting stunning visuals—only to be disappointed. That was my lesson in considering not just the projector’s features but also the environment. To truly honor your device, design your space for optimal viewing—think about blackout curtains or strategic placement. For insights on transforming small spaces, check out this guide. Experience isn’t just about hardware; it’s about tailoring your environment to maximize every pixel.
Maintenance Mistakes That Cost More Than You Think
In my quest for long-term excellence, I learned that neglecting maintenance can gradually erode performance. Dusty lenses, outdated firmware, and uncalibrated settings are silent killers. A quick monthly check using tools like compressed air and firmware updates keeps my projector performing at peak levels. I also keep a digital log of calibration tweaks, so I can reproduce optimal settings effortlessly. These small habits add years of vibrant visuals and save money on replacements. Remember, good upkeep involves more than just turning it on—think of it as nurturing a growing part of your home theater experience.
Curated Resources that Made a Difference
For me, certain tools became indispensable: our in-depth guides provided clarity on choosing the right model; the HCFR calibration software helped me fine-tune colors to perfection; and a quality HDMI cable guaranteed full 4K HDR performance. Each resource empowered me to get the most out of my projector and avoid common pitfalls. Over time, I realized that honing my setup with trusted tools directly translated into a more immersive experience, making my investment truly worthwhile.
Your Cinematic Journey Starts Now
Every home cinema enthusiast reaches a turning point when they realize that mastering the technical is just as rewarding as the visuals. With patience and the right mindset, you can craft a space that rivals professional theaters—without breaking the bank. Embrace the learning curve, experiment with calibration, and continually adjust your environment for perfection. Remember, your 4K projector is more than a gadget; it’s the gateway to unforgettable movie nights. And the best part? Once you get the hang of these lessons, every movie becomes a spectacular event. So, I challenge you—what’s one upgrade or tweak you’ve been hesitant to try? Share your thoughts below and let’s elevate our home setups together.