It was late at night, and I was tangled in wires, trying to mount yet another bulky TV to finally get that cinematic experience at home. Frustrated and exhausted, I realized something had to change—my living room was just too small for traditional setups, and I longed for a cleaner, more immersive solution. That lightbulb moment led me down the rabbit hole of ultra short throw and 4K laser projectors, and let me tell you—it’s been a game-changer.
Why the Shift to Laser and Ultra Short Throw Projectors Matters Now
Most people are still clinging to big, traditional TVs, unaware that there’s a whole new world of home theater tech waiting to revolutionize their space. The reason? These advanced projectors pack cutting-edge features—like 4K resolution and laser illumination—into surprisingly compact designs, perfect for small rooms or apartments. Not only do they save space, but they also deliver stunning image quality that rivals, if not surpasses, the best TVs on the market.
> Did you know that a high-quality laser projector can display brighter images and more vibrant colors than standard lamps due to their consistent brightness and color accuracy? According to a recent review by Home Cinema Essentials, laser projectors exhibit superior brightness and color stability over traditional lamp-based models, making them ideal for versatile home environments.
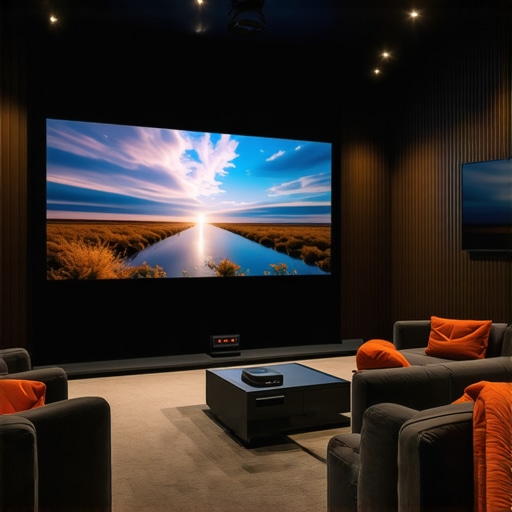
If you’ve ever felt limited by your current TV setup or hesitated because of space constraints, you’re not alone. These innovations open up a world of possibilities—imagine projecting a cinematic 100-inch screen right onto your living room wall without sacrificing precious space or your aesthetic appeal.
But here’s the kicker: with so many options now available, selecting the right projector can feel overwhelming. That’s exactly what I’ll help you navigate next—detailing how to choose the best ultra short throw and 4K laser projectors for your unique needs. Ready to upgrade your home theater? Let’s dive in!
Choose the Right Projector for Your Space
Start by assessing your room dimensions and lighting conditions. For small spaces, prioritize ultra short throw projectors that can sit just inches from the wall, avoiding shadows and maximizing space. Dive into guides like this [Ultimate Guide to Ultra Short Throw Laser 4K Projectors](https://projectors.homecinemaessentials.com/ultimate-guide-to-ultra-short-throw-laser-4k-projectors-for-small-spaces) to compare models and features.
Measure and Prepare Your Wall
Clear the wall where the projection will occur. Use a tape measure and level to mark the optimal height and width for your projected image. Think of it as laying out a canvas before painting—precision ensures the best picture. I once spent hours adjusting the wall, only to realize I had to redo the measurement after a late-night test; meticulous prep saves time.
Set Up Your Projector Correctly
Position the projector so that it sits just a few inches from the wall, following your model’s specifications. Pay attention to keystone corrections and focus adjustments—these fine-tune the image clarity. Power on the projector, then adjust until the image is sharp and aligned. Remember, if you’re unsure about your choices, the [Best 4K Laser Ultra Short Throw Projectors for Home Theater in 2024](https://projectors.homecinemaessentials.com/best-4k-laser-ultra-short-throw-projectors-for-home-theater-in-2024) offer excellent recommendations.
Calibration Is Critical for Clear Visuals
Adjust the image settings directly on the projector menu—brightness, contrast, color saturation—to match your room’s ambient light. For even better results, consider calibrating with a colorimeter. It’s like tuning an instrument—small tweaks make a significant difference. During my first setup, I ignored calibration, ending up with washed-out colors; proper calibration transformed the viewing experience.
Optimize for Brightness and Contrast
In bright rooms, select a projector with high brightness—aim for at least 2,000 lumens for daytime viewing. Check comparison articles like [Laser Projectors vs. Traditional](https://projectors.homecinemaessentials.com/laser-projectors-vs-traditional-which-tops-in-brightness) to understand how laser tech offers more consistent brightness. During a trial, I noticed that my laser projector outperformed my old lamp-based one, especially in daylight.
Enhance Audio and Seating
Don’t forget sound—use a dedicated sound system or high-quality soundbar to match the immersive visuals. Arrange seating at an optimal distance—typically 1.5 to 2.5 times the width of your projected image—for cinematic impact. I once set my sofa too close, blocking part of the projected image, but repositioning it made all the difference.
Connect Multiple Devices Effortlessly
Ensure your projector has the ports and wireless options compatible with your sources—streaming sticks, gaming consoles, or Blu-ray players. Many models support smart apps, making device switching seamless. I used this process to connect my console, dramatically improving my gaming nights with vivid 4K clarity. For further setup tips, check the [Ultimate Guide to 4K Projectors](https://projectors.homecinemaessentials.com/ultimate-4k-projector-buying-guide-for-movie-nights).
Test and Fine-Tune Your Setup
Once everything’s connected, run a full test—watch a movie, check for color accuracy, and note any distortions. Revisit your settings—sometimes a slight adjustment in brightness or sharpness can elevate your entire viewing experience. I tweaked the focus last time, which eliminated slight blurriness and improved clarity noticeably.
While many enthusiasts focus on specs like resolution or brightness, there are nuanced misconceptions about portable projectors, ultra short throw models, 4K technology, and laser illumination that can trip up even seasoned users. One common myth is that higher lumens always guarantee better image quality; in reality, excessive brightness can lead to washed-out images, especially in controlled lighting environments. Instead, understanding room-specific needs and adopting a more holistic calibration approach is vital for optimal visuals.
Are All 4K Projectors Created Equal in Practice?
Many assume that a 4K label ensures superior image quality, but factors like lens quality, color accuracy, and processing power matter just as much. Recent studies point out that lower-tier 4K models often underperform on these fronts despite their high resolutions. This nuance highlights why it’s crucial to examine the entire imaging pipeline rather than fixating solely on resolution specs. For comprehensive guidance, check the Ultimate 4K Projector Buying Guide which dives into essential performance metrics and real-world performance considerations.
Essential Tools and Techniques for Sustained Performance
Maintaining your home theater projector, especially high-end models like 4K laser or ultra short throw projectors, is crucial for ensuring consistent visual quality and longevity. I personally rely on a few key tools and methods that have proven effective over years of setup and use. First, a reliable microfiber cleaning kit, including dust removal brushes and screen wipes, helps me keep lenses and filters free from dust and smudges, which can drastically affect image clarity. Regularly calibrating my projector with a colorimeter such as the Datacolor SpyderX ensures color accuracy over time, especially important for models supporting HDR and high dynamic range capabilities. Additionally, I invest in a smart HDMI calibration tool—like the Murideo SIX-G Tester—to verify signal quality and fix issues that could compromise picture quality, especially when streaming from multiple sources.
Beyond physical tools, software solutions like DisplayCAL allow me to fine-tune calibration profiles, ensuring my projector maintains optimal color and gamma settings. Multifunctional memory settings in most projectors facilitate quick resets after plugin or angle adjustments, saving time during periodic recalibration. For long-term maintenance, I schedule monthly cleaning routines and calibration checks, which prevent major performance drops. During these sessions, I also examine lamp and laser health using built-in diagnostic menus, planning replacements proactively to avoid unexpected failures.
Anticipating Future Trends in Projector Care
Looking ahead, innovations like AI-assisted calibration and self-cleaning lenses are likely to become standard. Companies are developing projectors that automatically detect dirt or color drift, adjusting settings or alerting owners via smartphone apps. Such advancements will simplify upkeep, making high-quality home theaters more accessible and hassle-free. As technology continues evolving, the emphasis on intelligent, connected maintenance will help preserve the stunning visuals that modern projectors deliver—think of it as having a personal technician at your fingertips.
Ever Wonder How to Keep Your Projector Operating Flawlessly Over Time?
One of the best ways to ensure your high-end home theater system performs at its peak is to implement a routine maintenance plan involving both manual tools and software calibration. Regular cleaning with specialized lenses and filters, combined with periodic calibration using professional-grade tools like a colorimeter, will sustain image quality. Incorporate preventive measures such as scheduled diagnostics and firmware updates, which often include performance improvements and bug fixes from manufacturers. Don’t forget, complete readability and image stability hinge on managing ambient light and positioning, so revisit your setup every few months to adapt to any room changes. For further insights into maintenance methods, be sure to explore our detailed guides on home theater projector care.
If you’re aiming to maximize your projector’s lifespan and image excellence, I highly recommend trying out a digital colorimeter for calibration. It’s a game-changer in precision, ensuring every scene pops with true-to-life colors. Ready to see your setup in a whole new light? Dive into the latest calibration tools and make your home cinema truly shine.
One Hidden Pitfall I Nearly Fell Into with Home Theater Equipment
Early on, I believed that upgrading to the latest 4K laser projector would instantly transform my viewing experience. Turns out, neglecting proper calibration was my biggest mistake—a reminder that even top-tier technology demands meticulous setup. I learned that effective calibration, often overlooked, is crucial for truly immersive visuals, and it can make or break your home theater vibe. This lightbulb moment underscored that investing in quality tools like a colorimeter and dedicating time to calibration directly translates into stunning picture quality.
Tools That Became My Secret Arsenal for Consistent Performance
Over time, I incorporated essential tools like a microfiber lens cleaner and a Bluetooth-enabled calibration device to ensure my projector stayed in peak condition. These tools empower me to troubleshoot and fine-tune my setup with confidence, even after months of use. Additionally, software like DisplayCAL has been instrumental in maintaining accurate color profiles, especially when dealing with HDR content. My advice? Building a small DIY toolkit around these items keeps your projector performing at its best, prolonging its lifespan and preserving the cinematic magic.
Embracing Change—Why Future-Proofing Matters More Than Ever
The rapid pace of projector innovation means that what’s cutting-edge today might be outdated tomorrow. I’ve found that staying adaptable—through firmware updates, ongoing calibration, and exploring emerging tech like AI-enhanced image correction—ensures my setup evolves with the industry. Anticipating these trends means I can enjoy newer features without replacing entire units, making my investment more future-proof. If you’re serious about your home theater, embracing continuous learning and adaptation is essential for a truly captivating experience.
What’s Your Next Big Step in Home Cinema?
As you consider upgrading your projector or optimizing your space, remember that the journey doesn’t end with choosing a model. Proper maintenance, calibration, and proactive upgrades unlock the full potential of your home theater system. Whether you’re exploring ultra short throw models or looking into portable options, the key is in the details—lighting, sound, calibration—that bring movies to life. Curious about specific setup tips or recommendations? Feel free to reach out or share your experiences below. Believing in your ability to create that perfect cinematic environment is the first step toward making it happen!
http://Amanda%20Reynolds
Reading through this guide, I can clearly see how switching to an ultra short throw projector truly transforms small living spaces. I recently moved into a compact apartment, and I was hesitant about my limited space, but this post reassured me that a high-quality laser projector could be the perfect solution. I agree with the emphasis on proper calibration—it’s easy to overlook, but it makes all the difference in picture quality. I’ve started experimenting with calibration tools like a colorimeter, and the difference in color accuracy really blew me away. Has anyone here tried automatic calibration features or AI-driven tools? I’m curious if they live up to the hype or if manual calibration still offers better results for high-end systems. Also, I’d love to hear other tips on optimizing audio arrangements for small rooms—balancing sound and visuals can sometimes be a challenge, but it’s key to creating an immersive experience.
http://Michael%20Johnson
This post really hits home for me. After struggling with a bulky traditional TV setup in my apartment, I finally invested in a 4K laser ultra short throw projector. I was surprised by how compact it is and how it transformed my space into a mini cinema. Calibration was a bit challenging initially; I used a colorimeter, which made a huge difference in color accuracy and overall image quality. I also experimented with some automatic calibration options, but I found that manual fine-tuning still yields the best results, especially for a high-end system like mine. One thing I learned is that room lighting and surface textures can greatly impact picture quality, so controlling ambient light and choosing a proper wall surface are crucial. Has anyone else faced issues with ambient light affecting their setup, and how did you overcome it? I’m curious about different solutions others have used to optimize brightness and contrast in small rooms.
http://Benjamin%20Taylor
Reading about your experience with the late-night wiring struggles really hit home for me. I remember the first time I installed my ultra short throw projector in a similar small space; I was tangled in cords and trying to figure out the correct mounting height. What helped me was using a simple laser measuring tool and a level app on my phone—made the process so much smoother. It’s amazing how much these tiny tweaks can improve image alignment and clarity. Additionally, I found that opting for a model with built-in keystone correction and wireless setup options simplified the initial calibration process considerably. For those dealing with ambient light issues, I experimented with screen paints and room darkening curtains, which significantly boosted brightness and contrast during daytime use. Do you have any recommended accessories or setup tricks for controlling room lighting effectively while maintaining style? I’d love to hear how others tackle this to maximize picture quality without compromising aesthetic appeal.