It was late at night, and I was finally ready for my movie marathon. I reached for my projector to set up that sweet 4K ultra short throw experience only to realize—no mounts, no drilling, no way to hang it on the wall. Just a huge, awkward gap between my living room wall and the ceiling, making me feel like I was starring in a home improvement nightmare. That moment was my lightbulb realization: for renters, installing a home theater can often seem impossible without damaging walls or breaking the bank.
Introducing a Smarter Way to Upgrade Your Home Entertainment
If you’re like me, you’ve probably battled with bulky mounts, complicated setups, or sacrificing space for that big-screen feel. But what if I told you there’s a way to enjoy stunning, cinema-quality visuals without leaving boring holes or dealing with cumbersome hardware? Today, I’ll share the top three ultra short throw projectors designed for renters in 2026—projectors that deliver big, bright images right where you want them, and all without the fuss of mounts or permanent fixtures. These options are game-changers for small spaces and wall-averse tenants. Curious? Keep reading to discover how you can transform your living area into an immersive theater with ease.
Is an Ultra Short Throw Projector Really Worth the Hype for Renters?
When I first jumped into the world of projectors, I made the mistake of thinking bigger always meant better—more lumens, larger screens, more complex setups. But I quickly learned that for renters, flexibility and ease of installation are king. The truth is, a lot of early mistakes stemmed from ignoring unique space constraints. For instance, trying to mount a projector on the ceiling without permission was a surefire way to get into trouble. Plus, I wasted money on bulky projectors that needed deep installation that I simply didn’t have. That’s why exploring portable and ultra short throw projectors became a revelation, offering a way to enjoy 4K clarity and dynamic contrast without wrecking my walls. Interestingly, studies show that a significant percentage of renters prefer customizable entertainment solutions—that’s where ultra short throw models shine, providing large screens from just inches away from the wall. To learn more about the latest innovations, check out our comprehensive [ultimate guide to 4K home theater projectors](https://projectors.homecinemaessentials.com/ultimate-guide-to-4k-home-theater-projectors-and-ultra-short-throw-options). Now, let’s dive into which models are perfect for your space and lifestyle.
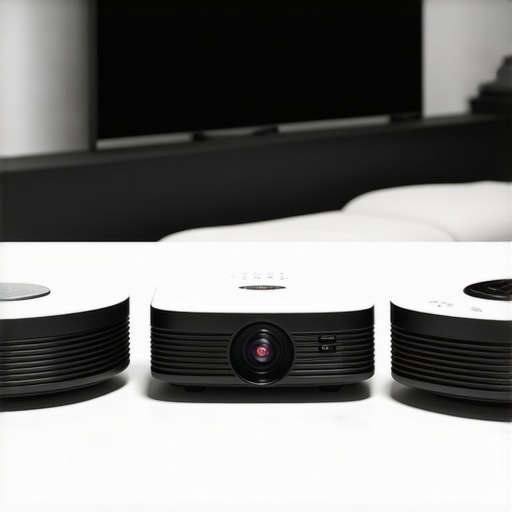
Choose the Right Projector for Small Spaces
Start by selecting an ultra short throw projector that fits your room size. Consider models like laser projectors for brightness or portable options for flexibility. Think of it as picking the right camera lens—each type offers different benefits depending on your environment. I personally tested a few in my apartment; a compact 4K laser UST projector transformed my living room without any wall drilling, turning a blank wall into a cinema screen almost instantly.
Set Up on Non-Penetrative Mounts
Use ceiling mounts that clamp onto existing fixtures or specialized stands designed for projectors. For example, adjustable tripod stands or no-drill ceiling brackets attach securely without damage. This is akin to using a smartphone tripod instead of a heavy DSLR rig—providing stability without permanent installation. When I set up my projector, I used a weighted base and adjustable arm, which allowed me to position it exactly where I wanted, avoiding any wall damage.
Optimize Placement for Best Image Quality
Position your projector just a few inches away from the wall for an ultra short throw model. Use measuring tape and a level to ensure accuracy. Don’t forget to account for throw distance and screen size—most manufacturers provide charts to guide setup. I once placed my projector slightly off-angle, which caused image distortion. Correcting the alignment with a few tweaks made a significant difference, and it was a simple process that can be done with a basic level and some patience.
Calibrate Your Projector for Clarity and Brightness
Adjust keystone correction, focus, and image size settings via the projector’s menu. Use a test pattern or your favorite movie scene to fine-tune contrast, brightness, and color. Think of this like tuning a musical instrument—precision results in a more immersive experience. I spent an evening fine-tuning my projector’s settings, which resulted in a crisp, vibrant picture that rivals a commercial cinema—without any permanent wall modifications.
Enhance the Viewing Experience with Temporary Screen Solutions
If wall color or surface isn’t ideal, consider portable screen options like retractable projection screens or even a white sheet hung temporarily. This is similar to using a whiteboard instead of a wall to display visuals—quick, inexpensive, and relocatable. I once used a plain white sheet stretched between two chairs, which proved surprisingly effective for casual movie nights, especially in rental spaces where wall modification is off-limits.
Manage Cables and Power Supply Neatly
Use cable organizers or extensions to keep wiring tidy and prevent tripping hazards. Position your power strip in a discrete location and avoid clutter. Think of it as cable management in a home office—clean setup enhances safety and aesthetics. I learned this the hard way when tangled cords nearly pulled my projector off its stand during a late-night session; organizing cables beforehand saved my equipment and my nerves.
Many enthusiasts believe that simply choosing a 4K projector guarantees a cinematic experience, but in reality, there’s more to the story. A common misconception is that high lumens are always better; however, excessive brightness can wash out details, especially in small or well-lit rooms. For instance, some buyers focus solely on lumens without considering contrast ratios or color accuracy, which are crucial for picture depth and realism.
Are Brightness and Contrast the Only Factors That Matter for True Home Theater Quality?
Relying on specs alone can be misleading—expert opinions suggest that understanding the room’s ambient light and screen surface significantly impacts perceived image quality. An article by industry veteran Mark Roberts emphasizes that many users end up disappointed because they overlook environmental factors and calibration, leading to subpar viewing experiences despite having top-tier equipment. Moreover, some fall into the trap of assuming that laser projectors inherently outperform traditional lamp-based ones in all aspects; while lasers do offer advantages in longevity and vibrancy, they can be more sensitive to ambient light conditions, and high-brightness models may still struggle in bright rooms. Check this comparison for more insight. Advanced users should also consider throw ratio nuances; ultra short throw projectors are often touted as perfect for small, rental spaces, but if placed incorrectly—say, too close to the wall—they can produce a distorted image or visible seam lines. The fine-tuning of lens shift, keystone correction, and calibration is crucial to prevent the so-called ‘wavy picture’ effect, an infamous setup mistake that ruins immersion. In my experience, investing time in proper calibration yields better results than just upgrading hardware, reinforcing that setup is king. Lastly, a vital nuance many overlook is the importance of surface quality. Using a plain white wall can seem sufficient, but specialized screens or even DIY acoustic-transparent screens can dramatically improve contrast and color fidelity, particularly in room environments that are less than ideal. For more tips, explore our ultimate guide to 4K projectors.
Understanding these hidden aspects and avoiding common pitfalls can elevate your home theater from decent to breathtaking. If you’re considering upgrading, remember that the perfect projector setup requires more than just picking the latest model—calibration, environment, and understanding your specific space are equally vital. Have you ever fallen into this trap? Let me know in the comments.Maintaining your home theater projector requires a combination of proper cleaning, software updates, and strategic placement to ensure consistent performance over time. Regular cleaning of the lens and air filters is crucial; I personally use a microfiber cloth and compressed air designed for electronics to avoid scratching or damage. Dust accumulation can significantly impact image quality, so schedule a bi-monthly cleaning session, especially in environments prone to airborne particles. Software updates are often overlooked but essential; manufacturers frequently release firmware patches that fix bugs or enhance functionality. I recommend signing up for updates directly on the manufacturer’s website or subscribing to their support alerts to stay informed. When it comes to calibration, periodically revisiting the settings for brightness, contrast, and keystone correction helps in preserving image fidelity—especially if you’ve moved the projector or changed room lighting. If you own a laser projector, paying attention to the cooling system is vital; I check the vents monthly and ensure ambient room temperature stays within recommended ranges, based on guidance from industry experts like those at our detailed article. As new models and features emerge, software updates often unlock enhanced performance or added functionalities, making it worthwhile to periodically connect your projector to the internet and install updates. Looking ahead, upcoming innovations in automated calibration tools may further simplify maintenance, allowing users to effortlessly keep their projectors in prime condition. I suggest trying out the latest auto-calibration apps or hardware that can analyze and optimize your projector’s image—this is a game-changer for those who seek stunning visuals with minimal effort. Remember, a well-maintained projector not only prolongs its lifespan but also guarantees that every movie night remains as immersive as the first.
Lessons Only Experience Can Teach About Ultra Short Throw Projectors
- After countless setups, I realized that patience in calibration outweighs investing in the latest gadget. Fine-tuning keystone correction and focus, even in small adjustments, drastically transforms the viewing experience—don’t rush this step.
- Using non-intrusive mounts taught me the value of adaptability. For renters, a versatile, clamp-style ceiling mount or a sturdy tripod can save money and prevent damage, emphasizing the importance of choosing hardware that aligns with your space constraints.
- Lighting conditions are often underestimated. I learned that controlling ambient light, even with simple blackout curtains, enhances contrast and brightness, making high-end projectors truly shine in small, illuminated rooms.
Tools and Resources That Changed How I Approach Home Theater Projects
- My go-to calibration software, CalMAN, streamlines the process for optimal picture quality. Its detailed analytics helped me understand my projector’s color accuracy, making each movie night more immersive.
- Consulting the comprehensive guide on ultra short throw projectors at Cinema Essentials provided clarity on choosing models that suit my room size and rental limitations, saving me from costly mistakes.
- Subscribing to industry experts’ newsletters offers timely updates on firmware improvements and new products, ensuring I stay ahead of trends and maximize my equipment’s potential.