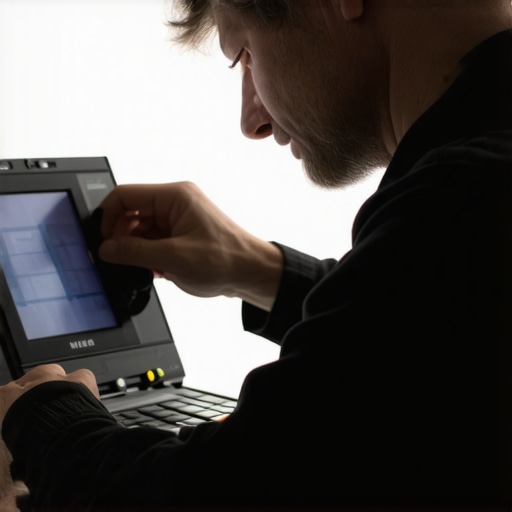
It was a quiet Saturday evening, the lights dimmed, popcorn ready, and my brand-new ultra short throw (UST) projector humming silently in the corner. I eagerly pressed the power button, expecting a cinematic masterpiece to flood my wall. But instead, I was greeted with a crooked, wavy image that looked like it was struggling to find its balance. My heart sank. It wasn’t supposed to be like this—how could something so sleek and new be giving me issues right from the start?
If you’ve ever experienced a tilted or distorted image with your home theater setup, especially with 2026’s latest laser and ultra short throw projectors, you’re not alone. This frustrating problem can ruin your entire viewing experience and leave you questioning whether you chose the right equipment. I’ve been there. But after a bit of trial, error, and a few insider tricks, I discovered quick ways to straighten out that crooked image without needing advanced tech skills or costly calibration tools.
Today, I’m going to share three fast alignment tricks that will help you fix that tilted UST image in no time flat. Whether it’s for your 4K portable projector or a dedicated laser ultra short throw setup, these methods are designed to be simple, effective, and friendly even for beginners. Trust me, I’ve made the classic mistake early on—assuming that perfect alignment would just happen naturally. Spoiler: it doesn’t. But with these tips, you’ll save yourself hours of frustration and get back to enjoying your favorite movies and games in true cinematic quality.
Why Your Projector Image Gets Tilted and Why It Matters
Before diving into the tricks, let’s understand what causes this misalignment. Tilted images often result from uneven mounting, slight shifts in the projector’s position, or even room changes like furniture rearrangement. In 2026, with the surge of portable and ultra short throw projectors, many users set up their units quickly without paying close attention to angle calibration, leading to skewed images that look unprofessional and distracting.
Accurate image alignment isn’t just about aesthetics; it affects your viewing comfort and the quality of your entertainment. A tilted picture can cause eye strain, make your content look distorted, and even obscure important details, especially with high-resolution 4K content. In fact, improper setup can reduce perceived contrast and sharpness—things that optical professionals and enthusiasts obsess over. That’s why fixing this problem swiftly is essential for optimizing your home theater experience.
If you’ve faced this issue and wondered whether it’s worth trying to fix it yourself, the answer is a resounding yes. Not only is manual adjustment often faster and cheaper than calling in professional setup services, but it also helps you develop a better understanding of your equipment. Plus, with the right knowledge, you’ll be able to troubleshoot similar issues down the line, ensuring your projector consistently delivers stunning visuals. For more in-depth information about setting up and optimizing ultra short throw projectors, you might find this ultimate guide to portable UST projectors helpful.
Now that we’ve covered why this problem happens, let’s jump into the practical, fast solutions that will straighten your image — and keep it that way. Ready to regain control over your picture quality? Let’s go!
,
Level the Mounting First
Start by ensuring your projector is perfectly level. Place a spirit level on the projector or a nearby flat surface, and adjust the mounting bracket until the bubble is centered. I once set up my laser UST in a hurry, ignoring this step, and ended up with a disturbingly skewed picture. Correcting the mount immediately fixed the tilt, giving me a clear path to fine-tuning the image.
Use Internal Image Adjustment Settings
Most projectors, including portable 4K units and laser models, have built-in keystone or trapezoid correction features. Access your projector’s menu—usually via a remote or onboard buttons—and employ these features to tilt the image back into proper alignment. When I used the keystone correction on my portable projector, I was able to achieve a nearly perfect rectangle within seconds, even when the wall wasn’t perfectly perpendicular to the unit.
Adjust the Projection Angle
If keystone correction isn’t enough, physically tweak the projector’s angle. Tilt it slightly on its mount or adjust its position to minimize distortion. Think of it like angling a camera lens; small changes can drastically improve the alignment. During setup, I repositioned my ultra short throw projector to reduce trapezoidal distortion, resulting in a sharp, level picture without overly relying on digital correction which can degrade image quality.
Level Your Surface Safely
Ensure your projector isn’t just mounted securely but also positioned on a level surface or wall. For portable units, use adjustable tables or wall mounts with leveling screws. An uneven tabletop caused my portable 4K projector to incline subtly, causing a wavy picture. With a quick shim and proper placement, the image became perfectly stable and straight.
Fine-Tune with Room Alignment Tricks
Sometimes, room features impact the projection. Use a laser level or a level app on your phone to check the wall or screen. Adjust the projector position until the projected image aligns perfectly with the level line. I used this method in my compact setup—aligning the image with a laser line projected on the wall—and got instant results, making my content look professional.
Use Digital Warping with Caution
If physical adjustments are limited, use the projector’s digital warping features sparingly. Overdoing keystone correction or distortion correction can soften or warp your image, especially with high-resolution content. I found that minimal digital correction, combined with physical tweaks, gave me the best clarity.
Incorporating these steps took just about ten minutes during a recent setup, transforming my crooked picture into a crisp, level display. For more tips on optimizing your projector’s setup, check out this guide on common UST setup mistakes and how to avoid them. Proper alignment not only improves image quality but extends the lifespan of your projector by preventing unnecessary strain on its components. Once your image is straightened out, you’ll wonder why you didn’t do it sooner—so give these tricks a shot today!Many enthusiasts believe that choosing the brightest projector or the highest resolution guarantees a perfect home theater experience, but in reality, there’s often a deeper misunderstanding at play. A common myth is that more lumens automatically mean better picture quality, yet this neglects ambient lighting conditions and screen type, which are critical factors. According to a study by the Society of Motion Picture and Television Engineers (SMPTE), optimal image quality depends on a balanced combination of brightness, contrast, and color accuracy, not just raw lumen output.
Another misconception revolves around ultra short throw (UST) projectors. Many assume that setup is straightforward and requires minimal adjustment, but the reality involves precise calibration of keystone, focus, and alignment to prevent wavy or distorted images. Oversights here can lead to serious image quality issues, especially with 2026’s advanced laser and 4K projectors. For example, improper placement might cause excessive keystone correction, which can soften the image and reduce clarity.
When it comes to portable projectors, there’s a tendency to overlook their limitations in brightness and lens quality. Many buyers are lulled by compact design but underestimate how ambient light can wash out images, or how short battery life impacts usability during movie nights. A key mistake is neglecting to evaluate lumen specifications in relation to room size, which can result in disappointingly dim images. For detailed advice, review the guide on [portable projectors for on-the-go cinema](https://projectors.homecinemaessentials.com/portable-projectors-your-on-the-go-cinema-solution).
Premium laser projectors are often touted for their longevity and color performance; however, a hidden nuance is thermal management. Poor cooling solutions can lead to color shifts or flickering over time, especially in compact models. Experts recommend ensuring adequate airflow and avoiding eco modes unless necessary. Not paying attention to these details can significantly impact long-term performance.
A particularly sneaky trap is relying solely on auto-correction features like keystone or auto-focus. While helpful, overreliance on these can mask underlying setup issues and lead to images that are correctly aligned digitally but still physically skewed. This can cause eye strain and reduce immersion, especially when watching high-resolution content. It’s crucial to manually verify physical alignment first and then use digital adjustments sparingly.
For the discerning enthusiast, understanding these nuances is key to truly optimizing their setup. The difference between a good and excellent home theater often hinges on paying attention to such subtle details—like room acoustics, screen type, and projector calibration—rather than focusing solely on specifications. If you’re exploring ultra short throw setups, see how [UST projectors are transforming small spaces in 2026](https://projectors.homecinemaessentials.com/why-ust-projectors-are-replacing-100-inch-tvs-in-2026).
Remember, the devil is in the details. By addressing these common misconceptions and hidden aspects, you can maximize your investment and enjoy a cinematic experience that rivals the theater. Have you ever fallen into this trap? Let me know in the comments.
Tools I Recommend for Effortless Maintenance
Keeping your home theater setup in top shape requires the right tools and a routine approach. I personally swear by an air compressor with a soft nozzle attachment, which I use to gently blow dust out of the projector vents and lens assembly without risking damage. Compressed air prevents dust build-up that can cause overheating or flickering over time, especially for laser and ultra short throw (UST) projectors that run hotter due to their high brightness levels.
Another essential tool is a microfiber cleaning cloth combined with a lens-safe cleaner. Regularly wiping your lens keeps image clarity optimal and prevents the accumulation of fingerprints or smudges that can degrade picture quality. I avoid harsh household cleaners, opting instead for products formulated for optical surfaces, like the Arase Ultra Fine Lens Cleaning Cloth, which I’ve found effective and gentle.
Additionally, I recommend monitoring your projector’s internal temperature with a digital infrared thermometer. Overheating can shorten the lifespan of laser modules and impact color accuracy. Checking the temperature periodically helps you identify ventilation issues early—before they become costly repairs. Proper cooling, coupled with these simple tools, extends your projector’s lifespan and guarantees consistent performance.
Scheduling Routine Checks to Preserve Performance
Establish a maintenance schedule to prevent major problems. I set a reminder every three months to clean air filters, check for dust in vents, and verify that the projector is on a level surface. When I notice dust, I gently blow it out with compressed air, focusing on vents and fan intakes. This consistency ensures that thermal management remains effective, especially for models equipped with auto-cooling features that might underperform if vents are blocked.
Furthermore, regularly calibrating your projector’s settings, such as contrast, color balance, and keystone correction, helps maintain image quality as components age. For detailed calibration techniques and to ensure your 4K projector continues delivering sharp visuals, review this guide on common setup mistakes.
Preparing for Long-Term Scaling and Upgrades
As your home cinema grows, consider modular and scalable tools. For instance, adjustable wall mounts with built-in leveling systems make repositioning your projector quick and precise, eliminating image tilt. Upgrading to a high-quality air filter system or dedicated cooling fans can preserve performance amid increased usage or ambient temperature rises.
Looking ahead, trends indicate that smart maintenance solutions like IoT-connected temperature sensors and predictive dust filters will become common, offering real-time alerts for preemptive care. Embracing these technologies now ensures your setup remains effortless to maintain and adaptable for future upgrades.
How do I maintain my projector over time to prevent issues and extend its lifespan?
Start by consistently cleaning vents and filters with soft tools, monitor internal temperatures with infrared gun devices, and calibrate settings periodically. Also, keep your projector on a sturdy, level surface to avoid alignment shifts, and consider software updates that optimize performance. Incorporating these habits and tools protector your investment and keep your cinematic experience smooth for years to come. For instance, regularly cleaning the projector’s filter with compressed air prevents dust build-up that can cause overheating—a common culprit behind image flickering or color fade over time. Looking into advanced maintenance, some experts recommend installing a dedicated cooling system for high-brightness laser projectors, especially in warmer climates. For a detailed overview, check this comprehensive guide. Don’t forget to try out a gentle, regular lens cleaning routine using microfiber cloths; it’s a small step that makes a big difference in sustained image clarity.
What I Wish I Knew Before My First UST Setup
One of the toughest lessons I learned was the importance of meticulous physical alignment over relying solely on digital corrections. It’s tempting to rely on keystone adjustments, but risking image softness or distortion isn’t worth it; a tiny misalignment can ruin the entire viewing experience. Also, I discovered that room factors like furniture placement and wall texture subtly influence projection quality, reinforcing the need for a holistic setup approach. Lastly, patience is key—taking a moment to double-check every adjustment prevents future headaches, saving you time and frustration while ensuring your projector performs at its best.
Tools and Resources That Turn Setup Into a Breeze
My favorite tools include a good-quality spirit level to ensure precise mounting and a microfiber cloth with optical cleaner for lens maintenance. The ultimate guide to portable 4K projectors offers invaluable tips on calibration, but I also trust the reviews from industry leaders who share real-world experiences. For ongoing maintenance, a thermal infrared thermometer has helped me monitor and prevent overheating issues, especially important for laser models. These tools make consistent calibration and upkeep straightforward, ensuring sustained top-tier image quality.
Your Next Step in Creating an Unmatched Viewing Environment
Now is the perfect time to elevate your home theater with confidence. Remember, mastering your projector setup isn’t just about achieving a straight image—it’s about transforming your space into an immersive cinema sanctuary where every night feels extraordinary. Whether you’re exploring ultra short throw options or fine-tuning a portable projector, embracing continuous learning and patience will yield incredible results. Are you ready to take the next step towards a flawless picture? Feel free to share your setup challenges below, and let’s troubleshoot together—your perfect home theater awaits!
http://Emily%20Carter
Wow, this post hits the mark for anyone setting up a new UST projector! I remember my first experience with one; I initially thought it was just a matter of plugging it in and enjoying the show. But I quickly learned that proper physical setup is crucial, especially regarding level mounting and minimizing keystone correction. Doing those small initial adjustments saved me a lot of quality loss and frustration down the line. I also found that room lighting and wall texture can impact the picture surprisingly much, so I now use a laser level and a simple wall paint color that helps reflect light evenly. Has anyone else faced unexpected challenges from room conditions that affected their image quality? Sometimes tuning the projector’s physical positioning makes more difference than digital corrections, especially with high-res content.
http://Michael%20Johnson
This post really resonated with me because I’ve learned through experience that physical adjustments—like ensuring the mount is perfectly level—can make a huge difference in image quality before even touching digital settings. I used a laser level during my last setup, and the difference was night and day. It’s surprising how even a small tilt can cause a wavy or distorted picture, which is especially distracting with 4K content. I’m curious, has anyone tried adjustable wall mounts with built-in leveling features? They seem like a smart investment, especially for quick realignments if your room gets reconfigured. Also, I’ve noticed that room lighting can cause glare or wash out the image, which makes me wonder—what are the best practices for optimizing room conditions to maximize picture quality? I’d love to hear everyone’s tips, because I think paying attention to these details really elevates the home theater experience beyond just high-end equipment.
http://Nathaniel%20Brooks
I really appreciate how practical these tips are—especially the emphasis on physically leveling the projector before touching digital adjustments. In my experience, a small tilt is often the culprit behind most image distortion issues, and it’s easy to overlook. I personally use a digital level app on my phone, which simplifies the process, but a traditional spirit level works just as well. One thing I found helpful was placing my projector on a sturdy, adjustable stand that I could fine-tune. This prevented any subtle shifts from affecting the picture over time. Has anyone experimented with different mounting solutions to help stabilize and maintain perfect alignment? Also, room lighting has always been tricky for me—I’ve noticed that glare from windows or ambient lighting can wash out the image, especially during daytime viewing. I’ve started using blackout curtains and ambient light-reducing paint on the walls, which made a noticeable difference. For those still struggling with image tilt or clarity, do you have any tips for balancing off-the-wall ambient light with optimal picture quality? I’d love to hear more approaches from fellow enthusiasts.