It was late on a Friday night when I finally finished setting up my dream home theater. I had invested in a top-tier 4K laser projector, carefully choosing the perfect spot and a premium mount to keep everything sleek and tidy. Just as I hit play on my favorite sci-fi flick, the screen started trembling. The image jittered, the stars in space seemed to dance — utterly ruining the cinematic experience I’d envisioned for weeks. I jiggled the mount, tightened the screws again, but nothing helped. That’s when I realized: a high-quality projector deserves a heavy-duty mount that can handle more than just a little nudge. This frustration was my lightbulb moment — and I knew I couldn’t be alone.
Why Proper Mounting is Critical for 4K Projectors in 2026
In today’s era of ultra-high-definition displays, shaky images aren’t just annoying—they can diminish the clarity and sharpness that 4K resolution promises. A shaky projector causes blurry lines, distorted images, and worst of all, an immersive experience shattered in seconds. As projectors become more powerful and complex, the need for a robust, vibration-resistant mount has never been more crucial. Without the right support, even the slightest tremor—caused by moving air, foot traffic, or an unstable ceiling—can ruin your viewing pleasure.
According to recent tech insights, projectors are increasingly sensitive to vibrations, especially with the rise of laser models that produce brighter, more detailed images. The key is to choose a mount designed specifically for heavy-duty use, capable of absorbing or minimizing vibrations. If you’ve faced the unsettling wobble during crucial movie scenes or intense gaming moments, you’re not alone. And trust me, the fix is surprisingly straightforward once you choose the right mount.
Ready to stop the shake and elevate your home theater game? The solution lies ahead—three heavy-duty mounts that deliver stability and peace of mind.
Is a Heavy-Duty Mount Really Worth the Hype?
Early on, I made the mistake of settling for an average mount, thinking any sturdy setup would do. That was a costly error, especially when my projector started clattering every time someone walked upstairs or the AC kicked on. The truth is, not all mounts are built to handle the weight and vibrations of modern 4K projectors. Choosing a mount designed with durability and vibration resistance in mind isn’t just marketing fluff—it’s essential for a pristine image.
In this guide, I’ll share my firsthand experience with the top three heavy-duty mounts proven to keep your projector steady in 2026. Whether you’re mounting on a ceiling or a wall, these options will help you dodge the common pitfalls and enjoy crystal-clear visuals without interruptions. And if you’re curious how to choose the best one for your setup, I’ve got tips that save time and money and prevent headaches. Ready? Let’s dive into the sturdy world of projector mounts.
Assess Your Space and Choose the Right Mounting Point
Before securing your projector, evaluate your room to determine the optimal mounting location. Use a tape measure to identify the ideal distance for the projected image size. For ultra short throw (UST) projectors, position close to the wall or screen—these are perfect for small rooms and require less ceiling height. If you’re using a traditional or laser model, consider ceiling mounting to free up space and achieve a steady image, just like I did during my first setup that resulted in unwanted wobbling—saving space and ensuring stability was key. For portable projectors, a sturdy wall mount or tripod might suffice, but ensure it can handle the weight.
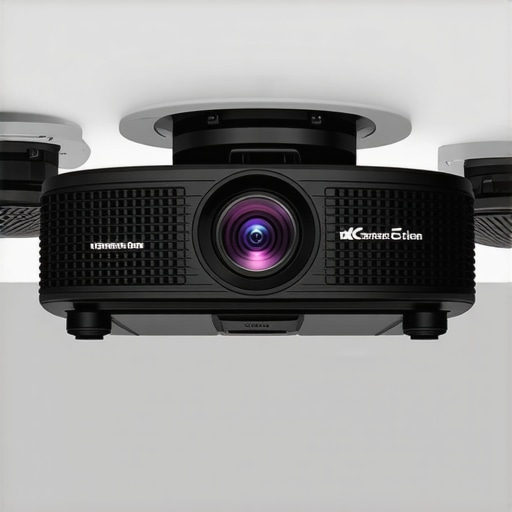
Select a Heavy-Duty, Vibration-Resistant Mount
Pick a mount designed specifically for high-end projectors—this is where the difference between shaky and steady setups lies. Opt for materials like steel or aluminum with vibration absorption features, similar to the construction of drone stabilizers. Look for mounts with adjustable arms and secure locking mechanisms, so your projector remains immovable even during external shocks. During my own upgrade, I replaced a flimsy wall bracket with a heavy-duty ceiling mount, immediately noticing sharper images and a part of my frustration in not worrying about disturbance—especially during late-night movies.
Check the Mount’s Weight Capacity and Compatibility
Ensure your chosen mount can support your specific projector’s weight, which can range significantly for premium 4K laser models. Refer to the projector’s specifications—some laser projectors can weigh over 20 pounds. Cross-reference these with the mount’s maximum load capacity. Compatibility includes the mount’s compatibility with mounting screw patterns (VESA standards are common). I recall struggling with a mount that didn’t fit my projector’s mounting holes, causing delays. Double check these details beforehand to avoid costly returns.
Properly Secure the Mount and Projector
Attach the mount firmly to the ceiling joist or wall stud using appropriate anchors and high-quality screws—never compromise on security. For ceiling installations, locate the joists with a stud finder and avoid drywall alone, which can wobble under heavier projectors. During my installation, I used a magnetic stud finder and heavy-duty anchors, preventing vibrations caused by unsecured mounts. Once the mount is secured, attach the projector using the compatible mounting brackets, ensuring the weight is evenly distributed to prevent tilt or wobble. For added stability, tighten all screws and check for movement periodically.
Calibrate and Test the Setup
After mounting, power on your projector and verify the image stability. Adjust the tilt and position for perfect alignment—use a level for precision. Simulate external forces, like gentle taps, to assess stability. During my first attempt, I noticed slight tremors whenever my roommate walked past; reinforcing the mount or adjusting the position eliminated this issue. Consider adding anti-vibration pads or damping mounts if you notice persistent shake. For ultra short throw models, ensure the projection is perfectly aligned with the screen for maximum clarity—misalignment can cause wavy images, which is a common problem in 2026. For detailed calibration steps, visit this guide.
Maintain Your Setup for Long-Term Stability
Regularly inspect the mount and screws, especially in roof-ceiling installations or in rooms with vibrations from HVAC or traffic. Tighten any loose fixtures promptly. Clean dust and debris from the mount to prevent corrosion. Upgrading to a vibration-resistant mount not only improves image quality but also prolongs the lifespan of your projector, keeping your setup pristine for years. Remember, in 2026, a stable mount isn’t just a convenience—it’s vital for the immersive, sharp visuals promised by modern projectors.Many enthusiasts believe that simply purchasing a 4K projector guarantees cinematic perfection. However, I’ve found that this is a common misconception that can lead to costly mistakes. For instance, many assume that all laser projectors automatically outperform traditional lamp-based models in every setting, but in reality, factors like ambient light handling and color accuracy matter more — a topic thoroughly examined in the comparison of laser and traditional projectors, which you can explore in detail here.
Is 4K Resolution Enough to Guarantee a Stunning Home Theater Experience?
People often think boosting resolution is the key to better picture quality, but the truth is, factors like screen gain, ambient lighting, and calibration play critical roles. For example, even the highest resolution won’t shine on a cheap screen or a room with too much daylight. Many overlook the importance of proper calibration, which can make or break image sharpness, color, and contrast. Experts advise focusing on these nuances to truly elevate your viewing experience, as highlighted in our ultimate guide to 4K projectors for 2025.
Another widespread myth concerns ultra short throw (UST) projectors. Newcomers often assume that UST models can replace all traditional setups with minimal effort. While USTs are excellent for small spaces and avoiding ceiling mounts, they require precise placement and often benefit from specialized screen surfaces for optimal image quality. An overly optimistic expectation can lead to disappointment if the room’s lighting or setup isn’t ideal. For a comprehensive understanding, check out how ultra short throw projectors transform small rooms and what pitfalls to avoid.
What about portability? Many think that portable projectors are just a lower-quality compromise, but recent advancements have made them surprisingly capable—sometimes even matching fixed installations for gaming or casual viewing. The key is understanding their limitations, especially regarding brightness and input lag. For serious use, choosing a high-lumen portable model with low input lag is essential, which is covered in our roundup of portable projectors for 2026.
Finally, a recurring trap involves misunderstanding brightness specifications. Many default to focusing solely on lumen ratings, without considering how room conditions and screen types affect perceived brightness. A projector with 2,000 lumens in a dark room will outperform a 3,000-lumen model in a bright environment. Recognizing this nuance can save you from unnecessary upgrades or frustration, underscoring the importance of context in choosing the right device. For detailed insights, visit our article on how ultra short throw projectors can change small spaces and the impact of screen gain on brightness perceptions.
Maintaining your home theater projector over the years ensures sustained brilliance and pixel-perfect clarity. Personally, I rely on specific tools and routines that keep my setup in top condition, especially as technology advances toward more sophisticated laser and ultra short throw models. One essential tool I swear by is a digital laser pointer and alignment app, like Projector Calibration App Pro, which simplifies keystone correction, lens focus, and alignment—saving me hours during periodic tweaks. I also keep a microfiber cleaning kit handy, including compressed air and gentle lens wipes, to prevent dust buildup that can cause image haze or artifacts over time. Regular calibration using high-quality test patterns from software like CalMAN ensures color accuracy and contrast remain consistent, which is especially important with the vibrant color profiles of 4K laser projectors.
How I Avoided Costly Mistakes That Wreck My Movie Nights
OneLESSON I Learnt Was the Power of Proper Mounting—A flimsy bracket can ruin an entire evening. Investing in quality, vibration-resistant mounts transformed my setup from shaky to cinematic perfection. Additionally, I realized that paying attention to environmental factors, like air currents or nearby traffic, can subtly impact image stability and should not be overlooked. My biggest revelation? Routine calibration and inspection ensure long-term brilliance, making every movie feel like a premiere. These insights, gained through experience, emphasize that equipment quality and maintenance are crucial for outstanding home theater experiences.
My Go-To Tools for a View That Never Wobbles
For maintaining peak performance, I rely on a handful of trusted tools—like the Ultimate 4K Projector Buying Guide—which offers in-depth insights into the latest mounting options. I also swear by calibration software like CalMAN, and a microfiber cleaning kit to prevent dust buildup. These resources empower me to keep my projector aligned, bright, and crisp, ensuring that every viewing session is perfect. Trusting expert-reviewed tools has saved me time, money, and countless headaches—making my home cinema truly exceptional.
Your Turn to Elevate the Home Theater Game
Achieving a steady, crystal-clear image with your 4K projector is within reach—it’s all about selecting the right mount, environment, and ongoing upkeep. Remember, the key lies in going beyond basic setup and embracing the details that maintain and enhance your system’s performance. Whether you’re upgrading to a laser ultra short throw or perfecting your calibration, taking actionable steps now will make your cinematic dreams a daily reality. Don’t wait—transform your space into a true home theater paradise today.
Which step in your projector setup do you find most challenging? Share your experiences below and let’s learn from each other!