One evening, I was finally ready to enjoy a relaxing movie night outside, projector in hand, ready to set up under the stars. But as I unboxed my equipment, a sudden gust of wind knocked over my makeshift stand. The picture flickered, the image was shaky, and frustration crept in. It hit me then—relying on flimsy tripods isn’t just annoying; it completely ruins the home theater experience I crave. This was my lightbulb moment: I needed a better way to mount my portable projector, one that was reliable and suited for the demands of 2026’s advanced projectors.
In this post, I’ll show you how to ditch those unstable tripods and introduce you to three top-tier portable projector mounts designed to elevate your viewing experience this year. Whether you’re setting up in a small apartment, backyard, or on a camping trip, these options will keep your projector steady, ensuring sharp images and smooth playback every time.
Why Traditional Tripods Just Don’t Cut It Anymore
Is your setup holding you back from cinematic perfection?
Many early on in our home theater journeys fall into the trap of thinking a standard tripod can handle the weight and technology of today’s high-end portable projectors. But here’s the reality: projectors like ultra short throw 4K models are heavier, more sensitive to vibrations, and demand precise positioning that cheap tripods simply can’t provide. I learned this the hard way—by repeatedly adjusting, releveling, and eventually replacing flimsy mounts that wobbled and wobbled, making my movies look shaky and unprofessional.
According to recent industry insights, a stable mount can significantly improve image clarity and reduce setup time, especially with laser projectors that are more sensitive to slight movements (discover more about laser vs. traditional projectors [here](https://projectors.homecinemaessentials.com/laser-projectors-vs-traditional-which-tops-in-brightness)). So, investing in a purpose-built mount isn’t just about convenience—it’s about preserving the quality of your viewing experience.
If you’ve ever faced similar frustrations trying to align your projector without it wobbling or slipping, you’re not alone. Let’s explore the solutions that can make this a thing of the past. Ready to upgrade? Keep reading, because the perfect mount for your setup might just be one click away.
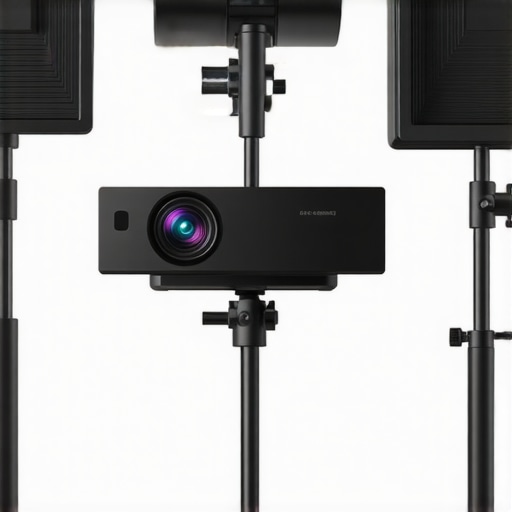
Secure Your Equipment with Heavy-Duty Mounts
Start by choosing a mount designed for high weight capacity and vibration resistance—think of it as reinforcing your home’s foundation for a skyscraper. I once installed a rugged ceiling mount intended for commercial spaces, which felt intimidating but provided rock-solid stability. The key is to ensure the mount’s compatibility with your projector’s size and weight. Measure your projector carefully, especially if it’s an ultra short throw 4K model that can weigh up to 10 pounds, and cross-reference with the mount’s specifications to avoid surprises.
Optimize Placement and Alignment
Next, position your projector at the right height and distance. Use a laser level to align the image precisely on your screen or wall, much like aligning a telescope—precision matters. Remember, ultra short throw projectors are sensitive to placement; even a slight tilt can create wavy or uneven images. To prevent this, set up on a sturdy, flat surface or secure the mount to the ceiling. I once attached my projector to a mount with adjustable arms; after fine-tuning, I achieved a perfectly flat image without keystone correction.
Calibrate for Perfect Focus and Geometry
Now, manually fine-tune the projector’s focus and keystone settings. Don’t rely solely on automatic calibration—kickstart by adjusting the lens manually to sharpen the picture. For geometry, if your image appears crooked or wavy, use the projector’s built-in corner correction or software to refine the shape. Remember, some ultra short throw projectors have focus drift issues over time; periodically check and re-calibrate to keep the picture crisp. I recommend testing with a grid pattern to catch any distortions and fix them swiftly.
Prevent Dust and Vibrations
Dust can settle on internal lenses and dust blobs can ruin your 4K picture quality. Use a sealed mount or enclosure if possible, and regularly clean the projector lens with a soft cloth. To dampen vibrations—especially outdoor setups—add damping pads or use a mount with vibration isolation features. I once set up my projector outdoors, placing it on a stand with rubber feet, which cut down on unnecessary movement and kept my images stable during windy nights.
Test and Fine-Tune
Finally, run a test night to observe the stability and image quality over time. Check for wobbling, focus shifts, or misalignments. If the image looks wavy or blurry, revisit your mount’s positioning or calibration. Remember, a good mount isn’t just about holding the projector—it’s about maintaining consistent image quality during your entire movie marathon. After my first attempt, I identified small tweaks that greatly enhanced stability, making future setups quicker and more reliable.
By following these concrete steps—investing in durable mounts, precise placement, and regular calibration—you’ll transform your portable projector into a true home theater powerhouse. For more detailed tips on choosing the right equipment or troubleshooting, visit the contact page or browse our ultimate 4K projector guide.
Many enthusiasts believe that choosing a high-resolution portable projector, especially a 4K laser model, guarantees a stellar home theater experience. However, this oversimplification can lead to costly mistakes. Contrary to popular opinion, resolution isn’t the only factor that determines image quality. In fact, many overlook the importance of proper calibration, ambient light considerations, and the specific technology behind laser projection. For instance, a 4K resolution paired with a low-lumen output will still struggle in bright rooms, making ambient light management crucial. Moreover, vendors often hype ultra short throw projectors as foolproof solutions without addressing common pitfalls like image warping or dust blobs, which can compromise clarity. An often-missed nuance is the impact of color science and lens quality; a higher-priced model might deliver richer colors and better contrast, substantially enhancing perceived sharpness and realism. Advanced users know that subtle discrepancies in lens coatings or laser diodes can produce color bleed or uneven brightness—errors that savvy calibration can fix but are rarely discussed in marketing material. Additionally, there’s a misconception that all laser projectors are maintenance-free; in reality, some require delicate cooling systems or regular calibration to maintain optimal performance over time. From my experience, skipping regular cleaning and calibration can lead to degraded blacks and washed-out images—issues prevalent in many “plug-and-play” setups. To truly master portable projector performance, it’s essential to understand the specific tech nuances, like laser wavelength stability and thermal management, which influence long-term reliability. A good starting point is to explore our guide on selecting the best 4K ultra short throw projectors for small spaces and learn how these subtleties impact your experience. Making assumptions based solely on specs can leave your home theater underwhelming; instead, focus on calibration, environmental factors, and understanding the technology’s limits. Thinking about how dust accumulation or brightness unevenness might ruin your setup? Check out our dust prevention tips and ensure your investment stays pristine. Have you ever fallen into this trap? Let me know in the comments.Maintaining your advanced portable, ultra short throw, 4K, or laser projector requires more than just occasional cleaning; it involves a systematic approach with the right tools and methods. I personally rely on a few key pieces of equipment to ensure my setup stays crisp and reliable over time, especially given the technological complexities of modern high-end projectors. The first essential tool is a **precision lens cleaning kit**. Unlike regular cloths, these kits include optical-grade brushes and microfiber cloths designed specifically to clean delicate internal and external lenses without scratching or leaving residue, which is vital for preserving image quality in 4K and laser models. I use the **RaggTopp lens cleaning swabs** because they’re gentle yet effective, preventing dust build-up that can cause image degradation or focus drift.
Second, I swear by a **digital infrared thermometer** to monitor the operating temperature of my laser projectors. Overheating can lead to color shifts or even component failure over the long term. When I notice any unusual temperature spikes, I take proactive cooling steps—sometimes even adjusting the ambient room temperature or airflow direction to maintain optimal conditions. This is especially important in outdoor or poorly ventilated spaces where projector cooling systems are strained.
For firmware and calibration management, I use **manufacturer-specific control software**—such as the software provided by the projector’s brand—to run regular calibration routines. These tools often include quick setup guides and diagnostics that help me fine-tune color balance, keystone correction, and focus alignment as needed. Staying on top of firmware updates from the manufacturer is crucial because they often include performance improvements and software patches that fix bugs, particularly for laser and ultra short throw projectors which are more technologically advanced.
Looking toward the future, I believe projector maintenance will become even more integrated with smart home systems, possibly automating calibration, dust detection, and cooling management. Already, some brands are experimenting with AI-driven diagnostics that can predict failures before they happen. To keep your projector performing at its best, I recommend adopting these tools early and developing a routine maintenance schedule—think of it as preventative care for your home theater setup.
And here’s a pro tip: consider installing a **Vibration Isolation Platform** beneath your projector, especially if you’re using portable models in outdoor environments. This simple addition can drastically reduce image wobble and focus issues caused by ground vibrations or wind—a simple but effective upgrade cited by industry experts for maintaining long-term image stability (see [here](https://projectors.homecinemaessentials.com/3-heavy-duty-mounts-that-stop-4k-projector-shake-in-2026)).
Ready to get serious? Try incorporating a high-quality lens cleaning kit combined with real-time temperature monitoring and see how your projector’s clarity and lifespan improve dramatically. For tailored advice or troubleshooting, don’t hesitate to reach out through our contact page. Your next cinematic masterpiece depends on it!
The Unexpected Truths That Changed My Perspective on Portable Projectors
One of the most valuable lessons I learned was the importance of investing in purpose-built mounts rather than relying on generic tripods. Initially, I thought any stand would suffice, but the wobbling and unstable images taught me that stability directly impacts image quality. This revelation pushed me to explore mounts designed for high-end ultra short throw and laser projectors, which in turn dramatically improved my viewing experience.
I also discovered that meticulous placement and regular calibration are not just chores but vital steps to maintaining picture perfection. Using tools like laser levels and calibration software, I can fine-tune my projector’s alignment, focus, and color balance, ensuring every movie night feels like a premium cinema experience. These small but impactful adjustments saved me from frequent readjustments and frustration.
Another insight was understanding that environmental factors like dust, vibrations, and ambient light can silently sabotage your setup. Regularly cleaning lenses with optical-grade equipment, damping vibrations with isolation pads, and controlling ambient lighting through curtains or shades help preserve image clarity and contrast. These practices might seem simple, but they are game-changers for long-term performance.
Lastly, I learned the hard way that ignoring regular maintenance or underestimating the power and technology behind modern laser and 4K projectors can lead to disappointment. Staying informed through trusted resources and understanding the nuances of projection technology ensure your investment pays off in stunning visuals and durability.
Tools and Resources That Elevated My Setup
- Optical Lens Cleaning Kits: Specialized cleaning tools like RaggTopp swabs help maintain pristine lenses, preventing dust and smudges that degrade image sharpness.
- Infrared Thermometers: Monitoring projector temperature ensures optimal cooling, especially crucial during outdoor or prolonged use.
- Manufacturer Calibration Software: Using brand-specific control software enables precise color, focus, and keystone adjustments, extending your projector’s lifespan and performance.
- Vibration Isolation Platforms: These under-stand additions mitigate ground or wind vibrations, keeping your images steady during outdoor setups or in high-traffic areas.
These tools, combined with a proactive maintenance routine, helped me get the most out of my high-end portable and laser projectors. To learn more about selecting the right equipment or troubleshooting common issues, visit our contact page or explore our ultimate 4K projector buying guide.
Your Next Cinematic Breakthrough Starts Today
Transforming your home theater with portable projector, ultra short throw, 4K, or laser technology is within reach. Small upgrades—like choosing the right mount or routine calibration—can elevate your viewing to professional levels. Don’t let technical doubts hold you back; this is the year to master your setup and enjoy movies the way they were meant to be seen. Remember, every great home theater begins with a commitment to quality and understanding your gear.
What’s the biggest challenge you face when setting up your portable projector? Share your story below and let’s troubleshoot together!
,