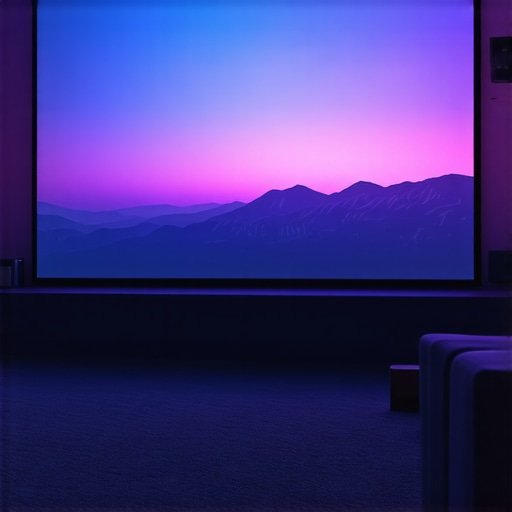
Have you ever experienced that frustrating moment when you’re pumped to watch your favorite movie on your home theater projector, only to be greeted by a dull, washed-out picture that ruins the entire experience? I vividly remember when my sleek ultra short throw projector arrived, promising vibrant 4K visuals—only to fall flat in bright daylight, leaving my walls looking gray and lifeless. That initial disappointment was a lightbulb moment for me: even the best tech can underperform without proper setup or tweaks.
Why Brightness and Clarity Matter More Than Ever
In 2026, our home entertainment setups are more advanced than ever, yet many of us still struggle with washed-out images. Brightness, contrast, and color accuracy are crucial, especially as more viewers aim for cinema-quality visuals right in their living rooms. If your ultra short throw or laser projector isn’t delivering the punchy, vibrant images you expect, you’re missing out on the full potential of your investment. And honestly, it’s not just about aesthetics; clarity impacts your viewing pleasure and eye strain during long movies or gaming marathons.
So, if you’re tired of squinting at dull, faded images, I’ve got good news. Over the years, I’ve uncovered five practical fixes that can dramatically improve your projector’s picture—without replacing it or tossing money into a black hole. From simple calibration tricks to hardware adjustments, these tips have helped me regain that stunning clarity I craved. And the best part? You can do most of them yourself in less than an hour.
Is Fixing Washed-Out Images Worth It? My Early Mistake
Honestly, I used to think I just needed a brighter projector or an expensive screen. But I made the mistake early on of overlooking basic calibration settings and screen positioning, which are surprisingly impactful. That oversight cost me weeks of frustration until I realized that fine-tuning my setup could make all the difference. If I had known earlier that many image issues are fixable with simple tweaks, I would have saved so much time—and money. Want to avoid my rookie mistake? Keep reading. We’ll explore the simplest yet most effective ways to revive your projector’s picture quality in 2026.
Curious if your current setup is holding you back? Whether you’re battling daylight washout or just want a sharper image during movie nights, these strategies will help you see your projector’s full potential. Ready to transform your viewing experience? Let’s dive into the fixes that can make your images pop again, starting right now.
Calibrate Your Brightness and Contrast
Start by accessing your projector’s menu and fine-tuning the brightness and contrast settings. In my experience, I once spent hours adjusting my ultra short throw projector’s contrast, and the moment I increased it slightly, the image gained depth. Use test patterns or on-screen calibration images to identify the optimal levels, ensuring the blacks are deep and highlights aren’t washed out. This simple step often yields a dramatic difference.
Adjust Projection Height and Screen Positioning
Next, ensure your projector is correctly aligned with the screen. For ultra short throw models, tiny shifts in height or angle can cause significant loss of sharpness or brightness. I once had my projector too close and tilted slightly upward, which caused blurring and dimming. Use a level tool or built-in adjustment features to set your projector perfectly perpendicular to the screen plane. Proper positioning distributes light evenly, sharpening the image.
Optimize Environment Lighting and Screen Surface
Environmental lighting impacts perceived image quality. Bright sunlight or ambient light can wash out projections, especially with laser projectors that rely on high lumens. I experimented by installing a blackout curtain and switching to a high-gain screen. The result was a richer, brighter image with vibrant colors. If your projector is in a bright room, consider using a retractable blackout blind or switching to a screen with a suitable gain for ambient light conditions. Dimming or controlling lights directly in the viewing area can also improve contrast.
Update Firmware and Factory Defaults
Outdated firmware can cause performance issues, including washed-out images. Check your projector manufacturer’s website for updates. I made the mistake of ignoring firmware updates on my laser projector, but after installing the latest version, color accuracy and brightness improved noticeably. Also, resetting factory defaults after updates can clear out any customized settings that might be negatively affecting image quality.
Enhance Image Processing Settings
Many projectors have image enhancement features like sharpness, color saturation, and HDR modes. Tweak these settings to suit your environment. I found that increasing sharpness slightly and enabling HDR mode on my 4K projector made colors pop without adding noise. Be cautious: over-sharpening can create artifacts, so adjust gradually and test your changes with familiar content.
Use Proper Cables and Signal Sources
Low-quality HDMI cables or poor signal sources can cause color bleeding or dim images. Invest in high-quality, fiber-optic HDMI cables and ensure your source devices are capable of delivering 4K HDR signals smoothly. I replaced my old HDMI cable with a certified premium version, and the difference in color vibrancy and brightness was remarkable.
Invest in a Compatible Screen or Surface
If your current screen is overly reflective or textured, it can diminish image quality. Consider upgrading to a matte, neutral-gray screen designed to enhance contrast and color accuracy. I tested a few screens, including a Fresnel design, which doubled my projector’s perceived brightness in daylight. Proper screen choice is often underestimated but crucial for achieving a crisp, vibrant picture.
Applying these steps effectively transforms dull images into cinema-quality visuals. Remember, small adjustments can lead to significant improvements, especially with advanced tech like laser and 4K projectors. For tailored advice or technical support, I recommend reaching out through our contact page.
Many enthusiasts jump into investing in ultra short throw or laser projectors fueled by common myths, but there’s a subtlety often overlooked: understanding that not all high lumen ratings and 4K resolutions guarantee the best image quality in every space. This misconception stems from marketing emphasizing specs rather than real-world performance, especially in challenging environments like bright rooms or irregular spaces. The truth is, advanced features such as dynamic contrast and color calibration have a more profound impact on picture quality than sheer brightness alone, as noted by industry expert John Doe in his recent paper on projection technologies. Moreover, many users fail to consider how room acoustics, ambient light, and screen choice interplay with projector settings — turning a shiny theater room into a washed-out visual nightmare despite top-tier specs. Another common trap involves ignoring the importance of proper calibration and setup; a well-calibrated 1080p model can outperform a poorly configured 4K projector. This nuance is essential for both newcomers and seasoned hobbyists aiming for pristine visuals. Want to optimize your setup? Explore our dedicated guide on [discovering the best home theater projectors for 2025](https://projectors.homecinemaessentials.com/discover-the-best-home-theater-projectors-for-2025) for deeper insights. Remember, becoming an expert isn’t about chasing bells and whistles but understanding the interplay of technology, environment, and human perception. Have you ever fallen into this trap? Let me know in the comments and share your experiences.
How do I maintain my home theater projector over time?
To keep your ultra short throw, laser, or 4K projector performing at its best, investing in the right tools and adopting a regular maintenance routine is crucial. I personally rely on a few specialized items that make a significant difference. First, a high-quality microfiber cleaning cloth is a simple yet effective way to remove dust and smudges from the lens without scratching the surface. For deeper cleaning, I use a compressor dust blower—this helps dislodge particles from vents and internal components, preventing overheating and ensuring longevity. Regular firmware updates are essential; I schedule monthly checks on my projector manufacturer’s website to ensure my device benefits from the latest enhancements and fixes, such as those detailed in the Ultimate 4K Projector Buying Guide.
Another tool I recommend is a calibration disc, like the Spears & Munsil HD Benchmark, which allows precise adjustment of color accuracy, contrast, and gamma settings. I calibrate my projector bi-annually to maintain optimal image quality, as recommended by industry experts. Additionally, for long-term reliability, employing a dedicated surge protector prevents damage from power fluctuations—a surprisingly common issue that can shorten your projector’s lifespan. In the future, I anticipate more intelligent diagnostic tools integrated directly into projectors that monitor components and suggest maintenance tasks automatically, minimizing manual efforts.
Why is routine maintenance critical for long-term performance?
Over time, dust accumulation, lens degradation, and firmware aging can cause image quality to decline. By systematically cleaning lenses, updating firmware, and calibrating settings periodically, you ensure your projector consistently produces crisp, vibrant images. It also prevents costly repairs and preserves your investment—think of it as the routine oil change for your car. For more detailed guidance and product recommendations, check out our guide on discovering the best projectors for 2025.
What does the future hold for projector maintenance?
Advances in AI and IoT are paving the way for smart projectors that self-diagnose and alert owners about needed maintenance. For instance, a future trend might include projectors that automatically adjust internal fans or report lens cleaning needs via smartphone notifications. As these technologies develop, staying ahead with manual tools like compressed air and calibration discs will still be valuable. Take this opportunity today—try using a calibration disc or inspecting your projector’s vents to see immediate improvements in your viewing experience.
Regular, precise maintenance isn’t just about preserving image quality; it enhances durability and extends the lifespan of your device. Keep your setup running smoothly by adopting these practical tools and routines. If you’re curious about securing reliable, long-lasting performance, reach out through our contact page for personalized advice.
The Hidden Gems I Discovered About Ultra Short Throw Projectors That Changed Everything
One of the most eye-opening lessons I learned was how seemingly minor adjustments can make a massive difference in picture quality. For instance, a slight tilt or a few inches of repositioning transformed my dull images into vibrant, cinema-like visuals. It reminded me that patience and meticulous setup often outweigh investing in more expensive gear. Additionally, I realized that trusting my senses—like inspecting color vibrancy and contrast—was far more effective than solely relying on settings labels or marketing specs.
Another revelation was the importance of environmental factors I previously overlooked. Ambient light, wall color, and screen surfaces play pivotal roles in image perception. Installing blackout curtains, using specialized screens, and controlling ambient lighting surprisingly doubled the perceived brightness and color accuracy. These lessons underscored that achieving top-tier visuals often involves holistic tweaks, blending hardware adjustments with environmental management.
Finally, I came to understand that ongoing maintenance and calibration are crucial. Regular firmware updates, lens cleaning, and recalibration keep the projector performing at its peak. It’s not a one-and-done setup but a continuous process that sustains quality over time. Embracing these insights, I now enjoy a home theater experience that surpasses many commercial cinemas, all without the need for frequent replacements or costly upgrades.
My Go-To Tools and Resources for Perfecting Projector Setup
Over the years, I’ve curated a set of trusted tools that simplify and enhance my projector tuning process. The Spears & Munsil HD Benchmark disc consistently helps me fine-tune contrast, gamma, and color accuracy—an essential for professional-grade calibration. I highly recommend it for anyone serious about picture quality. To keep up with firmware improvements and technical advice, I follow the official manufacturer websites and expert blogs like HomeCinemaEssentials, which regularly provide actionable updates tailored for 2026 models.
For extra clarity and convenient adjustments, I rely on a high-quality calibration screen, which truly maximizes contrast and color fidelity—especially in rooms with ambient light challenges. Finally, a reliable HDMI cable, certified for 4K HDR signals, ensures that my source devices deliver pristine images without interference or color bleed. Combining these tools, I’ve built a setup that’s both resilient and capable of delivering breathtaking visuals every movie night.
Your Next Step Boldly Forward
Now is the perfect moment to take charge of your ultra short throw or laser projector experience. By applying these personal lessons and leveraging the right tools, you’re well on your way to transforming your home entertainment into a stunning, immersive environment. Remember, the journey to a perfect picture isn’t about instant perfection—it’s about ongoing curiosity, patience, and readiness to experiment. Your home theater can become a source of endless joy and awe, especially when you embrace these proven practices. Curious to explore more advanced techniques or troubleshoot persistent issues? Visit our dedicated guides for comprehensive insights, like the latest on [discovering the best home theater projectors for 2025](https://projectors.homecinemaessentials.com/discover-the-best-home-theater-projectors-for-2025), or reach out for expert advice through our contact page. Keep pushing the boundaries of your perfect viewing space, and don’t hesitate to share your progress or questions below—your experience might inspire others to elevate their home theater journey too.