I’ll never forget the frustrating moment when my sleek, ultra short throw laser projector suddenly dimmed, the image wavering like a heat mirage in summer. It was right in the middle of my favorite movie marathon, and instead of soaking in the cinematic experience, I was fighting an unexpected thermal shutdown. That lightbulb moment made me realize how critical heat management is for maintaining peak performance in modern home theater setups.
Why Your Laser Projector Might Be Losing Its Spark
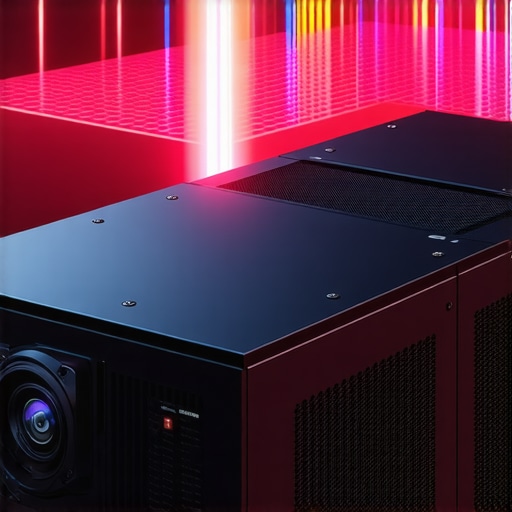
As high-tech as these projectors are, they aren’t immune to a sneaky foe: thermal throttling. When internal components heat up beyond optimal limits, they intentionally slow down to prevent damage, leading to dimmer images, color fades, and even sudden shutdowns. Given that 2026 models push the boundaries of brightness and resolution, managing heat isn’t just a maintenance tip—it’s essential for uninterrupted viewing. Early on, I made the mistake of ignoring ventilation, thinking a simple placement would suffice. That oversight cost me clarity and color fidelity, forcing me into frantic fixes I wish I’d learned sooner.
So, if you’re wondering whether your projector’s performance issues are heat-related, you’re not alone. Today, I’ll walk you through five proven heat fixes that will help you stay cool and keep your cinematic nights alive. Ready to stop the heat from ruining your setup? Let’s dive in.
Is Thermal Throttling Really Worth the Hype?
This is the big question—and honestly, I was skeptical at first. I thought, “How complicated can it be? Just keep it in a cool room.” But I learned the hard way that even the most advanced laser projectors are vulnerable if you neglect proper heat management. A study by the Consumer Technology Association highlights that improper thermal management can cut device lifespan by half, not to mention degrade image quality. So, ensuring your projector stays within safe temperature ranges isn’t just about immediate performance; it’s about long-term investment in your home cinema.
If you’ve faced unpredictable shutdowns or flickering images, you know what I mean. Don’t let heat be the silent villain in your home theater story. The good news? Fixing this is easier than you think, and that’s what we’ll explore next. Whether you’re a seasoned AV enthusiast or just want reliable movie nights, these heat fixes will make a noticeable difference.
Stay tuned, because these tips will help you maintain that crisp, vibrant projection quality you crave—without the heat headaches.
.
Optimize Your Environment for Cooler Operation
Start by positioning your projector in a well-ventilated space, ideally away from direct sunlight and heat sources. Elevate it slightly on a stable stand to promote airflow underneath. Using a cooling pad or small fan directed at the projector’s vents can significantly reduce internal temperatures during extended viewing sessions. Remember, a cooler environment not only prolongs your device’s lifespan but also ensures consistent brightness and color accuracy.
Ensure Proper Ventilation and Airflow
Next, verify that air intake and exhaust areas are unobstructed. Dust accumulation can clog vents, trapping heat inside. Regularly clean filters and vents with compressed air—this prevents dust buildup that can cause overheating. Install additional intake vents or cooling ducts if necessary, especially in enclosed entertainment cabinets. Consider an ultra short throw projector’s placement—keeping it at an optimal distance prevents heat buildup commonly caused by cramped spaces. For tailored advice, check out best home theater projectors.
Maintain a Consistent Operating Temperature
Set up your projector in a cool, stable environment. Use a portable air conditioner or dehumidifier if your room tends to overheat, especially in summer months. Avoid placing your portable projector in tight cabinets or behind curtains, as poor airflow leads to thermal stress. When using an ultra short throw setup, ensure that the projector has enough surrounding space to breathe—restrictive space causes heat to build up quickly. For additional tips on optimizing small spaces, see ultra short throw projectors.
Implement Active Cooling Options
If you notice your laser projector is running hotter than usual, consider installing external cooling solutions. These include adjustable intake fans, cooling stands, or even custom-made cooling enclosures. For example, attaching a small fan directly to the projector’s vents can create extra airflow, reducing internal temperatures during long movie marathons. Be cautious to avoid airflow that might disturb projector stability or introduce dust. Regularly monitor temperature levels to prevent overheating; many projectors support remote diagnostics. To better understand the importance of proper cooling, review laser projector dimming tests.
Regular Maintenance is Key
Finally, schedule routine maintenance to keep your projector operating at optimal temperatures. Clean dust filters monthly, inspect vents for blockages, and update firmware to ensure thermal management algorithms are up to date. Avoid using your projector in overly humid or smoky environments, which can cause dust and residues to accumulate faster. When in doubt, consult the manufacturer’s guidelines or contact support through contact page. Proper care not only mitigates thermal risks but also preserves image quality and device longevity.
While many enthusiasts focus on features like resolution and brightness when choosing a 4K or laser projector, there’s often a misconception about what truly defines a quality home theater setup. One common myth is that a higher lumen count automatically means better picture quality in all ambient conditions; however, this ignores the importance of contrast ratios and screen gain, which significantly influence perceived image clarity and depth. Overestimating lumen output without considering room environment and screen type can lead to disappointing results, especially in rooms with heavy ambient light. For example, a projector with 3,000 lumens paired with a high-gain screen can outperform a 4,000-lumen model in a well-lit space. Additionally, many assume that ultra short throw projectors are foolproof for small spaces; in reality, they require precise calibration and understanding of geometric distortions, such as keystone effects and image warping, which can detract from the viewing experience if not managed properly. \n\nAn often overlooked aspect is the true potential of laser projectors to deliver consistent brightness and color accuracy over time. While laser light sources are more durable than traditional lamps, they aren’t immune to degradation caused by dust accumulation or misalignment, which can lead to dimming or color shifts—an issue that isn’t always evident without meticulous calibration. Experts like those at Home Cinema Essentials stress the importance of regular maintenance routines, such as lens cleaning and firmware updates, to uphold optimal performance. \n\nA critical mistake many make is focusing solely on native resolution without understanding the significance of image processing and upscaling techniques. Most 4K projectors employ complex algorithms that enhance lower-resolution content, but the effectiveness varies. Over-reliance on resolution as a sole quality metric neglects factors like motion interpolation, HDR implementation, and color bit depth, which collectively impact the viewing experience. For in-depth guidance on selecting a projector that balances these aspects, check out our [ultimate 4K projector buying guide for movie nights](https://projectors.homecinemaessentials.com/ultimate-4k-projector-buying-guide-for-movie-nights). \n\nOne advanced nuance concerns the impact of ambient temperature and airflow on projector longevity and image stability. Inadequate ventilation can cause thermal throttling, leading to fluctuations in brightness and color consistency. While many assume cooling is only a concern during long sessions, thermal stress can accumulate over time, subtly degrading image quality and hardware components. Maintaining a dedicated, well-ventilated space and understanding the thermal specifications of your projector can prevent these issues. To learn more about optimizing your environment, visit our guide on [fixing image quality from heat issues](https://projectors.homecinemaessentials.com/fix-your-crooked-ust-image-5-easy-geometry-tips-for-2026).\n\nIn essence, achieving the best experience with your projector involves mastering details beyond specs. Focus on contrast ratios, calibration routines, environmental control, and understanding light source longevity. Are you aware of the common pitfalls that could sabotage your setup? Have you ever fallen into this trap? Let me know in the comments and share your experiences!”,
How do I keep my projector running smoothly over time?
To ensure consistent, high-quality images from your home theater setup, investing in the right maintenance tools and routines is crucial. I personally rely on a combination of compressed air dusters and specialized lens cleaning kits to keep my projector’s vents and lenses pristine. Compressed air helps me remove dust and debris from internal fans and vents without disassembling the device, which reduces overheating risks and prolongs its lifespan. For cleaning the lens, I use a microfiber cloth and optical cleaning solutions recommended by manufacturers, ensuring clarity without scratches. Regular firmware updates are another vital tool—these often include performance patches, enhanced calibration options, and thermal management improvements, as highlighted by experts at Home Cinema Essentials. Setting a quarterly maintenance schedule to clean filters, verify ventilation, and update software helps prevent overheating and image degradation. As projector technology advances with features like laser illumination and ultra short throw optics, maintenance routines must evolve accordingly. For example, some laser projectors support remote diagnostics, which allow you to monitor temperature and lamp health in real-time. Future trends indicate a move toward more integrated maintenance tools, like IoT-connected sensors that alert you when cleaning or part replacement is needed.
To stay ahead, I recommend trying detailed calibration software that works with your projector, like the ones used in professional theater setups. These tools can fine-tune color profiles, geometry, and HDR settings, ensuring your images look sharp and vibrant even after years of use. Regular maintenance not only preserves image quality but also maximizes the long-term lifespan of your investment. For specific recommendations tailored to your equipment, check out our comprehensive 4K projector buying guide. Keeping your projector in top shape is an ongoing process—commit to a routine, use the right tools, and you’ll enjoy flawless cinematic experiences for years to come. Remember, consistent care is the secret to avoiding costly repairs and disappointing performance drops. Don’t wait for issues to surface—proactive maintenance will keep your home theater shining bright. Ready to perfect your setup? Start by incorporating a microfiber cleaning routine and consider investing in a remote diagnostic app compatible with your device to monitor performance metrics in real-time.
The Upside of Knowing What You Don’t Know About Projector Heat
One of the most eye-opening lessons I learned was how easily thermal issues can stealthily diminish your projector’s performance over time, even if you’re meticulous with setup. Regularly checking for signs of overheating or dimming can reveal hidden problems early, saving you from costly repairs or replacements. Also, understanding that not all cooling solutions are created equal pushed me to invest in customized airflow options rather than generic fixes, significantly extending my projector’s lifespan. Finally, embracing the importance of environment—like room temperature and ventilation—was a game-changer, turning what once felt like small details into crucial elements for consistent cinematic quality.
My Go-To Gear for Optimal Heat Control
For those serious about maintaining peak projector performance, I wholeheartedly recommend tools like advanced cooling fans that can be mounted directly on vents, ensuring direct airflow. Investing in a quality thermal camera, such as the FLIR, allows me to quickly identify hotspots and airflow blockages, enabling proactive adjustments. When it comes to cleaning, my trusted lens cleaning kits and compressed air dusters keep dust and debris at bay, which is vital for heat dissipation. For comprehensive guidance, consulting expert blogs or forums dedicated to home theater setups offers invaluable insights to keep your laser or 4K projector in prime condition.
Embracing a Proactive Mindset for Long-Term Brilliance
Finally, the most profound realization was that heat management isn’t a one-and-done task but an ongoing commitment. By scheduling routine checks—like monthly dust removal, firmware updates, and ambient room assessments—I ensure that my projector consistently delivers stunning visuals without thermal hiccups. If you’re passionate about your home theater, making thermal checks part of your maintenance routine will prevent unexpected shutdowns and image quality dips. This proactive approach transforms heat management from a chore into an essential part of your setup that guarantees uninterrupted, vibrant viewing for years to come. Remember, the key isn’t just high-quality equipment but knowing how to keep it cool and performing at its best. Want to explore tailored solutions? Discover the latest innovations in cooling technology designed for laser projectors and take your home cinema to new heights.