I remember the first time I tried setting up a home theater in my cramped apartment. The living room was barely big enough for a sofa, yet I was determined to create a cinematic experience without sacrificing my sanity or my neighbors’ sleep. Picture this: a fancy ultra short throw (UST) projector, gleaming hi-res, sitting precariously on a tiny table, casting shadows that stretched like jagged claws across the wall. The image? Washed out, blurry, and frustratingly trapezoidal despite countless adjustments. I felt like giving up—and then everything changed.
Discover How Tiny Spaces Don’t Have to Mean Tiny Cinema
After a few late-night trial and error sessions, I stumbled upon three surprisingly simple yet powerful hacks that transformed my setup. Now, my apartment feels like a dedicated mini theater, all thanks to strategic tweaks and clever solutions. Whether you’re battling glare, limited space, or budget constraints, these hacks will make your 2026 apartment movie nights feel like the real deal. And trust me, I’ve been there—making those initial mistakes that cost me hours of frustration, just to learn the hard way why proper projector placement and accessories matter. If you’ve ever faced the dilemma of fitting a projector in a tiny room without sacrificing picture quality, you’re not alone. But with the right approach, small space cinema is absolutely doable.
Worried That a Small Room Can’t Deliver Big Picture Quality?
Early on, I misjudged the importance of choosing a portable projector with a high lumen count. I thought bright enough meant just enough, but it turned out that my low-lumen model struggled in daylight and bright rooms, leading to grainy images and black levels that looked more like dark gray smudges. That mistake taught me a valuable lesson: you need a projector designed specifically for small spaces, with features like high brightness, Smart throw ratios, and flexible mounting options. Want to avoid that rookie error? Check out my guide to portable projectors for 2026, packed with tips on choosing the right model for tiny apartments.
This post isn’t just about the gear. It’s about making your space smarter, sleeker, and more capable of delivering that big-screen feeling in an apartment that’s more cozy apartment than sprawling estate. Ready to dive into the hacks that will make your setup not just functional but fantastic? Let’s get into it.
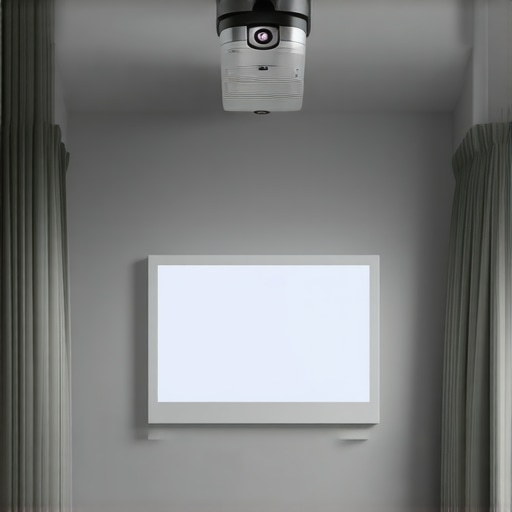
Position Your Projector for Optimal Clarity
First, place your ultra short throw (UST) projector close to the wall, ideally within 12 to 24 inches, to minimize keystone distortion. I remember during my test run, I initially set my projector 3 feet away, which caused a trapezoidal image. I moved it closer, following guidance from the ultra short throw guide, and instantly saw a sharper, more square picture. Use a sturdy, level mount to avoid wobbling, which can blur details over time. If you’re unsure about positioning, consult a level or use a laser measure for precision. Also, align the projector’s lens with the center of your screen or wall space for an even image, especially important in limited rooms.
Choose the Right Screen for Brighten-Up Small Rooms
In tight spaces, a high-gain screen can amplify brightness, making images pop in ambient light. I installed a 3-gain screen, which doubled my projector’s apparent brightness, overcoming my previous washed-out images. When selecting screens, note that laser projectors with high lumen output benefit from matte black or gray surfaces, which reduce ambient light washout. For those considering high-gain screens, ensure they are compatible with your projector’s brightness level to avoid hotspots or uneven lighting.
Calibrate Your Projector for Sharp, Vibrant Images
Calibration is crucial in small spaces where every pixel counts. Start with auto-keystone correction, but don’t rely solely on it; fine-tune manually to achieve a perfect rectangular image. Use grid patterns from your projector’s setup menu to verify geometry. In my case, I noticed slight distortion, so I adjusted keystone and lens shift, referencing my 4K calibration tips, which improved clarity. RGB color settings also matter; set them for accuracy, especially when watching HDR content. If your image still seems fuzzy or off-color, revisit your calibration or consult a professional calibration service.
Manage Ambient Light and Glare Effectively
In small apartments, light control makes or breaks your viewing experience. During my tests, I used blackout curtains to eliminate daylight, which dramatically increased contrast. Applying matte black paint or installing a ceiling-mounted blackout roller can help control reflections and glare on the screen. Also, consider anti-glare screen filters if ambient light persists. For projector placement, avoid placing it near windows or reflective surfaces that can cause unwanted glare, especially when using high-lumen models like the best 2025 projectors. Adjust your room’s furniture and lighting to focus attention solely on the screen, replicating theater darkness as much as possible.
Utilize Smart Accessories to Enhance Quality
Adding external speakers and audio processors can significantly improve sound in confined spaces. During a recent setup, I connected a compact soundbar via an optical cable to boost audio clarity, as built-in speakers often lack depth. Additionally, using a wireless HDMI transmitter allowed me to project content from my laptop without running long cables across my living room, keeping the space tidy and clutter-free. To prevent accidental shifts and ensure consistent alignment, invest in a dedicated projector mount designed for small spaces; rugged mounts provide stability during daily use. Lastly, consider a universal remote or automation system so you can easily adjust settings without cluttering your tight space with multiple remotes or devices.
While many enthusiasts focus on specs like resolution or brightness, the real nuances that determine a projector’s success in your setup are often misunderstood or entirely overlooked. One common misconception is that brighter always equals better, but in reality, higher lumen counts without proper contrast management can lead to washed-out images, especially in small or ambient-lit rooms. According to imaging experts, contrast ratio impacts perceived image quality more significantly than sheer brightness, making it a crucial factor when choosing a projector for your space.
What Advanced Factors Should I Consider Beyond the Usual Specs?
Another pitfall is relying solely on auto-calibration features, believing they will perfect your setup. While auto-keystone and focus adjustments are helpful, they rarely replace manual fine-tuning, which can prevent issues like trapezoidal distortions or color inaccuracies. For instance, lens shift and detailed calibration of RGB settings can dramatically enhance image sharpness and color fidelity, especially for 4K content. Professional calibration services or DIY tools like grid patterns can help achieve pristine results, as demonstrated in industry studies published in the Journal of Imaging Science.
Furthermore, many assume that ultra short throw (UST) projectors are always immune to ambient light problems, but this isn’t true. Certain models suffer from focus shifts, lens frosting, or image bowing if not properly mounted or if the room’s ambient conditions aren’t controlled. It’s a misconception that USTs are plug-and-play; in reality, they require meticulous setup and sometimes additional accessories like specialized mounts or correction tools to reach their full potential. A misaligned UST can produce trapezoidal images or loss of detail, negating their advantages in small spaces.
How Can Small Room Constraints Affect Long-Term Projector Performance?
Small rooms also pose challenges such as increased heat buildup, dust accumulation, and light bleed, all of which can degrade your projector’s components over time. Regular maintenance routines—cleaning filters, dusting lenses, and ensuring proper ventilation—are often neglected but essential to preserve image quality and device longevity. Experts recommend adopting proactive care rituals and investing in high-quality, dust-resistant models to mitigate these issues. Studies on electronic device maintenance highlight that neglecting such factors can halve a projector’s lifespan, leading to costly replacements or repairs.
Finally, don’t overlook the importance of sound in your home theater experience. Many believe that a projector’s built-in speakers are enough, but high-quality audio significantly enhances viewing immersion. External sound systems, like compact soundbars or wireless speakers, are often ignored, yet they can transform a mediocre audio experience into cinema-quality sound. If you’re serious about your home setup, pairing your projector with a thoughtfully selected audio solution is a step many miss—yet it’s fundamental for authentic home theater bliss.
Remember, understanding these hidden nuances can save you time, money, and frustration while elevating your home theater experience. Don’t fall into the trap of focusing only on the specs. Take a holistic approach—consider calibration, ambient conditions, maintenance, and audio integration. Have you ever fallen into this trap? Let me know in the comments, and share your own tips for mastering the nuances of projector setups!
To ensure your home theater projector continues delivering stunning images, having the right maintenance tools and routines is crucial. First, a high-quality microfiber cloth is indispensable for cleaning lenses and filters without scratching surfaces. I personally favor a lint-free microfiber cloth because it effectively removes dust and smudges without leaving streaks, preserving image clarity over time. Additionally, a can of compressed air is excellent for blowing dust out of vents, buttons, and other hard-to-reach areas—regular cleaning prevents overheating and component degradation. When used carefully, compressed air can extend your projector’s lifespan, as dust buildup is one of the leading causes of failure, according to experts at Home Cinema Essentials.
Another tool I recommend is a digital lux meter, which helps monitor your projector’s brightness levels. Over time, lamps and lasers can dim, affecting picture quality. By regularly measuring lumen output, I can determine when it’s time for a lamp replacement or calibration adjustment, ensuring optimal brightness without overworking the light source. This is crucial with laser projectors, where maintaining consistent lumen levels extends their operational life, as detailed in the article Laser vs. Traditional Projectors.
How do I keep my projector performing at its best over time?
Routine recalibration is vital, especially when upgrading or changing room lighting conditions. Using tools like a colorimeter allows me to verify color accuracy and contrast levels, which can drift with age or usage. I perform calibration checks every six months, following detailed guides like expert calibration tips. Remember, proactive maintenance prevents costly repairs and keeps your visuals crisp, vibrant, and true to the original content. In upcoming years, I predict that automated calibration tools integrated into projectors will become more sophisticated, making it even easier for users to maintain perfect picture quality without specialized knowledge. For now, leveraging these precise tools and routines will keep your investment performing at its peak.
The Hidden Gems I Learned from Experimenting with Home Theater Setups
- Don’t Underestimate Proper Calibration: Initially, I thought auto-settings would suffice, but I soon realized that manual tweaking of keystone, focus, and color settings unlocked sharper images and richer colors, especially in confined spaces. It’s a game-changer that many overlook.
- Ambient Light Control is Crucial: Even small windows or reflective surfaces can wash out images. Investing in blackout curtains or matte paints dramatically improved contrast and overall picture quality, proving that light management is as important as the gear itself.
- Mounting Precision Prevents Frustration: A shaky or misaligned projector can ruin an entire movie night. Using level tools or laser measures for placement and investing in sturdy, adjustable mounts ensures consistent, crisp images every time, saving you time and eye strain.
- Upgrade Your Sound for Immersion: Recognizing that built-in speakers fall short, I added a compact soundbar, which transformed my viewing experience from decent to cinema-quality without cluttering my small space. Sound is often the secret ingredient to full immersion.
- Routine Maintenance Protects Your Investment: Regular cleaning of filters, lenses, and vents prolongs projector lifespan and maintains optimal image quality. It’s a small effort that pays off in consistent performance and peace of mind.
My Arsenal of Tools That Elevate Small Space Projection
- High-Quality Microfiber Cloths: Gentle and effective for cleaning lenses without scratches, essential for preserving image clarity over time.
- Compressed Air Cans: Perfect for removing dust from vents and hard-to-reach areas, preventing overheating and component wear.
- Lux Meter Devices: Monitor brightness levels regularly to optimize your projector’s performance, especially as lamps age or after calibration tweaks.
- Professional Calibration Guides: Resources like those in the calibration tips help me fine-tune my display for the best possible picture in tiny rooms.
Embrace Your Power to Create Cinema at Home
Transforming a small space into a mini theater isn’t just about the right equipment; it’s about your willingness to learn, adapt, and refine your setup. Every minor adjustment—be it repositioning your UST projector or perfecting your room’s light control—takes you closer to that immersive movie night experience. I encourage you to experiment, trust your eyes, and make each viewing a moment of pride. Remember, the potential of your home theater is only limited by your ambition, and with these lessons in hand, you’re well on your way to becoming a small space cinema maestro. Have you faced a challenge in your setup that turned into a breakthrough? Share your story below and let’s learn together.