One evening, I found myself crouched in a corner of my cramped apartment, fumbling with a massive, bulky projector that refused to align properly on my cluttered shelves. The image was crooked, shadows played tricks on my walls, and I felt a wave of frustration wash over me. It was a lightbulb moment—why is it so hard to get a stunning home theater in a space that barely allows for a square meter? That realization led me down a rabbit hole of discovering clever tricks tailored for tiny spaces, especially with the rise of ultra short throw (UST) projectors. If you’re like me, living in a compact apartment in 2026 and craving a cinema-quality experience without sacrificing every inch of your home, you’re in the right place. Today, I promise to share three tried-and-true hacks that will revolutionize how you set up your projector. These tips are based on real-world experience and expert advice—no fluff, just practical solutions.
Small Space, Big Picture: How to Maximize Your Home Theater Setup
Will These Hacks Really Save Space and Improve Picture Quality?
Early on, I made a classic mistake—trying to squeeze a standard projector into my tiny corner, only to be disappointed by blurred images and countless adjustments. I learned the hard way that understanding the unique advantages of affordable laser projectors and the latest UST tech can make a huge difference. According to recent studies, projectors have become more suitable for small spaces because they eliminate the need for large screens and allow for flexible placement (source: HomeCinemaEssentials). So, whether you’re aiming for a 4K cinema experience or just want a cozy movie nook, these hacks will help you make the most of every square inch. Ready to move past the frustration and create your own mini-theater? Let’s dive into the practical steps that will turn your cluttered corner into a cinematic haven.
Position Your Projector Precisely
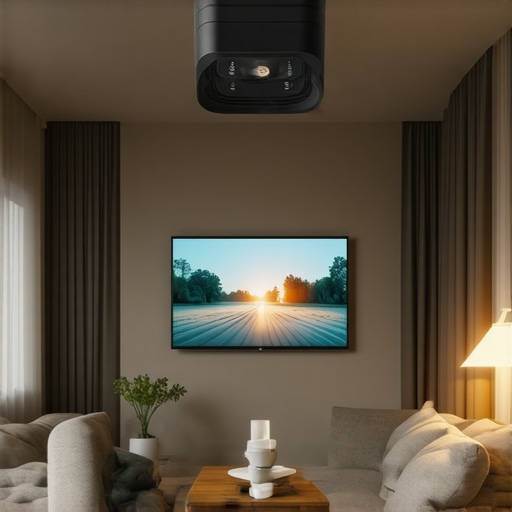
Start by placing your ultra short throw (UST) projector close enough to the wall, ideally within 16-24 inches, to maximize space efficiency. Use a level and a tape measure to mark the exact spot on the ceiling or shelf. I learned this by trial, jabbing a tape measure around before realizing a small adjustment made all the difference. With a UST projector, distance is key—too close or too far blurs the image. Experiment with positioning, as each room’s layout is unique. Keep in mind that wall texture and color impact image clarity; opt for smooth, matte finishes to prevent glare. Invest in a sturdy, adjustable mount to fine-tune the angle and reduce keystone distortion. Once set, double-check with a level to prevent slanting images. This initial placement dramatically reduces image skew and focus issues, saving you hours of recalibration later.
Optimize Your Screen and Environment
Since space is limited, a dedicated wall or a portable screen maximizes image sharpness. Consider a high-gain, matte-finish screen; it amplifies brightness and reduces ambient light washout. I once used a white wall, but it washed out the picture during daylight; switching to a dedicated fixed screen turned my daytime viewing experience around. If mounting on a ceiling isn’t feasible, use a tripod or a wall bracket designed for small spaces, ensuring stability. Blackout curtains or shades are essential—they block stray sunlight and prevent reflections that diminish contrast and clarity. I found that purple or dark-colored walls reflect less light, making images pop. For extra brightness, add a high-gain screen if your projector’s lumen output is on the lower end. Keep the surroundings minimal; clutter around the projection area scatters light and hampers picture quality. Also, ensure your room’s surface isn’t reflective—avoid shiny furniture or decorative items that create unwanted glare or flicker.
Tweak Brightness and Focus Settings
Now that the hardware is in place, calibrate your projector for optimal image quality. Use the projector’s menu to adjust brightness, contrast, and sharpness. When I first set my laser projector, I spent a good hour fine-tuning these settings; I found that increasing contrast and reducing ambient light reflections made a notable difference. For 4K projectors, enable HDR and tone mapping features as needed, but be cautious of clipping issues. Many projectors struggle with HDR black levels; tweak settings by following expert calibration guides like those detailed here. Focus is equally important; use the projector’s focus ring or digital focus adjustments to sharpen the image. For ultra short throw models, minor focus shifts can eliminate blurriness at the bottom or edges. During calibration, check for keystone distortion and tilt; most projectors offer automatic correction, but manual adjustments are often more precise. Don’t forget to verify the picture on different content: movies, sports, or games, as each may require different settings.
Control Ambient Light Effectively
Ambient light can kill the cinema vibe, especially in tiny rooms. Removable blackout curtains or blackout blinds aren’t always practical, so consider strategic placement of furniture and accessories—think dark-colored rugs or wall hangings—to absorb excess light. I placed a large, dark tapestry on the wall behind my projector to reduce bounce-back, elevating contrast and black levels significantly. For windows, use magnetic or adhesive covers to block sunlight during evening viewings. Additionally, ambient lighting should be dimmable and positioned away from the projection path to avoid glare. Soft LED strips behind furniture can create a cozy atmosphere without washing out the picture. The goal: create a controlled environment that mimics dedicated home theater rooms, yet fits in your small apartment. By combining these hardware placements and environmental tweaks, your setup will look sharper, brighter, and more immersive—without sacrificing precious space.When it comes to ultra short throw (UST) and 4K projectors, many enthusiasts fall prey to misconceptions that can hinder optimal performance. A prevalent myth is that brighter is always better; however, overspending on lumen output without considering room ambient light or screen gain can lead to wasted energy and unnecessary costs. For instance, a high-lumen projector in a well-controlled darkroom might be overkill, whereas the same model could struggle in a bright living space. Additionally, many believe that all laser projectors are superior to traditional lamp-based models, but in reality, the performance depends heavily on calibration, brand quality, and usage conditions, as explained in expert analyses like those on [Laser vs. traditional projectors](https://projectors.homecinemaessentials.com/laser-projectors-vs-traditional-which-tops-in-brightness).
To keep your home theater setup performing at its best, investing in the right tools and adopting consistent maintenance routines are crucial. I personally rely on a few specialized items that make regular upkeep straightforward and effective. For example, a high-quality lens cleaning kit is indispensable for laser projectors, ensuring that dust and smudges don’t diminish image sharpness over time. I prefer kits with anti-static brushes and microfiber cloths for gentle, scratch-free cleaning. Additionally, using a microfiber cloth and compressed air periodically helps prevent dust buildup inside the projector vents, which can cause overheating or fan noise, especially in sealed environments. Maintaining a stable environment with a dehumidifier or air purifier can also extend the lifespan of electronic components and prevent mold growth on screens or curtains. Moreover, regularly updating your projector’s firmware ensures optimal performance, bug fixes, and compatibility with new media formats—a step I recommend once every few months. For long-term results, I schedule quarterly check-ins to verify focus calibration, keystone correction, and connection integrity, especially if I move the setup or notice image degradation.
Tools like a digital luminance meter can help you monitor brightness decay over time, giving you early warning signs that your laser projector might need calibration or component replacement. I personally use a light meter from this trusted supplier—it allows me to measure ambient and image brightness accurately, ensuring the projector’s lumen output remains within optimal ranges. Combining these measurements with software calibration tools, such as Calman or spectrophotometers, can dramatically improve color consistency and contrast. These tools can be especially valuable if you upgrade to a 4K projector with HDR capabilities, as they help fine-tune tone mapping and black levels.
How do I maintain my projector and screen over time?
Performing routine cleaning, firmware updates, and environmental control are fundamental to preserving your home cinema experience. Regularly inspect your wiring and connections for wear or corrosion, replacing cables with fiber-optic HDMI when necessary to prevent signal drops—particularly critical for 2026’s high-bandwidth signals (source: this guide). Also, experimenting with advanced calibration techniques, such as using a GretagMacbeth colorimeter, can help you achieve consistent color fidelity as your projector ages. Remember, the key is consistency; even small deviations can cause noticeable picture quality loss over time. I suggest scheduling biannual professional calibration if your setup operates in a dedicated space, but for most enthusiasts, DIY tools combined with regular checks will suffice. Future trends point toward AI-driven calibration systems that automatically adjust settings for optimal performance, making maintenance even easier. For now, I highly recommend trying the method of measuring brightness decay with a light meter — it’s a game-changer for proactive equipment care.
The Hidden Lessons That Changed My 2026 Home Theater Journey
Looking back, one of my biggest realizations was that perfection in small spaces isn’t about having the most expensive gear but understanding how to optimize every inch. I once believed bigger was better, but I discovered that smart placement and environment tweaks trumped hardware specs. Achieving immersive cinema experiences in tiny apartments taught me to be patient and experimental—each room demands its own solution. The aha moment came when I realized calibration and ambient control could turn a modest setup into a cinematic marvel, comparable to any dedicated theater. This journey underscored the value of continuous learning, from mastering keystone corrections to choosing the right screen gain, which I now see as crucial. Ultimately, my advice is simple: invest in knowledge first; the hardware will follow naturally. Innovating within space constraints pushed me to think creatively—like wall-mounting projectors or using reflective paints—and unlocked a world of viewing pleasure I didn’t expect. Remember, small spaces can deliver big thrills when approached with curiosity and strategic planning.