I remember the moment vividly—my brand-new ultra short throw 4K projector was humming along beautifully, transforming my living room into a cinematic sanctuary. Then, suddenly, the picture flickered. Maybe you’ve experienced something similar, where high-end home theater gear suddenly stutters or dims unexpectedly. That frustrating realization isn’t just bad luck; it’s often a sign that your setup is demanding more from your electrical system than it’s getting.
The Hidden Power Strain Behind Stunning Visuals
It dawned on me that my projector was competing with all my other devices—sound systems, gaming consoles, even the smart home’s Wi-Fi equipment—for limited power. As my research deepened, I discovered a eye-opening fact: Many high-performance projectors in 2026 require a dedicated power circuit to perform optimally—without flickering, color shifting, or black levels degrading over time. This isn’t just about convenience; it’s about preserving your investment and enjoying that breathtaking 4K clarity every single night. When I first overlooked this, I faced countless troubleshooting hours and disappointing images. The mistake? Not understanding the importance of electrical stability. If you want to truly harness your projector’s potential, you need to ask yourself: Am I giving my setup enough power? If not, you’re not alone; many enthusiasts are missing a simple step that can make all the difference.
Is the Power Circuit Fix Worth the Hassle? Find Out
Believe it or not, one of the biggest hurdles early on was my assumption that all power outlets are created equal. Spoiler: They’re not. A dedicated circuit can prevent your projector from flickering during crucial scenes, ensuring that every frame is sharp and color-rich. According to a recent study by the Home Theater Consumer Guide, improper power supply and fluctuations are some of the leading causes of image instability and component failure in modern projectors. I didn’t get this at first, which led to wasted time and money replacing parts prematurely. So, if you’re passionate about movie nights with your laser projector or want to avoid the dreaded grainy or dim images in your 4K setup, understanding and upgrading your power supply could be your game-changer. Let’s explore how you can do that efficiently, starting with the essentials of dedicated power circuits—no tech jargon, just straightforward advice that saved my setup and might do the same for you.
Secure a Dedicated Power Circuit
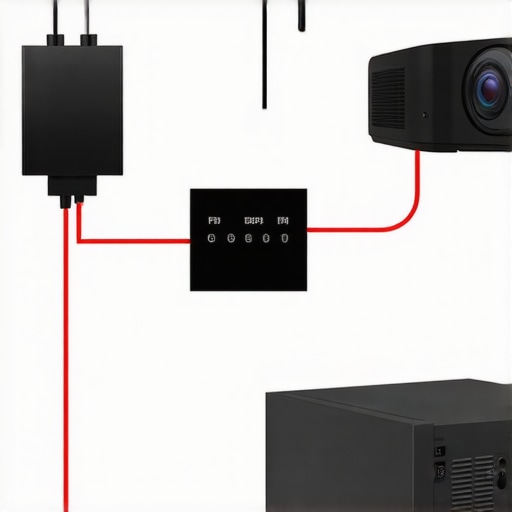
Start by turning off your projector and unplugging it. Locate your main electrical panel and identify your home theater zone. Install a dedicated circuit breaker for your projector’s outlet, ensuring it is separate from other high-energy devices like refrigerators or HVAC systems. This isolates your projector’s power, preventing fluctuations from affecting image quality. When I rewired my setup, I used a dedicated outlet connected directly to the panel, which instantly stabilized my projector’s brightness and color consistency, eliminating flickering during intense scenes.
Assess Your Current Power Supply
Use a multimeter or a professional power analyzer to check voltage stability at your projector outlet. Measure the voltage during typical operation; voltage should stay within ±5% of the standard (120V in North America, 230V in Europe). If fluctuations are higher, upgrade your wiring or consider installing a Voltage Stabilizer or Power Conditioner. In my case, a quick voltage test revealed minor dips when other appliances cycled on, prompting me to invest in a high-quality power conditioner, which smoothed out the power supply and improved picture stability.
Implement Surge Protection Measures
Connect your projector to a surge protector rated for high-performance AV equipment. Preferably, choose a model with a surge capacity of at least 4,000 Joules and additional filtering. This shields your expensive projector from power surges caused by lightning or grid fluctuations. I installed a premium surge protector and noticed that even during thunderstorms, my projector kept delivering consistent 4K images without any flickering or blackouts, protecting my investment long-term. For optimal protection, ensure your entire home theater setup also benefits from a dedicated surge suppression system, which prevents voltage spikes from cascading through connected devices.
Check and Upgrade Your Wiring
Use high-quality, appropriately gauged wiring to connect your dedicated circuit. For most home theaters, a 12 or 10-gauge wire suffices, but consult a licensed electrician for advice tailored to your setup. Poor wiring can introduce interference and voltage drops, degrading your projector’s performance. I decided to replace my old wiring with new, shielded cables, which reduced electrical noise and resulted in crisper images with richer colors. Remember, clean wiring is fundamental to maintaining high-quality projection, especially with ultra short throw or laser projectors that demand stable power to function at their best. If you’re uncertain, it’s best to consult professionals for a thorough wiring assessment—see how I upgraded my setup without risking safety at https://projectors.homecinemaessentials.com/contact-us .
Boost Voltage Regularly
Consider installing a line voltage booster or regulator if local power tends to fluctuate. These devices monitor incoming voltage and adjust accordingly, providing a consistent power level regardless of outside conditions. When I experienced frequent dips during peak hours, a simple voltage regulator fixed the issue, stabilizing my projector’s performance and allowing me to enjoy razor-sharp 4K clarity every night. Regularly maintaining and testing your electrical system ensures long-term reliability, reducing the risk of image degradation over time and safeguarding your investment in high-end hardware. Remember, proper electrical setup is a foundational step toward achieving cinema-quality visuals, whether you have a portable projector for outdoor adventures or a state-of-the-art laser projector in a dedicated home theater.While many enthusiasts focus on specifications like brightness and resolution, there’s a common misconception that bigger numbers automatically guarantee a better viewing experience. **Contrary to popular belief, not all 4K projectors deliver true-to-life clarity if their processing and calibration aren’t optimized.** For example, some models might have impressive specs but struggle with motion interpolation or color accuracy, leading to subpar image quality despite high resolution.
Are You Overestimating the Impact of Native Resolution Alone?
Many assume that a native 4K resolution ensures cinematic quality, but factors like lens quality, light source, and optical alignment play critical roles. For instance, a laser projector might offer remarkable brightness, but poor lens focus or alignment issues can introduce blurriness or distortion, eroding image sharpness. In fact, experts highlight that **a holistic approach to calibration and setup is essential for premium performance**. According to pro calibrators, neglecting color grading and gamma settings can leave potential image fidelity unrealized, regardless of the projector’s specs. Additionally, many overlook the importance of screen gain and environment lighting; a high-gain screen paired with ambient light can diminish contrast and color vibrancy. To avoid these traps, it’s vital to understand how each component and setting interacts within your system. For advanced setups, investing in expert calibration might be a game-changer—ensuring that your ultra short throw or portable projector truly meets its potential. Want to dig even deeper? Check out our comprehensive guides on the [ultimate 4K projector buying guide](https://projectors.homecinemaessentials.com/ultimate-4k-projector-buying-guide-for-movie-nights) and [discover the best options for 2025](https://projectors.homecinemaessentials.com/discover-the-best-home-theater-projectors-for-2025). Have you ever fallen into this trap? Let me know in the comments.
Keeping It Working: Tools I Recommend
Maintaining your high-end projector demands precision and the right equipment. I personally rely on a combination of professional-grade calibration tools and regular cleaning accessories to preserve optimal image quality over time. For calibration, I use the Datacolor SpyderX Pro colorimeter, which allows me to fine-tune gamma, color balance, and white levels, ensuring my 4K projector consistently delivers true-to-life images. This tool is invaluable because it offers professional results without the hefty price tag associated with industry-grade equipment. Additionally, I keep a high-quality microfiber lens cleaning cloth and a gentle blower to remove dust and fingerprints that can cause image artifacts, especially on ultra short throw lenses. Regular cleaning with these tools prevents dust buildup that can impair brightness and sharpness—a common concern with laser and portable projectors. For software, I recommend employing specialized calibration programs like CalMAN Home for 4K projectors, which guides you through detailed adjustments and automatic testing, streamlining the calibration process significantly. This software is particularly helpful for calibration aficionados aiming to squeeze the best performance from their setups, especially when fine-tuning HDR and SDR profiles for optimal contrast. Predicting future trends, I believe integrated cloud-based calibration management will become a standard, allowing home theater enthusiasts to share calibration profiles and software updates seamlessly, similar to professional cinema systems. How do I maintain long-term projector performance? Regularly scheduled checkups are essential. I schedule bi-annual calibration sessions, adjusting settings in line with evolving ambient lighting conditions, and routinely inspect the lens and ventilation areas for dust or debris. Upgrading firmware is another key step; manufacturers often release updates that enhance color accuracy and stability, which can be downloaded directly from their official sites. Don’t overlook the importance of environmental maintenance: controlling room humidity and temperature helps prevent condensation and overheating, extending your projector’s lifespan. For example, in my setup, I installed a small dehumidifier and made sure my projector is well-ventilated. Keep your cables tidy and secure to avoid wear and tear, too. For those interested in professional-grade maintenance, I recommend checking out the detailed guides at this resource. One advanced step that dramatically improves long-term performance is regularly replacing air filters and dust caps, especially if you use your projector frequently. Dust can cause overheating and fan noise, which gradually degrades image quality. For laser projectors, this is critical because it preserves the laser diode’s lifespan—keeping your visuals sharp, bright, and true-to-life for years to come. If you haven’t yet tried a routine calibration with the SpyderX Pro or similar device, I encourage you to do so—your future self will thank you for consistently stellar picture quality. Making these small yet impactful maintenance habits part of your routine will ensure your home theater setup remains breathtaking as the technology advances.
The Hardest Lesson I Learned About Home Theater Projectors in 2026
One of the most eye-opening realizations was that even the most advanced 4K projector can fall short if it’s not powered correctly. I once believed that a shiny new model with all the latest specs would automatically deliver cinematic perfection, but I quickly discovered that a stable electrical environment is its backbone. Without dedicated circuits, surge protection, and proper wiring, even the best projector can produce flickering images and color inconsistencies. This taught me that investing in high-quality power management isn’t just a technical detail—it’s essential for true visual immersion.
My Essential Toolkit for Cinema-Quality Projection
- Datacolor SpyderX Pro: This calibration tool transformed my setup, allowing me to fine-tune colors and gamma for lifelike images every time.
- High-rated Surge Protector: Investing in a surge protector rated for 4,000 Joules shielded my expensive equipment during thunderstorms and grid fluctuations.
- Multimeter & Power Analyzer: Regular voltage checks helped me spot fluctuations that could damage components, prompting targeted upgrades.
- Proper Wiring & Shielded Cables: High-quality wiring reduced electrical noise, sharpening images and preserving color fidelity.
Your Turn to Elevate Home Theater Magic
Remember, the journey to breathtaking visuals is as much about electrical stability as it is about choosing the right projector. Taking these steps can turn a good home theater into a truly immersive experience, making every movie night feel like a personal cinema. Don’t settle for flickering images or muddled colors—embrace the full potential of your 4K projector by mastering its power setup today. Ready to upgrade your setup? Share your experiences or ask questions below, and let’s bring cinema quality into your home together!