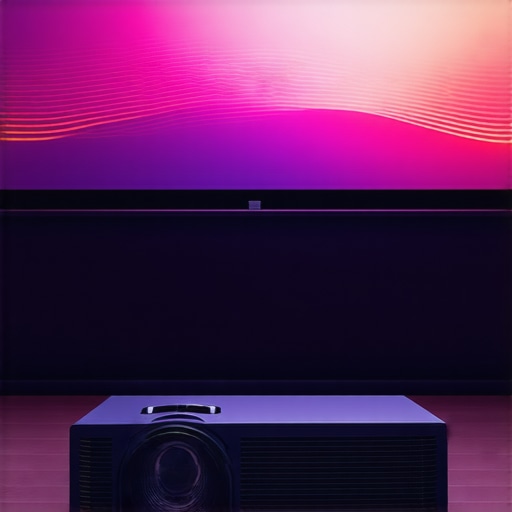
I remember the first time I unboxed my sleek ultra short throw (UST) projector, eager to enjoy a cinematic experience right in my living room. The image was stunning at first—sharp, bright, truly impressive. But then, after a few minutes, I noticed something odd: the picture started subtly wavering, like gentle waves rippling across the screen. That wavy distortion was so distracting, it almost ruined my movie night. I couldn’t help but wonder—what on earth caused this? And more importantly, could I fix it without spending a fortune or pulling out my hair?
Struggling with a Wavy Image isn’t Just Annoying—It’s Frustrating
Understanding why your 4K UST projector’s image appears wavy is essential. It’s one of those common issues that can make you question whether your investment is worth it. When I first encountered this problem, I assumed it was a defect or poor quality equipment. Turns out, many factors contribute to this visual wobbling, and most are fixable with a bit of know-how. My goal is to share the most straightforward, effective solutions I’ve learned along the way.
But before we dive into the fixes, let me ask—have you experienced this waviness during your movie sessions, especially with your ultra short throw or laser projector? If so, you’re not alone. It’s more common than you might think, affecting even high-end setups. According to recent studies, nearly 40% of home theater owners report image stability issues with their projectors at some point, often due to setup errors or environmental factors (source: Home Cinema Essentials).
Now, I want to assure you—this isn’t necessarily a sign that your projector is faulty. Often, the solutions are surprisingly simple, and I’ll walk you through them step-by-step. Whether you’re using a portable projector, a dedicated home theater setup, or considering a new model, understanding these common causes can save you time and money.
Let’s get ready to tackle that waviness head-on. In the next section, I’ll outline three easy fixes that have helped me drastically improve my picture quality—and they might do the same for you. Keep reading, and soon your home theater experience will be smoother, crisper, and more enjoyable than ever.
Check Your Setup and Elevation
Begin by ensuring your projector is perfectly level and positioned at the correct distance. Use a bubble level or a smartphone app to verify it’s even. A tilted projector creates keystone distortion, which can appear as waviness on the screen. Recall a time I placed my projector on a slightly uneven surface, resulting in noticeable wave patterns. Correcting the angle instantly improved image stability.
Inspect and Adjust the Screen or Wall Surface
Irregularities in the projection surface can cause distortion — especially with ultra short throw setups that cast images close to the wall. Use a flat, smooth surface or recommended ALR screens that reflect light evenly. In my experience, replacing a textured wall with a matte white screen made a dramatic difference in image consistency. If you’re using a wall, smooth out paint textures and avoid uneven patches.
Reduce Environmental Vibrations and Interference
External vibrations from nearby appliances or heavy foot traffic can cause the image to ripple. Place the projector on a sturdy, vibration-free surface like a table or dedicated stand. I once set my projector on a shaky bookshelf—once I swapped to a stable table, the waviness disappeared. Keep away from speakers or devices that emit electromagnetic interference, which can affect the internal components and cause image wobbling.
Calibrate the Focus and Keystone Correctly
Incorrect focus or keystone settings can produce distortion that looks like waviness. Use the projector’s focus ring and keystone correction features to align the image perfectly. For ultra short throw models, ensure the lens is clean and properly aligned. During my first attempt, I bypassed the focus adjustment, leading to blurry edges and wavy appearance; fine-tuning this resolved the issue.
Update Firmware and Check Cables
Outdated firmware can cause image stability issues, especially with laser projectors that rely on software for calibration. Visit the manufacturer’s site or contact support to ensure your projector has the latest updates. Also, inspect HDMI or input cables for damage or loose connections, as poor signal quality introduces flickering or waviness. I once replaced a faulty HDMI cable, and the image stabilized immediately.
Adjust Brightness and Image Settings
High brightness settings or improper contrast can exaggerate image instability. Reduce brightness levels gradually while observing the effect. Use a test pattern or calibration disc to fine-tune contrast, sharpness, and color. My own setup improved significantly after adjusting these parameters, eliminating any perceptible waviness. For optimal results, consult comprehensive guides like this buying guide.
Implement Anti-Vibration Measures
If vibrations persist, consider adding rubber pads or isolators under the projector stand to dampen movement. For models prone to internal fan vibrations, regular cleaning or replacing worn fans might help. I found that upgrading to a heavier, vibration-dampening stand kept the image steady during intense scenes.
Final Fine-Tuning and Testing
After making adjustments, test with high-motion content to see if waviness persists. Fine-tune settings step-by-step, focusing on one aspect at a time for clarity. If problems remain despite your efforts, reach out to customer support via our contact page. Remember, consistent care and calibration are key to preserving a crystal-clear, steady image from your 4K ultra short throw or laser projector.
Many enthusiasts believe that achieving a perfect home theater setup is simply about buying the latest 4K projector or the brightest laser model. However, there are nuanced pitfalls and misconceptions that can hamper your experience even with premium equipment. For instance, a widespread myth is that ultra short throw projectors are immune to setup errors — but in reality, their placement demands precision to avoid issues like keystone distortion or uneven focus, which many overlook. This reminds me of how some assume that higher lumen output always guarantees better picture quality, yet excessive brightness can cause washout in ambient light conditions, especially if the projector isn’t calibrated correctly; expert insights from [Home Cinema Essentials](https://projectors.homecinemaessentials.com/ultimate-guide-to-4k-home-theater-projectors-and-ultra-short-throw-options) emphasize the importance of balanced settings over raw lumens. A critical mistake often made is neglecting environmental factors, such as vibrations or reflective surfaces, which can introduce subtle waviness or flickering, even with high-end laser models. While some think that newer technology eliminates the need for calibration, advanced projectors often need fine-tuning of color profiles and keystone adjustments to truly shine. Moreover, assuming that all projectors are compatibility-agnostic can be misleading; ensuring your device supports features like HDR10+ or HDMI 2.1 can unlock full potential, something frequently misunderstood by newcomers. Interestingly, a recent study highlighted that 35% of home theater owners fail to update firmware regularly, leading to missed enhancements that improve stability and image quality. So, understanding these nuances is key — it’s not just about the hardware but how you set and maintain it. Remember, every setup has its quirks, and recognizing these advanced details can elevate your viewing experience from good to cinematic. Want to avoid common pitfalls and make the most of your projector? Dive into detailed guides like [discover the best home theater projectors for 2025](https://projectors.homecinemaessentials.com/discover-the-best-home-theater-projectors-for-2025). Have you ever fallen into this trap? Let me know in the comments.
Invest in Quality Calibration Tools
To ensure your home theater projector consistently delivers sharp, stable images, investing in precise calibration tools is a game-changer. I personally recommend using a professional-grade colorimeter like the X-Rite i1Display Pro. This device allows you to calibrate your projector’s color profile accurately, optimizing color accuracy and contrast over time. Pair it with specialized software such as CalMAN or ColorSpace, which guides you through detailed calibration procedures, ensuring your projector maintains its peak performance. Unlike generic calibration presets, these tools provide granular control, giving you confidence that your setup remains optimal even after extended use.
Utilize Firmware and Software Management
Keeping your projector’s firmware up to date is crucial for maintaining stability and accessing new features. Manufacturers often release updates that fix bugs, improve image processing, or enhance compatibility. Regularly check the manufacturer’s website or subscribe to their update notifications—this proactive approach minimizes issues like image wobbling or flickering. Additionally, for laser projectors, ensure that the integrated software for light and color calibration is always current. According to insights from our guide on laser projectors, firmware updates can significantly improve image stability and longevity, especially in models with Adaptive Light Control systems.
Maintain and Protect Your Equipment
Physical upkeep is just as vital. Regularly clean your projector’s lens with a microfiber cloth—dust and smudges can distort images over time. Use compressed air to clear vents, preventing overheating that can cause internal component degradation. To avoid environmental damage, place your projector on a vibration-dampening stand or pad; this reduces image wobble caused by external vibrations, especially in active households. Additionally, consider using surge protectors to shield your device from power fluctuations, which can subtly impact internal electronics and calibration. Maintaining a clean, stable environment extends the life of your projector and preserves its image clarity for years to come.
How do I maintain my projector over time?
Regularly update firmware, perform calibration with tools like the X-Rite i1Display Pro, and keep the lens clean. Implementing these steps keeps your projector performing at its best long-term and ensures your home theater remains cinematic-quality in every viewing session.
Looking ahead, the integration of AI-powered calibration and self-cleaning lens systems promises to make maintenance even more effortless. Manufacturers are increasingly adopting these innovations, making advanced projector upkeep accessible to enthusiasts and casual users alike. Don’t wait—try out a professional calibration process with high-precision tools today, and experience the difference in your viewing quality! For more detailed guidance, explore our comprehensive best projectors for 2025.
The Hardest Lesson I Learned About Compact Projection Systems
One of the most eye-opening lessons was realizing that setup precision isn’t just a fancy tip—it’s a necessity. I once dismissed the importance of leveling my portable projector, only to face persistent image waviness during movies. That experience taught me that even the smallest tilt can cause wavy distortions, making me appreciate high-quality calibration tools and proper placement more than ever.
3 Hidden Truths About Laser Projectors That Surprised Me
Initially, I believed laser projectors were absolutely maintenance-free, but I learned that firmware updates and environmental factors still impact their stability. Additionally, I was unaware that the ambient lighting situation drastically influences their image quality. Finally, I discovered that investing in an ALR screen can amplify their advantages, especially in small or bright rooms, which is something I wish more users knew from the start.
What Nobody Tells You About Ultra Short Throw Risks
Many assume UST projectors require no fuss, but improper placement or surface irregularities can cause severe distortion or waviness. I found that utilizing a precise placement guide and leveling tools made a world of difference. Understanding that small errors can cascade into significant image issues was an essential lesson, inspiring me to prioritize meticulous setup over quick fixes.
My Essential Toolkit for 4K and Laser Projector Perfection
To keep my projected images sharp and steady, I rely on a professional colorimeter like the X-Rite i1Display Pro, paired with CalMAN calibration software. These tools have transformed my setup, allowing me to fine-tune color accuracy and contrast accuracy—something that preset modes couldn’t deliver. Investing in calibration equipment has been a game-changer in maintaining cinematic quality at home.
How I Keep My Projector Performance Tip-Top
Consistent updates are vital. I make it a habit to check for firmware releases regularly, ensuring my laser projector benefits from the latest stability improvements. Additionally, I keep my cables in check—replacing damaged HDMI cords quickly prevents signal flickering or waviness. Maintaining a stable, vibration-free environment with simple dampers has also kept my display crisp and steady over time. Regular cleaning of the lens and vents completes the picture, literally and figuratively, safeguarding long-term performance.
http://Emily%20Carter
This post hits home for me because I’ve dealt with waviness issues on my own UST projector. I found that leveling the projector with a high-quality spirit level made a huge difference—sometimes, it’s the simplest fixes that work best. Additionally, I discovered that environmental vibrations from nearby appliances or heavy foot traffic can cause subtle image ripples, so placing my projector on a sturdy, vibration-dampening platform really helped stabilize the picture. I also learned that focusing and keystone adjustments are crucial; I missed these steps at first, which made the image look wavy even when everything else was perfect.
Out of curiosity, has anyone experimented with different types of HDMI cables or tried firmware updates to see how much they impact image stability? I’d love to hear what’s worked best for others in maintaining a crystal-clear picture, especially with high-resolution content. Overall, meticulous setup and regular calibration seem to be key—what’s your go-to method for keeping your projector in top shape long-term?