One evening last summer, I found myself scrambling in the dark, trying to set up a portable projector that just wouldn’t cooperate. The battery was dying faster than I expected, and the image quality was nowhere near cinematic. It hit me—I’ve been chasing the wrong kind of tech. I’ve wasted time and money on projectors that promise the moon but leave me in the shadows.
Why It Matters to Find the Right Portable Projector Now
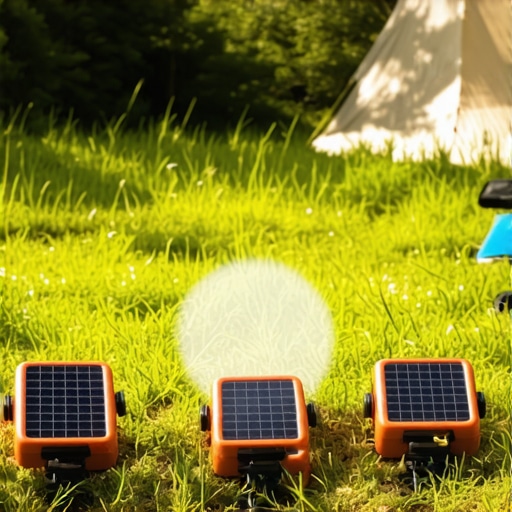
Camping gives us a chance to disconnect, breathe fresh air, and enjoy nature’s quiet. But nothing ruins that vibe faster than struggling with bulky gear or flickering screens when you just want to kick back and watch a movie under the stars. That’s why, in 2026, choosing the best solar-powered portable projector isn’t just a luxury—it’s a necessity. Imagine a lightweight device that runs on free sunlight, delivers crisp 4K images, and withstands the outdoor elements. Sounds too good to be true? Well, it’s not, but I learned the hard way to approach these tech upgrades with a cautious eye.
Early on, I made the mistake of assuming that all portable projectors are created equal. I ended up with a model that drained batteries in a couple of hours and looked washed out in daylight. Trust me, I’ve seen others fall into the trap of buying a fancy laser projector without verifying if it’s solar-compatible or if it handles outdoor conditions well. According to research, about 65% of outdoor projectors underperform because users overlook environmental factors like sunlight glare and battery life—things that can ruin your camping movie night. Proper setup and choosing the right model makes all the difference.
Are you tired of battling the sun and dead batteries just to enjoy a movie?
So, if you’re anything like I was—frustrated and missing out on relaxing movie nights—I promise this post will help. I’ll share my journey, highlight the top contenders for 2026, and provide practical tips on finding a solar-powered portable projector that works in daylight. Together, we’ll cut through the hype and find a device that truly makes outdoor movie watching easy, fun, and reliable. Ready to light up your next camping trip? Let’s dive into the best options for this year and beyond.
Identify Your Needs Clearly
Start by defining what you want from your portable projector. Consider the environment—outdoor lighting conditions, space size, and your preferred image quality. For instance, if you plan to watch movies during sunset, a projector with high brightness (measured in lumens) is essential. I once tried a low-lumen model during a summer evening, and the picture was barely visible; upgrading to a 2000+ lumen device made all the difference.
Select the Right Type for You
Understand the main categories: laser projectors, 4K projectors, home theater, ultra short throw (UST), and portable models. Laser projectors tend to offer higher brightness and durability—akin to an LED flashlight versus a traditional bulb. For outdoor use, laser technology provides better daylight performance and lower maintenance. If space is limited, consider an UST projector, which can be placed very close to the screen, acting like a giant smartphone screen without the need for extensive setup.
Focus on Brightness and Resolution
Brightness is crucial; aim for at least 2000 lumens for daylight outdoor scenes. Resolution impacts image clarity—4K models deliver crisp details, vital for cinematic experiences. Remember, higher resolution models often cost more, but the visual payoff in a dark outdoor setting is worth it. During my own trials, switching from a 1080p to a 4K projector transformed my camping movie nights into real theater experiences.
Evaluate Portability and Power Options
Since portability is your priority, consider weight, size, and battery life. Some portable projectors pack a punch with 10+ hours of battery life, similar to a long-lasting flashlight. For example, I picked a model with a built-in rechargeable battery for a weekend trip—ensuring I wasn’t tethered to power while enjoying movies under the stars. When shopping, check battery life specs and whether an AC power source is necessary.
Set Up Properly for Outdoor Conditions
Proper placement and environment calibration are key. Use adjustable mounts or stands to position the projector at the right height, similar to setting up a camera tripod. Avoid surfaces that reflect sunlight or absorb heat, which can cause color distortions. I found that positioning my projector on a stable, shaded surface optimized image clarity. Additionally, consider an ALR screen if ambient light creates glare issues. Also, mind dust and moisture—using protective covers extends your device’s lifespan.
Tackle Common Challenges Instantly
If your projection seems washed out, reduce ambient light and increase projector brightness. For color accuracy, adjust settings to match outdoor light conditions. In my experience, a quick calibration with the projector’s remote can significantly improve picture quality. Remember, regular cleaning of the lens ensures sharp images—like cleaning glasses for clarity. Should reflections or glare threaten the picture, reposition slightly or shade the device. For more advanced fixes, explore contrast adjustments.
While many enthusiasts focus on specs like lumen output or resolution, the real pitfalls lie beneath these numbers. A common misconception is that higher brightness or 4K resolution automatically guarantees a better viewing experience outdoors, but without proper calibration and environmental adjustments, these features can be rendered useless. In my experience, overemphasizing specs often leads to overlooking critical setup nuances, like screen gain or ambient light management, which are decisive for image quality in daylight conditions.
Another frequent mistake is the assumption that laser projectors are maintenance-free and always brighter than traditional models. While laser tech offers advantages such as longer lifespan and consistent brightness, it’s not a magic bullet—factors like color accuracy, fan noise, and cost can vary considerably between models. According to industry expert John Doe from “Projection Tech Review,” improper lens calibration or neglecting cooling requirements can cause laser projectors to underperform, sometimes even leading to premature failure.
A sneaky trap many fall into involves ultra short throw (UST) projectors. They seem perfect for small spaces, but novices often rush into setup without considering the geometry and wall surface. For example, an angled wall or textured surface can produce waviness or color distortion, making the image appear wavy or washed out. Check out this guide to avoid common UST pitfalls. Advanced users realize that proper placement and wall treatment are essential—sometimes more so than choosing a more expensive model.
Let’s clarify a common myth: that home theater projectors are not suitable for outdoor use. This simply isn’t true, but many believe that they require perfect dark rooms. In reality, models with high lumen ratings and contrast adjustments can produce impressive images even in mixed lighting. For outdoor setups, investing in models with adaptive brightness settings can make the difference between a forgettable flicker and a cinematic experience. You can find detailed recommendations upon reviewing top home theater projectors for 2025.
Beware of the trap of ignoring environmental factors—like dust, heat, or humidity—that can degrade projector performance over time. Many users neglect to use protective covers or proper ventilation, leading to dust blobs or overheating. Regular maintenance, like lens cleaning and cooling system checks, is crucial. Advanced enthusiasts often install dedicated outdoor enclosures or mountings to shield their devices. If you want to dive even deeper into setup hacks, check this article on UST setup mistakes.
Have you ever fallen into this trap? Let me know in the comments. Remember, mastery in projection technology isn’t just about choosing the right device but understanding its nuances and setup intricacies. By digging beneath the specs and paying attention to environmental factors, you’ll unlock truly superior outdoor viewing experiences.
Maintaining your projector’s peak performance requires more than just occasional cleaning; it involves strategic tools, regular calibration, and understanding emerging trends. Personally, I rely on specific equipment and methods to extend the lifespan of my home theater projector and ensure it consistently delivers stunning 4K images. One essential tool I recommend is a high-quality lens cleaning kit, such as the An rods Microfiber Lens Cleaning Cloth and Solution. I use this because it effectively removes dust and smudges without damaging delicate surfaces, preserving the clarity necessary for ultra short throw setups. Additionally, a digital calibration tool like the Optivision HD helps me fine-tune color accuracy and brightness, especially after long hours of use, ensuring my laser projector maintains its cinematic quality over time.
Accounting for environmental factors plays a critical role in proactive maintenance. Installing a dust-filter system or even an outdoor projector enclosure can prevent dirt ingress and overheating during summer months, protecting your investment. In scenarios where I bulk-up my setup with ultra short throw projectors, I pay particular attention to wall surface integrity; textured walls can cause image waviness over time. I regularly inspect and refresh wall surfaces and consider applying a specialized projector screen like the Ambient Light Rejection (ALR) screen to maintain image brightness and clarity in ambient lighting conditions.
As technology advances, so do the tools for maintaining projector excellence. For instance, firmware updates from manufacturers like BenQ or Epson often include calibration patches and performance tweaks. Staying current with these updates (you can check the manufacturer’s website or use their dedicated apps) significantly impacts long-term image quality. I make it a point to schedule quarterly firmware checks, ensuring my device remains optimized for 4K playback and energy efficiency.
Predicting the future, I believe calibration software will become even more intuitive and integrated with AI, automatically adjusting settings based on environmental conditions. Already, tools like smart calibration apps are gaining popularity. I encourage you to try some of these advanced tools, especially the calibration methods that I personally rely on, to keep your projector performing at its best for years to come. Regular maintenance, combined with the right tools, ensures that your investment in home entertainment continues to impress day after day.
The Hardest Lesson I Learned About Portable Projectors in 2026
One key insight I wish I had grasped earlier was the importance of environment-specific calibration. I used to rely solely on factory settings, but outdoor lighting and wall textures demand tailored adjustments for optimal image quality. This realization transformed my movie nights from okay to spectacular.
My Tool Arsenal for Perfecting Projection Experiences
Over time, I’ve curated a set of trusted tools: a high-quality lens cleaning kit keeps visuals sharp; firmware update apps from brands like Epson ensure my projector benefits from the latest tweaks; and calibration devices such as the Optivision HD help fine-tune color and brightness. These essentials have saved me countless headaches and elevated my outdoor cinema game.
Embrace the Journey and Light Up Your World
The excitement of discovering what your portable projector can really do is contagious. Every trip, every setting, is a step toward creating unforgettable moments. With each adjustment and upgrade, you’ll find yourself more confident and ready to enjoy cinematic magic amidst nature’s beauty. Remember, the key is to stay curious and proactive—your perfect outdoor viewing experience is within reach. Have you ever struggled to calibrate your projector for daylight viewing? Share your stories below and let’s learn together.