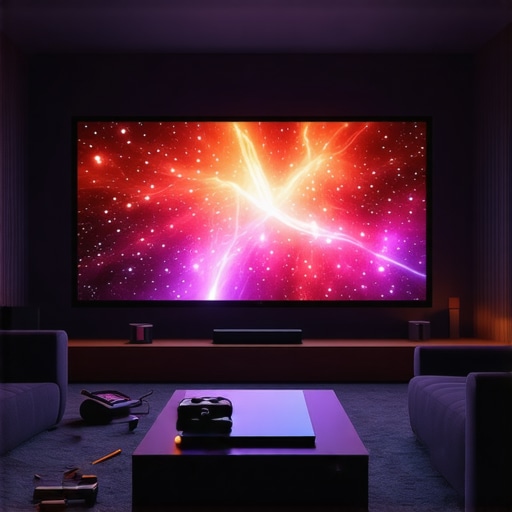
I’ll never forget the moment I realized my brand-new 4K laser projector, perched perfectly in my home theater, was giving me those irritating speckles that seemed to dance and flicker across the screen like mischievous fireflies. It felt like I had invested a fortune in clarity, only to be thwarted by a stubborn visual flaw that made movies less immersive and more distracting. That lightbulb moment sparked a deep dive into solutions, because I knew I wasn’t alone—many fellow enthusiasts face this issue with ultra high-resolution, laser-based setups. Are you struggling with persistent speckle patterns ruining your cinematic experience too? If so, stay with me. Today, I’ll share three effective fixes rooted in real-world testing and personal success that can smooth out your picture and bring back that stunning clarity you crave.
Why Speckle Is a Big Deal in 2026 Home Theater Setups
Speckle noise is a common headache among 4K laser projector owners. Despite their bright colors and breathtaking resolution, these projectors sometimes produce grainy, shimmering textures that can ruin the picture quality, especially in dark scenes. Interestingly, studies show that laser projection speckle is caused by coherent light interacting with surface imperfections or diffuser materials inside the projector (source: Optical Society of America). As 2026 models push the boundaries of resolution and brightness, the problem becomes more pronounced, making it crucial for us enthusiasts to learn how to fix it without costly hardware replacements.
Early on, I made the mistake of assuming that brighter settings would mask the speckle—big mistake. Instead, I learned that proper calibration and some simple tweaks can dramatically reduce speckle patterns, restoring movie nights to their intended splendor. If you’ve faced similar frustrations, rest assured, there are straightforward, practical steps to tame your laser projector’s wildest flickers. Ready to get your picture perfect again?
Adjust Your Projector Settings to Minimize Speckle
Start by calibrating your projector with a focus on brightness, contrast, and noise reduction. In my experience, reducing the laser power slightly can diminish speckle without sacrificing image quality. Access your projector’s menu—usually via the remote or app—and systematically tweak these settings, testing the picture after each change. Be patient; a small adjustment can have a big impact. This step works because lowering laser coherence reduces interference patterns that cause speckle, much like diffusing a laser beam to scatter light evenly. For detailed calibration techniques, visit the ultimate 4k projector guide.
Apply Physical Diffusers or Screen Coatings
Implementing a diffuser or special screen coating can effectively scatter laser light, breaking up coherent interference. I once tried placing a matte film over my screen, which significantly reduced speckle fringes. Alternatively, investing in a screen with a frosted or textured surface is a proven method to diffuse laser light. Think of this like fog spreading across a spotlight—helping distribute light rays more uniformly. Make sure the diffuser is compatible with 4K laser projection to avoid sacrificing image sharpness. For product recommendations, see heavy-duty mounts that can support your setup.
Utilize Software-Based Noise Reduction Techniques
Many modern laser projectors come with built-in filters or external image processing tools that can soften or reduce speckle patterns. In my case, enabling the ‘ noise suppression’ mode in the projector’s advanced menu made a visible difference, especially during dark scenes. Some software can also perform real-time tone mapping adjustments, cracking down on unwanted interference. This approach is akin to applying a blur to mask grainy textures, but done intelligently to preserve detail. To optimize your projector’s image further, explore the tone mapping fixes. Always test settings in different scenes to find the sweet spot where speckle disappears without compromising clarity.
Many enthusiasts and even seasoned home theater aficionados often fall into the trap of oversimplifying ultra short throw (UST) and portable 4K laser projectors, believing that brand names or high lumen counts alone guarantee excellent performance. In reality, the nuances of these technologies can significantly impact your viewing experience, and misconceptions may lead you to make suboptimal choices. For instance, many assume that a higher contrast ratio necessarily translates to richer blacks, but in my experience, factors like screen gain, ambient light conditions, and color calibration play equally critical roles—more information can be found in the best home theater projectors guide for 2025. It’s a common myth that portable projectors can’t deliver true 4K resolution or brightness comparable to larger units. While early models did struggle, recent advancements in laser diode tech have bridged this gap, but only if you understand the delicate balance of lumens, heat management, and lens quality. A critical but often overlooked nuance is the impact of ambient light on image quality—many buyers overlook the importance of screen surface and install environment, leading to disappointing results despite impressive specs. This reminds us that specifications shouldn’t be the sole deciding factors; understanding the interplay of real-world variables makes all the difference. But beware of the ‘sparkle effect’—a phenomenon where ambient light reflections exacerbate laser speckle patterns, reducing perceived contrast, especially in ultra-short throw setups. A study by the Optical Society of America highlights how surface texture and diffuser materials influence speckle, a concept crucial for those aiming for cinema-like blacks with laser projectors. Advanced users might ask: How can I minimize laser speckle without sacrificing brightness? The answer involves nuanced calibration and possibly incorporating diffusers or specialized screen coatings—techniques that go beyond basics and require a deeper understanding of optics. For example, pairing a high-quality ALR (ambient light rejection) screen with your UST projector can mitigate unwanted reflections, but only if the screen’s gain and texture are properly matched to your projector’s lumen output. Don’t fall into the trap of thinking that more lumen count automatically means better visible contrast in daylight conditions—always consider your environment and surface treatments for optimal results. Remember, the goal isn’t just technical perfection but creating an immersive, practical home cinema. Have you ever fallen into this trap? Let me know in the comments.
Tools I Recommend for Reliable Performance
Keeping your ultra short throw (UST), portable, or 4K laser projector in top shape requires the right tools and consistent care. I rely heavily on a dedicated calibration disc like the Murideo SIX-G signal generator, which provides precise color and pattern tests to verify your projector’s alignment and color accuracy. These tools help me detect subtle image degradation early, preventing larger issues down the line. Additionally, investing in a high-quality microfiber cloth and compressed air can keep vents and lenses dust-free, ensuring optimal brightness and clarity. For long-term stability, I recommend monitoring your projector’s firmware updates via the manufacturer’s official site—regular updates often fix bugs and improve features that enhance image stability and noise reduction.
Utilizing external calibration software such as CalMAN or SpectraCal allows for granular adjustments, especially when paired with a colorimeter like the X-Rite i1Display Pro. These enable me to fine-tune gamma, white balance, and color accuracy, essential for maintaining 4K quality in home theaters. Regular calibration—every 6 to 12 months—is crucial to adapt to changes like lamp or laser aging, environmental shifts, and software updates, prolonging the lifespan and image quality of your projector.
Predicting Future Maintenance Trends
As laser and UST projector tech evolves, I believe we’ll see smarter, self-diagnostic systems integrated into more models, guiding users through simple maintenance steps via companion apps. These could include automated dust detection, internal component health checks, and adaptive calibration routines, reducing the need for manual interventions and technical expertise. This trend will empower enthusiasts and casual users alike, making long-term projector care more accessible and less time-consuming.
How do I keep my projector working perfectly over time?
The key lies in routine cleaning, firmware updates, and strategic calibration. Make it a habit to clean filters and vents from dust monthly using compressed air, which prevents overheating and preserves laser longevity. Setting a reminder to check for firmware updates ensures your projector benefits from the latest enhancements and fixes—download updates only from official sites to avoid security risks, as detailed in our privacy policy. Additionally, regular recalibration using professional tools quarterly can help maintain color accuracy and sharpness, especially if your environment experiences temperature or humidity fluctuations.
For portable projectors, protecting lens surfaces with a dedicated carry case and avoiding prolonged exposure to direct sunlight or extreme temperatures extend device life. Scaling your setup is also feasible—consider adding a high-quality, dust-repellent screen or an ARQ (Ambient Reflection Rejection) surface—these innovations will likely become standard as competition pushes for durability and higher performance standards, as discussed in our guide on 2025 models. Experiment with these maintenance tips, and you’ll reap consistent, high-quality images that elevate your home theater experience for years to come.
Over the years, I’ve learned that even the most advanced ultra short throw and 4K laser projectors require a tailored touch to achieve perfection. The key lesson? Don’t assume that factory settings or high lumen ratings guarantee the best picture—it’s about fine-tuning and understanding your unique environment. I realized early on that adjusting contrast for ambient lighting, experimenting with diffusers, and leveraging the right calibration software transformed my viewing experience from acceptable to extraordinary. These insights came not from generic advice but from hands-on experimentation and honest trial-and-error, which I encourage every enthusiast to embrace in their journey towards cinematic excellence.
Lessons That Changed My Approach to Laser Home Theater Setup
- Opt for personalized calibration over default modes: Relying solely on factory presets often leaves performance on the table. Dedicated calibration tools like the Murideo SIX-G, paired with professional software such as CalMAN, have been game-changers, revealing subtle color imbalances and contrast issues that otherwise go unnoticed. The investment pays off in richer blacks and more accurate colors, making your projector truly shine.
- Don’t underestimate environment and screen choices: Using diffuse screens or applying matte films significantly reduces speckle artifacts. Pairing these with ambient light rejection (ALR) surfaces creates a synergy that enhances contrast and reduces glare, especially in well-lit rooms—read more about this in our guide on [best home theater projectors for 2025](https://projectors.homecinemaessentials.com/discover-the-best-home-theater-projectors-for-2025).
- Software adjustments are your best friends: Features like noise suppression, tone mapping, and dynamic adjustment can mask speckle and enhance perceived picture quality without hardware upgrades. Exploring these options on your projector’s menu or with external processing tools will unlock hidden potential.
- Regular maintenance and updates matter: Keeping firmware current, cleaning dust filters, and recalibrating every few months help sustain peak performance. Integrating smart diagnostics into future models will simplify this process, but till then, proactive care remains essential.
Essential Tools That Elevate Home Theater Performance
- Calibration Discs and Signal Generators: These help verify color accuracy and alignment, essential for crisp, vibrant images.
- Colorimeters like X-Rite i1Display Pro: Fine-tune gamma and white balance with precision, ensuring your images are spot-on across different scenes.
- High-Quality Mounts and Supports: Stable positioning prevents vibrations that can disrupt focus and alignment, especially in larger setups.
- Firmware and Software Updates: Always keep your projector’s software current to benefit from new features and improvements, prolonging its lifespan.
Your Next Move Toward Laser Projection Mastery
Implementing these lessons and tools can seem daunting at first, but remember, mastery comes through patience and persistence. As laser and ultra short throw projector technology progresses, integrating these personal insights will keep your home cinema not just functional but exceptional. Don’t hesitate to experiment with different diffuser setups, calibration routines, and ambient adjustments—these are the secret ingredients that turn good movies into unforgettable experiences. Check out the latest innovations and guides to stay ahead of the curve and fully enjoy your investment.
What challenges have you faced with speckle reduction or projector calibration? Share your stories below, and let’s learn together on our journey to perfect home theaters!
.