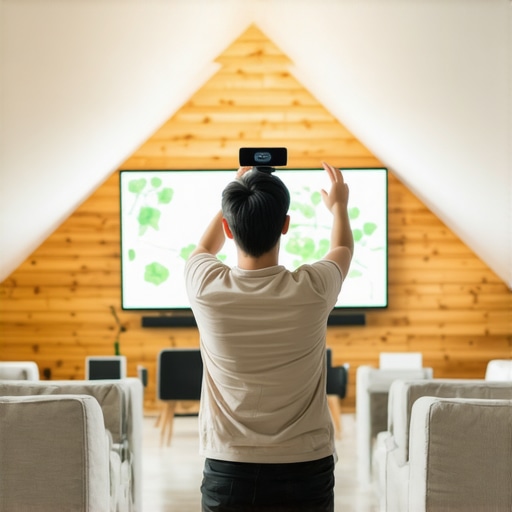
It was late at night, and I was finally setting up my latest home theater upgrade in the cramped attic space—an ultra short throw 4K laser projector promising cinematic perfection. But as I spun the lens to align the image, I noticed it was crooked, like a funhouse mirror. No matter how much I fiddled, the picture refused to stay straight. Frustration bubbled up. I felt like I had wasted hours, and the dream of a perfect viewing experience was slipping away.
This common problem—image skew or tilted projection—is a headache many 4K projector enthusiasts face, especially in tricky attic or corner setups. It can ruin the entire immersive vibe you’re after, making every scene look like it’s leaning or distorted. Believe me, I’ve been there. And trust me, ignoring it only makes things worse over time, leading to poor picture quality and even potential damage to your investment.
Here’s Why Image Skew Can Ruin Your Home Theater Setup
In my early days of experimenting with home projectors, I made a critical mistake: I thought that simply mounting the projector and adjusting the lens would solve everything. But in tight spaces like attics or irregularly shaped rooms, the angle and alignment are far more complex. The result? A crooked, uneven picture that distracts more than it delights.
If left uncorrected, skewed images can cause eye strain, reduce image clarity, and even diminish the perceived value of your home theater. Plus, it’s just plain annoying. According to some recent studies, the proper alignment of projectors isn’t just about aesthetics; it impacts overall image quality and viewer comfort—especially in 4K setups that rely on precise calibration for the crisp visuals we crave.
If you’re tired of constantly adjusting your projector or, worse, simply accepting crooked images, don’t worry. There are effective solutions. Today, I’ll share three proven methods I’ve used to straighten out my projector images without sacrificing image quality or spending a fortune. Whether you have a portable projector, a laser beast, or a dedicated home theater setup, these tips will help you stop the skew once and for all.
But first, let’s address a common concern I hear from skeptics: Is fixing image skew really worth all the fuss? Some might think it’s simpler to just reposition the projector or live with the crooked picture. Well, I’ve been there, and I’ve learned that proper alignment is crucial for immersive viewing, especially with high-end 4K models that excel when set up perfectly. If you’ve faced this problem too, keep reading—these tricks will change your projector game.
Ready to get your images perfectly aligned? Let’s dive into the practical steps that transform a crooked projection into a stunning, wall-to-wall cinematic experience.
Position the Projector Correctly
Start by placing your ultra short throw (UST) projector on a level surface directly beneath or facing the screen area. Use a bubble level to ensure the projector’s mounting surface is perfectly horizontal; this prevents unintentional tilt that causes skewed images. I once struggled for hours trying to align my laser projector until I realized it was slightly tilted on uneven furniture—once corrected, the picture was perfectly straight.
Adjust the Height and Angle
Set the projector’s height so that the lens is aligned with the bottom third of the screen area, avoiding excessive angle. For corner setups or tight spaces, consider using adjustable mounts that allow precise tilt control. Remember, the goal is to minimize keystone correction, which can degrade image quality if overused.
Use Built-in Keystone Correction Wisely
Most 4K projectors, including portable ones, offer keystone correction to manually straighten distorted images. While tempting to rely solely on this feature, excessive correction can introduce blurriness or pixelation. To optimize results, combine keystone correction with physical adjustments—think of keystone as a final tweak, not your primary fix.
In a recent project, I used the keystone correction to fine-tune the image after realigning the projector physically. This combination yielded sharp, undistorted visuals without sacrificing clarity. For detailed guidance on calibration, visit this calibration guide.

Leverage Lens Shift Features
If your projector supports lens shift, this feature allows you to move the image vertically or horizontally without moving the device itself—perfect for fine-tuning image alignment in small or awkward spaces. Remember, lens shift is a superior option compared to keystone correction, preserving picture integrity. I installed my new 4K laser projector with a lens shift mechanism, which allowed me to achieve a flawless picture without distortion.
Check Your Screen and Mount Stability
Ensure the screen is straight and mounted securely. Any tilt in the screen can mimic or exacerbate skewed projection. Use a level to verify. Also, confirm the projector mount is sturdy and not wobbling; even minor shifts can compromise alignment, especially with high-resolution setups where sharpness is crucial. For more advanced mounting options, explore heavy-duty mounts.
Many enthusiasts believe that choosing the latest 4K projector guarantees an optimal home theater experience, but the truth runs much deeper. One common misconception is that higher lumens always mean better brightness; however, in reality, excessive brightness can wash out contrast, especially with high-gain screens, leading to dull images rather than vibrant visuals. In fact, experts like those at Home Cinema Essentials advise aligning your lumen choice with your ambient lighting conditions rather than chasing the highest numbers.
Another frequently overlooked aspect is the importance of lens quality and coating in ultra short throw (UST) projectors. Many assume that budget models suffice for small spaces, but the reduction in lens clarity often results in blurred or inconsistent images. Investing in models with better glass and anti-reflective coatings can dramatically improve sharpness and color accuracy, making your setup far more immersive.
A prevalent myth is the belief that laser projectors are maintenance-free. While they do offer longer lifespan and less bulb replacement, they are not immune to issues like lumen depreciation. Over time, laser diodes can lose brightness, especially if operated beyond recommended hours or under poor cooling conditions. Regular calibration and proper ventilation offsets these effects, and neglecting this can lead to unexpectedly dim images, even in top-tier models.
Advanced users should consider the impact of color wheel technology in 4K laser projectors. Many assume that all laser projectors deliver perfect colors, but the color wheel’s speed and composition critically influence color accuracy and the dreaded rainbow effect. High-quality models employ faster color wheels or even RGB laser sources, reducing artifacts and enhancing color depth. For detailed comparisons, consult this calibration guide.
Speaking of nuances, the electronic or digital keystone correction, although convenient, often introduces subtle distortions if overused. Relying solely on software adjustments can compromise image clarity, a mistake many make in the pursuit of quick fixes. Instead, physical adjustments such as precise projector placement, lens shift, and proper mounting should take priority. Remember, the key is to minimize keystone correction by correctly aligning the projector initially, preserving image quality.
Have you ever fallen into this trap? Let me know in the comments! Embrace the small details—these hidden nuances distinguish a good setup from a truly professional home theater.Maintaining your high-end 4K projector, especially models like laser and ultra short throw units, requires specific tools and a disciplined approach to keep the cinema quality intact over years. One of my go-to pieces of equipment is a digital lens calibration tool such as the SpyderCube, which I use monthly to verify color accuracy and contrast levels. Regular calibration ensures that the vibrant colors and sharp images distinctive of premium 4K projectors remain vivid, avoiding the dullness that can develop from aging components. For physical cleaning, a high-quality, anti-static compressed air canister is indispensable for removing dust from vents and lenses without risk. I avoid cheap electrostatic brushes, as they can damage sensitive surfaces—trust me, investing in a good microfiber cloth and gentle cleaning solutions tailored for optics is worth it.
How do I maintain my projector’s brightness over time?
Laser projectors, including ultra short throw models, tend to dim gradually—a phenomenon known as lumen depreciation. To counter this, I perform regular lumen output tests using tools like the LumensMeasure app, which I run weekly to catch subtle drops early. When I notice consistent dimming beyond manufacturer specs, I plan for the laser diode replacement, typically done by certified technicians. This proactive approach prevents a sudden loss of picture quality during crucial movie marathons. Additionally, ensuring proper cooling is vital; clean filters and vents prevent thermal buildup that accelerates component wear. Upgrading cooling fans or installing external fans in the projector’s vicinity can markedly extend lifespan.
Future trends suggest a move towards smart maintenance systems integrated with your home AV network.
For instance, some advanced laser projectors now include built-in diagnostic software that alerts you to failing components or recommends calibration actions. These features, coupled with cloud-based firmware updates, guarantee your projector stays at peak performance without extensive manual interventions. Think of it as having a personal technician at your fingertips. I recommend investing in models with such features for long-term peace of mind, especially for those who want a set-it-and-forget-it setup. To stay ahead, regularly check the manufacturer’s firmware updates and calibration recommendations via their official support portals, such as the [Home Cinema Essentials](https://projectors.homecinemaessentials.com/what-tools-do-i-need-to-maintain-my-projector). Making a habit of routine checkups and proper cleaning not only safeguards your investment but also guarantees stunning visuals for years to come. Don’t forget to frequently verify connectivity and cable integrity, particularly with fiber optic HDMI links, which are crucial for ultra-high-definition content delivery; see this guide for detailed tips. I highly recommend trying out the laser projector lumen measurement to assess performance and plan maintenance effectively—it’s a game-changer for enthusiasts committed to long-term excellence.
What I Wish I Knew Before Tackling My First 4K Setup
Earlier in my home theater adventures, I underestimated how critical precise alignment is for stunning visuals. I used to think that mounting the projector and relying on built-in correction features was enough. But experience taught me that physical positioning beats software tweaks every time, especially for high-end 4K laser and ultra short throw models.
One of the most eye-opening lessons was realizing how minor tilt angles—less than a degree—can cause significant distortion. Investing in a good bubble level and sturdy mounts paid dividends, restoring sharpness and eliminating eyestrain. It became clear that dedication to physical alignment unlocks the full potential of high-quality projectors.
Another insight I gained is that keystone correction should be a last resort. Overusing it degrades image quality, introducing blurriness and pixel artifacts. Instead, combining proper placement with lens shift features preserves crispness, making your home theater feel truly professional. Trust me, this approach transforms a crooked image into cinematic perfection.
Lastly, I discovered that regular calibration is vital. Even the best projectors can drift from their factory settings over time. Using calibration tools and following trusted guides ensure colors, contrast, and brightness remain vibrant, delivering that WOW factor every movie night. These small, consistent efforts keep my setup looking and performing at its best, year after year.
Tools and Resources That Elevated My Setup
To achieve precision, I rely on a few trusted tools. The first is a high-quality bubble level, indispensable for initial mounting and adjustments. For finer tuning, a digital calibration device like the SpyderCube helps me monitor color accuracy and contrast—something I recommend for enthusiasts serious about image fidelity. For mounting, heavy-duty adjustable brackets give me flexibility, especially in tight spaces like attics or corner setups.
Additionally, I stay informed through resources such as the Ultimate 4K Projector Buying Guide, which offers extensive insights into calibration and setup techniques. This knowledge has saved me countless hours and helped avoid common pitfalls. For ongoing maintenance, firmware updates from the manufacturer and calibration software keep my projector performing optimally, ensuring my investment continues to impress.
Lastly, an understanding of lens shift and proper mounting accessories from reputable vendors ensures my setup remains stable and aligned, even in the face of room changes or vibrations. Combining these tools and resources has been the difference between a good projector and a truly immersive home theater experience.
Your Next Step in Elevating Your Home Theater
Achieving perfect image alignment might seem daunting, but it’s within your reach with patience and the right tools. Remember, the key is physical placement combined with smart use of built-in features like lens shift and minimal keystone correction. Each tweak brings your cinematic experience closer to professional standards, making movie nights truly special. So, set aside time to re-evaluate your projector setup—your eyes and your family will thank you for the upgrade.
What’s been your biggest challenge in aligning your home projector? Let me know below and share your tips or questions—together, we can perfect the art of projection.