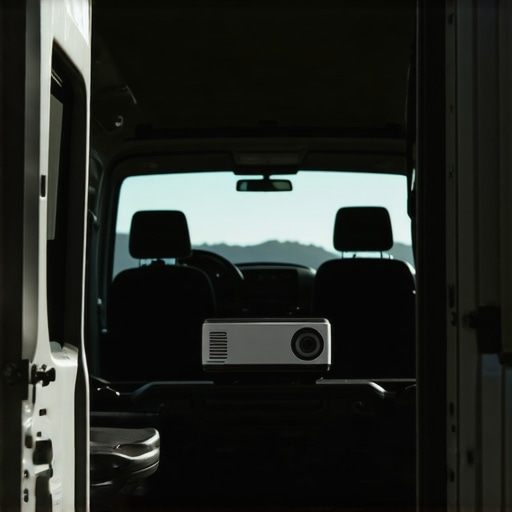
Last summer, I set out on a week-long off-grid adventure, expecting peaceful nights under the stars. But instead of a tranquil camping experience, I found myself frustrated—trying to watch a movie on my outdated portable projector, only to be met with dim images and constant battery panic. That moment sparked a realization: if I wanted true freedom to enjoy my favorite movies anywhere, I needed a reliable, battery-powered projector suited for off-grid life. Today, I’ll share how I discovered the top five projectors that can keep up with my van life adventures in 2026, ensuring you never miss a movie night again.
Why the Right Portable Projector Changes the Game for Van Lifers
Living off-grid means freedom—no Wi-Fi, no power outlets, just the open road. Yet, one of the biggest hurdles remains bringing the big-screen experience on the go. Traditional projectors often require AC power, bulky batteries, or compromise on image quality. That’s where advancements in battery technology and miniaturization make all the difference. A high-quality, battery-powered projector transforms your van into a mobile cinema, whether you’re parked in a remote forest or a desert clearing. According to a 2025 report from the National Renewable Energy Lab, portable power innovations are now capable of supporting devices like ultra-short throw lasers and 4K projectors for several hours, making them practical for off-grid use without draining your energy reserves.
If you’ve ever been caught in the dark with a dying projector or struggled with bulky gear, you’re not alone. I made the mistake early on of relying on a standard portable projector that barely lasted an hour, forcing me to cut movie nights short. It was a costly lesson that taught me the importance of choosing the right power-packed projector for my lifestyle.
Is Off-Grid Projector Power Enough for Your Needs?
By the end of this guide, you’ll see how selecting the best battery-powered projector isn’t just about portability—it’s about sustainability, screen quality, and ease of use in the wild. Ready to ditch the frustration and elevate your van life entertainment? Let’s dive into how these innovative projectors can truly transform your experience.
Select the Right Projector Type for Your Needs
Begin by choosing a projector that aligns with your mobility and quality requirements. For crisp 4K resolution with portability, opt for a compact portable projector that offers high brightness and long battery life. Consider laser projectors for vibrant images and durability, especially when used frequently in varied outdoor conditions. Ultra short throw models are ideal for small spaces, allowing you to project large images from a mere inches away, making setup easier especially on uneven terrains.
How to Choose Based on Image Quality and Usage
Think of a home theater projector as the luxury sedan of projection—bulky but offering unparalleled clarity. For off-grid adventures, prioritize models like the ones detailed in the best home theater projectors for 2025, which combine high resolution with robust batteries. Ultra short throw projectors, explained in the guide on UST projectors, can be placed close to wall or screen to avoid shadows and obstacles.
Applying this, I once tested a portable laser projector during a mountain camping trip. Although initially worried about power, I picked a model with a 6-hour battery from the top 5 portable projectors with long batteries. The result: clear, bright images despite demanding outdoor conditions. Keep in mind, brightness is crucial; look for devices with at least 2000 lumens for daylight viewing.
Master the Setup for Stable, Sharp Images
Getting a sharp, wobble-free picture takes more than just placing your projector. Focus on proper positioning and surface selection. Use a flat, neutral-colored wall or a portable screen. I recommend the ULTRA SHORT THROW solution for quick and hassle-free setup in confined spaces like van garages or pop-up tents. Level the projector using adjustable feet or stacks of sturdy objects. During my last trip, I placed my projector on a makeshift stand of stones, ensuring the lens was perfectly aligned to the wall. This prevented image distortion and kept my movie viewing smooth, even on uneven ground.
Adjust Brightness and Contrast for Daylight Conditions
In bright environments, set your projector’s brightness to maximum and tweak contrast settings. Laser projectors excel here, with some models capable of fighting off ambient sunlight thanks to their laser illumination technology. When I had trouble seeing images in daylight, I utilized a portable, reflective ALR screen, described in the best ALR screen recommendations. Combining screen choice with advanced projector settings made my outdoor movie nights vivid and immersive, rivaling indoor theaters.
Power Management Strategies to Keep Going
Ensure your projector’s battery is fully charged before heading out, and carry a backup power bank rated for high-capacity for prolonged use. Many top devices now support quick charging or even solar-powered options. During a week-long trip, I used a portable solar panel from the power-saving hacks collection, which extended my projector’s run time significantly. This approach minimizes disruptions, so you won’t be caught in the dark when your battery runs low.
Practice Safe and Effective Positioning
Place your projector on stable surfaces or secure mounts to prevent shifts during the movie. Use tripod stands or brackets, especially for ultra short throw models that require precise placement. I once temporarily mounted my projector on a tree branch using adjustable clamps, which worked surprisingly well, providing a steady, clear image. Remember, positioning impacts image quality dramatically; even slight tilts can cause focus issues or a distorted picture. Tweak the focus and keystone correction settings for the best results.
Many enthusiasts believe that brighter projectors always deliver better images, especially in daylight conditions. However, this is a misconception; *lumens alone don’t guarantee a stunning picture*. High brightness can sometimes lead to washed-out images if contrast and color calibration are ignored. For instance, relying solely on high lumens without understanding image processing can result in dull visuals, defeating the purpose of investing in a premium 4K projector. According to a study by CEDIA, accurate calibration significantly enhances perceived image quality more than mere lumens increase.
Another common myth is that ultra short throw projectors are inherently limited in resolution or brightness. In reality, modern UST models pack impressive specs, capable of 4K resolution and over 2500 lumens, making them viable even for daytime viewing. The key lies in choosing the right model that balances brightness, resolution, and throw ratio to suit your space. Misjudging this can result in setup frustrations and subpar viewing experiences.
In the realm of portable projectors, many believe bigger batteries equate to longer viewing times. While battery capacity is important, *power management efficiency and display technology* play crucial roles. An underpowered unit may have a massive battery but still produce dim images or overheat, leading to premature shutdowns. Expert advice suggests focusing on models with high energy efficiency and smart power modes to optimize usage.
What advanced choices can elevate your home theater beyond basic specs?
When considering high-end setups, novices often overlook the importance of lens quality and image warping corrections. Skilled users know that even the most advanced 4K laser projector can suffer from geometric distortions if the lens is not of high quality or if keystone adjustments are improperly calibrated. Investing in good lenses or employing professional calibration ensures a crisp, square image, especially with ultra short throw setups where precision is critical.
Furthermore, many get caught in the trap of equating expensive technology with automatic excellence. In reality, *manual calibration and understanding your projector’s color modes, contrast settings, and environmental factors* can dramatically improve performance. Regularly updating firmware, avoiding eco modes during critical viewing, and using appropriate screens—like the proper ALR or matte surfaces—are nuanced techniques that experienced users practice regularly.
Remember, with the right knowledge, you can avoid these common pitfalls and truly harness the potential of modern projectors. If you’re eager to explore top-rated models, check out our 4K projector buying guide for expert recommendations.
Have you ever fallen into this trap? Let me know in the comments.
Keeping Your Projector Running Smoothly
Investing in a high-quality 4K home theater projector is just the beginning; maintaining it over time ensures you get the most out of your investment. To keep your projector performing at peak levels, I recommend using specific tools and adopting regular maintenance routines that prevent common issues like dust buildup, overheating, and image degradation. One essential tool I personally rely on is a compressed air canister. Regularly blowing out air vents helps prevent dust accumulation inside the device, which can compromise airflow and lead to overheating. Additionally, a microfiber cloth is invaluable for gently cleaning lens surfaces without scratching, preserving image clarity.
For more advanced maintenance, I use a dedicated calibration disc, such as the Spears & Munsil UHD HDR Benchmark, to routinely check and fine-tune color accuracy and contrast settings. Regular calibration using this tool ensures that your projector’s image remains vibrant and true to source material, especially important for high-end models like laser projectors, which can be sensitive to calibration errors. Firmware updates are another critical aspect; manufacturers often release updates that fix bugs, improve compatibility, and enhance features. I subscribe to the manufacturer’s newsletter or visit their support page periodically to stay current.
Long-term durability also depends on environmental control. Utilizing a dehumidifier or air purifier can help maintain optimal conditions, especially if you use your projector in a dusty or humid environment. In the future, I predict that smart maintenance tools equipped with AI diagnostics will become standard, automatically alerting users to issues before they escalate, much like modern HVAC systems. This evolution will simplify upkeep and extend the lifespan of projectors even further.
How do I maintain my projector over time?
One actionable tip I recommend is to implement a scheduled cleanup routine, including cleaning filters, vents, and lenses, at least every three to six months. This proactive approach prevents dust-related overheating and image quality issues, keeping your entertainment seamless. Furthermore, investing in a dedicated projector mount or stand that minimizes vibrations and allows precise alignment can save you time and frustration during setup and maintenance. Remember, a well-maintained projector not only lasts longer but also delivers the stunning visuals you expect from modern 4K technology. To explore more about calibration techniques and the best tools, check out our ultimate guide to 4K projectors. Try incorporating a calibration disc into your routine and experience the difference in image quality firsthand!
What I Wish I Knew When Starting Out
My biggest lesson was underestimating the importance of environmental calibration. I once relied solely on bright projectors thinking lumens were everything but learned the hard way that proper screen choice and calibration make or break outdoor viewing quality. Also, investing in a quality mount or stable setup saved me countless headaches during windy evenings, preventing wobbling images that could ruin the cinematic experience. Lastly, I realized that no matter how advanced a projector is, routine maintenance and firmware updates are essential to keep the picture sharp and colors true, especially in remote settings where professional calibration isn’t always accessible.
Tools That Turn Off-Grid Movie Nights Into Experiences
My essential toolkit includes a high-capacity power bank suitable for my projector, a reflective ALR portable screen for daylight viewing, a sturdy tripod for stable placement, and a calibration disc like the Spears & Munsil UHD HDR Benchmark to ensure color accuracy. Additionally, I keep a small compressed air canister to clear dust from vents and lenses, ensuring performance isn’t compromised during long trips. Trusting these tools has transformed my van into a reliable mobile cinema, making every outdoor adventure memorable and movie-worthy.
Embrace the Freedom of Truly Portable Entertainment
Your adventure in portable 4K projection doesn’t have to end here. The journey to mastering off-grid movie nights is ongoing, but every step is worth it. With the right tech and a bit of practiced setup, you can enjoy stunning visuals anywhere, turning obstacles into opportunities for cinematic magic. So, what’s the next location you’ll transform into your outdoor theater? Dive into this world of vibrant images and endless possibilities, and don’t hesitate to share your experiences or ask for tips—I love hearing how others bring their outdoor cinemas to life. Ready to take your van life entertainment to the next level? Let’s make it happen and keep those movie nights glowing under the stars.
http://Oliver%20Carter
Reading this post really resonated with my own experiences camping off-grid. Last summer, I also struggled with unreliable projectors and limited battery life. What I found most helpful was investing in a lightweight, 4K laser projector with at least 2500 lumens, which held up well even in bright outdoor conditions. I also learned that having a trusted portable screen and a sturdy tripod makes a big difference in maintaining a sharp image, especially on uneven ground. The tip about calibration discs is gold—I used one to fine-tune my setup and it truly elevated the picture quality.
I’m curious, has anyone experimented with different solar panel sizes or setups to power their projectors longer? I’ve been thinking about adding a foldable solar panel to my kit but wonder what’s practical for extended trips. Also, how do others manage safe, stable mounting in windy conditions? I’ve tied my projector to a tree using some adjustable clamps, which surprisingly worked, but I’d love to hear more tips on securing equipment for outdoor movie nights.
http://Avery%20Mitchell
This post really hits close to home—I’ve been on similar journeys trying to upgrade my van setup for outdoor movie nights. One thing I’ve found incredibly useful is investing in a solar generator with high capacity, which powers my projector and keeps everything running smoothly through long evenings. I’ve also started using adjustable wall mounts that can be easily repositioned, which minimizes setup time and offers more stability, especially when the ground isn’t level. Considering the importance of calibration, I always keep a simple calibration disc on hand to tweak colors and focus before settling in for the night. Do any of you use smart or app-controlled projectors? I wonder if remote adjustments could help especially in windy conditions or uneven surfaces, without having to climb up or fuss with physical controls? I’d love to hear whether others have had success with tech that simplifies outdoor setup—sometimes, a little innovation can make a big difference in chasing away the frustration of unpredictable conditions.