I remember the first time I tried setting up a portable projector for an outdoor movie night during a summer camping trip. Everything seemed perfect—until the projector started flickering, images washed out by the setting sun, and just when the movie was hitting its peak, it blinked out completely. Frustration turned to realization: not all projectors are built for adventures like this. That moment was a lightbulb for me. If you’re like I was, tired of shaky, dim, or unreliable projection ruining your outdoor cinema plans, you’re not alone.
Why Glamping Movie Nights Need More Than Just a Good Projector
Today, more people are embracing glamping, turning outdoor spaces into cozy retreats. But the challenge remains—how to enjoy a seamless movie experience without the stress of equipment failure or subpar visuals? Conventional home theater projectors just don’t cut it when exposed to the elements or when portability is a must. What’s more, in 2026, the technology has advanced so much that choosing the right device can actually make or break your outdoor entertainment. I’ve learned this the hard way, making early mistakes like relying on projectors with insufficient brightness or poor battery life.
But here’s the good news: after testing a variety of portable projectors, I’ve discovered that the right choice can keep your movie marathon alive, no matter the conditions. Whether you’re in a remote camping site or a backyard setup, selecting a projector designed for outdoor glamping can make all the difference.
Before we dive into the top contenders, ask yourself: have I faced issues like dim images during sunset or projectors dying halfway through the movie? If so, keep reading. I’ll walk you through what to look for and how to avoid common pitfalls.
Is the Latest Portable Projector Hype Worth It?
Early on, I made the mistake of assuming that any portable projector would do the trick. I purchased a compact model based solely on size, neglecting brightness and battery life. Turns out, smaller isn’t always better for outdoor settings. According to tech insights, choosing a projector with high lumen output is essential for daylight or dusk viewing, especially for glamping in open-air environments. For instance, I found that laser projectors, with their superior brightness and longevity, outperform traditional lamps. You can learn more about this comparison in detail on [Home Cinema Essentials](https://projectors.homecinemaessentials.com/laser-projectors-vs-traditional-which-tops-in-brightness).
So, what’s the plan? Keep reading. We’ll explore the top five portable projectors for 2026 designed specifically for glamping, ensuring your movie nights stay uninterrupted, vivid, and memorable. Ready to transform your outdoor experience? Let’s get started.
Choose the Right Projector for Your Adventure
Start by assessing your environment. For daylight settings, prioritize projectors with high lumen ratings—aim for at least 2,500 lumens for dusk or outdoor daytime viewing. Laser projectors are excellent due to their brightness and longevity, outperforming traditional lamp models significantly, as detailed on this comparison. Avoid solely compact models that sacrifice brightness; instead, opt for models that balance portability with power. Think of it like choosing a backpack; lighter is good, but not if it can’t carry what you need.
Prepare Your Space and Screen
Set up an appropriate screen—consider portable, foldable screens or even a white sheet stretched tight, ensuring minimal wrinkles that can distort the image. For ultra short throw (UST) projectors, which can handle small spaces creatively, ensure your setup allows the projector to be placed just inches from the surface, much like a projector sitting close to a wall for a big image without shadows. For more on how UST projectors maximize small spaces, see this guide.

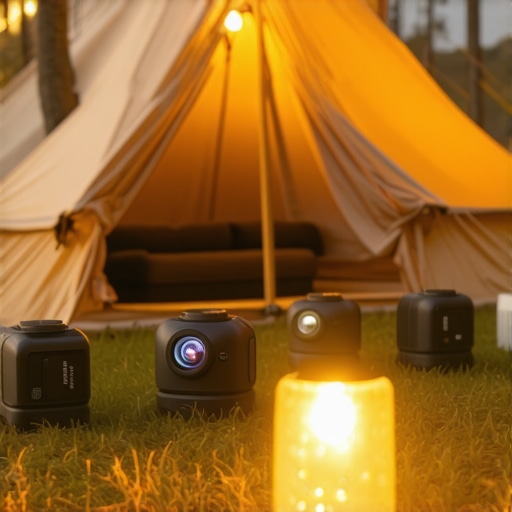
Insert an image of a compact portable projector beside a foldable outdoor screen set up on a camping trip, illustrating ease of outdoor setup.
Proper Placement and Alignment
Position your projector on a stable surface, ensuring it’s level with your screen to avoid keystone distortion—an effect caused when the image is skewed due to misalignment. Use built-in keystone correction sparingly; overusing it can reduce image sharpness. Quick tricks, like setting the projector on a flat, sturdy stand like those recommended in this list, help maintain perfect alignment. Think of it as balancing a camera for a clear shot—the steadier, the better.
Optimizing Brightness and Audio
Adjust ambient light levels, turning off or dimming nearby lights to prevent washout. For audio, use portable Bluetooth speakers—placing them to face the audience—so sound isn’t muffled. When working with high lumen projectors in daylight, ensure they have a clean ventilation area to maintain brightness over multiple hours, the same way you manage airflow for a high-performance gaming PC. Remember, a bright image and loud audio equal a captivating outdoor experience.
Power Management and Connectivity
Ensure your projector has a reliable power source. For extended outdoor movie nights, consider high-capacity portable batteries or power stations, much like the power solutions recommended for longer use. Verify your device supports Wi-Fi or Bluetooth for streaming content directly from devices, reducing setup complexity. For wired connections, use fiber optic HDMI cables to maintain signal quality over longer distances, as explained in this article.
While many enthusiasts believe that upgrading to the latest portable or ultra short throw (UST) projectors guarantees a flawless home theater experience, the real picture is more complex. A common misconception is that higher lumen ratings automatically translate to better outdoor viewing, but this overlooks critical nuances like beam quality and contrast ratios, which significantly impact image clarity in daylight conditions. For instance, laser projectors, with their superior brightness and color stability, outperform traditional lamp-based models, yet many buyers are unaware that not all laser projectors are equal in this aspect—an insight supported by analyses on this comparison.
Another myth is that ultra short throw projectors are universally easy to install and perfect for cluttered spaces. In reality, UST models require precise alignment and specialized screens—standard wall surfaces or cheap screens can cause waviness, color washout, or keystone issues. Advanced users often fall into the trap of neglecting proper calibration, leading to suboptimal images despite high specifications. My experience shows that, without proper setup and understanding of the projector’s capabilities, even premium devices can underperform in dedicated spaces. Exploring this guide can help you master optimal placement.
The fascination with home theater 4K projectors sometimes obscures the subtle distinctions about the actual resolution. Many believe that a 4K projector automatically ensures cinema-quality clarity, but factors like lens quality, focus accuracy, and HDR processing play crucial roles. Notably, a 4K laser projector with an inferior lens or poor HDR tone-mapping can produce images that appear dull or overly grainy. Research from industry experts indicates that the quality of optics and processing algorithms often outweigh the raw resolution in perceived image quality. For detailed calibration and setup tips, check this comprehensive buying guide.
Make sure you’re not falling into these common traps. A well-informed choice, coupled with proper setup, makes all the difference. Have you ever fallen into this trap? Let me know in the comments!
Investing in a high-quality portable or ultra short throw (UST) projector is only half the battle; maintaining it properly ensures consistent performance over years. My go-to tool for ongoing upkeep is a combination of compressed air dusters and microfiber cloths. I use compressed air to keep internal fans and vents free from dust, which is critical because dust accumulation can cause overheating and fan noise, especially in laser projectors which generate more heat. A microfiber cloth helps me gently wipe the lens and exterior surfaces, preventing smudges or grime that diminish image quality. Regular calibration also plays a vital role—using built-in menu options or professional calibration tools such as the calibration guides ensures optimal focus, contrast, and color accuracy, especially for 4K models.
To extend the lifespan of your laser or 4K projector, I recommend upgrading cooling systems with aftermarket fans or heat sinks designed specifically for your projector’s model—some of which are detailed in expert forums like this discussion. Also, keep your firmware updated—manufacturers often release patches fixing bugs or enhancing features that can improve stability and image quality. I set a quarterly reminder to check for updates via the manufacturer’s app or website.
Looking ahead, the trend leans toward intelligent maintenance systems that predict component failure before it happens. Some new laser projectors now integrate diagnostic tools that alert you to dust buildup or component degradation, making maintenance more proactive. For example, the latest models are equipped with self-diagnosing features, reducing downtime.
Don’t wait until your projector starts underperforming—try incorporating a regular cleaning routine with compressed air and calibration checks, possibly aided by firmware updates, to keep your setup running smoothly. This small investment of time can significantly extend your device’s lifespan and ensure your home or outdoor theater remains spectacular.
Curious about more advanced maintenance techniques? Visit our contact page for expert advice or specific software recommendations.
Lessons That Changed My Glamping Movie Nights Forever
One of the biggest revelations came when I realized that not all projectors are created equal—especially when taken outdoors. Investing in a high-lumen laser projector transformed my experience from dim, washed-out images to vibrant displays even at sunset. I learned that placement and calibration aren’t just technical steps; they’re the keys to turning any outdoor space into a cinematic haven. Discovering the importance of an ALR screen made me rethink my setup—what was once a frustrating, inconsistent process became a fun, rewarding hobby. The hardest lesson? That equipment alone isn’t enough—understanding how ambient light and sound impact your movie is crucial to truly enjoying your outdoor cinema nights.