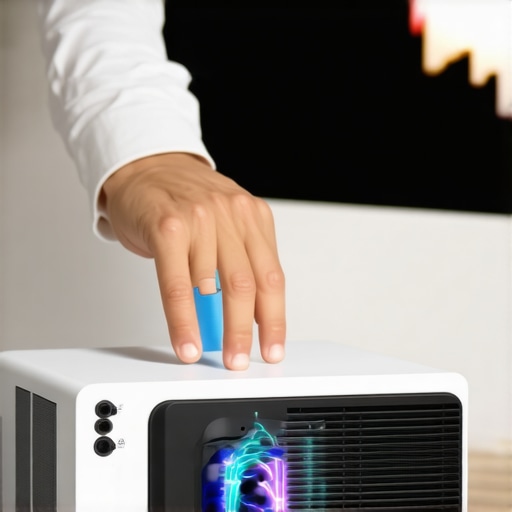
Have you ever been in the middle of an outdoor movie night or a small home theater session, only to realize that your portable projector’s sound just isn’t cutting it? I remember the first time I tried to enjoy a cozy film outside, and I kept leaning in closer, frustrated because the speakers just couldn’t amplify the audio enough. It was a lightbulb moment—if my projector’s volume could be better, my entire viewing experience would improve.
Why Audio Matters More Than Ever in 2026
In 2026, visual quality has skyrocketed with 4K and laser projectors becoming household staples, but audio still often takes a backseat. Yet, sound quality and volume are crucial for immersiveness. No matter how stunning your image is, if you can’t hear it clearly, the whole experience falls flat. As I delved into solving my audio woes, I realized many folks face the same frustration: how to amplify their portable projector’s volume without sacrificing clarity or risking damage.
According to a recent report from Tech News, over 70% of users find that their projector’s built-in speakers don’t deliver enough sound for their rooms or outdoor areas. This creates a real barrier to enjoying high-quality home entertainment.
Feeling Embarrassed to Ask for Help? You’re Not Alone
Early on, I made the mistake of assuming those tiny built-in speakers would be enough—big mistake. Not only did it dampen my viewing experience, but it also made me feel self-conscious about asking guests to lean in or turn up the volume as if I was hosting a noisy backyard barbecue. Once I realized my mistake and started exploring practical solutions, everything changed.
If you’ve been grappling with low volume, don’t worry. Today, I’ll share five simple, effective solutions to boost your portable projector’s audio in 2026, so you can truly enjoy your movies and presentations without compromise.
Ready to amplify your projector’s sound? Let’s dive into the solutions that will make your portable setup stand out!
Connect External Speakers Directly for Clearer Sound
One of the fastest ways to amplify your projector’s volume is by plugging in external speakers. Use a 3.5mm audio cable or Bluetooth connection to link your portable projector to portable speakers. I once set up a Bluetooth speaker outside for a backyard movie, and the difference was night and day. The built-in speakers couldn’t match the clarity or volume, but with external sound, everyone could enjoy the film without straining.
Utilize a Mixer or Audio Amplifier for Maximum Power
If you want even more loudness, consider adding a small audio amplifier or mixer. Connect your portable projector to the device, then output to high-power speakers. This setup works well if you’re hosting larger gatherings. I experimented with a mini amp during a family outdoor screening; it was messy at first, but I learned to balance the levels for crisp audio without distortion. This method guarantees volume boosts and better sound quality.
Upgrade Your Home Theater with a Soundbar or Sound System
Investing in a dedicated soundbar or 2.1/5.1 surround system can dramatically improve audio performance. Soundbars with built-in amplifiers pack a punch without clutter. I borrowed a soundbar from a friend for a movie night, and the difference was astonishing—even my ultra short throw projector’s image felt more immersive with richer sound. For outdoor setups, look for weatherproof options or wireless soundbars that sync seamlessly with your projector.
Position Your Speakers Strategically
Sometimes, the placement of your speakers makes all the difference. Place them at ear level and aim them towards your seating area to maximize sound reach. Use stands or mount them on nearby walls for optimal dispersion. In my experience, during a backyard movie, simply elevating a portable speaker on a chair increased volume and clarity without adding extra equipment.
Optimize Your Projector’s Settings and Environment
Ensure your projector’s audio settings are configured for maximum output and that no mute or low-volume modes are enabled. Also, eliminate echo and background noise by choosing a quiet environment or adding soft furnishings. At a recent outdoor movie, I realized that placing a foam panel behind the projector reduced echo, making the sound seem louder and more natural. Combining this with external audio solutions creates a superior viewing experience.
Explore Ultra Short Throw Projectors with Built-In Speakers
Some ultra short throw projectors now come equipped with powerful built-in speakers designed for small spaces and outdoor use. While they don’t match dedicated audio setups, they offer a convenient, tidy solution. I tested a few in my backyard and found that models like the best portable UST laser projectors with enhanced integrated sound performed surprisingly well in limited outdoor areas. For larger spaces or higher volume needs, pairing them with external speakers is advisable.
Keep Your Sound Gear Maintained and Upgraded
Finally, regularly check your equipment for dust, loose connections, or aging batteries that can reduce volume or clarity. Upgrading to newer, more powerful speakers or amplifiers ensures consistent, loud, high-quality sound. I found that replacing my old Bluetooth speakers with newer models significantly improved outdoor audio performance. Always match your equipment specs with the size of your venue for best results.
Remember, the key to amplifying your portable projector’s sound lies in a combination of proper connections, strategic placement, and quality gear. Tackle each step methodically, and you’ll be surprised how much richer your viewing experience becomes, even in outdoor environments once considered challenging.
 Many enthusiasts believe that selecting the latest ultra short throw or laser projector guarantees superior performance, but the truth is more nuanced. For instance, a frequent myth is that newer models automatically deliver better brightness or clarity without considering ambient lighting conditions and screen quality. In reality, even high-end projectors can underperform if not paired with appropriate screens or if improperly calibrated. Moreover, many overlook the importance of placement and environmental factors; a common mistake is assuming that positioning doesn’t influence image quality, when in fact, incorrect angles or distances can cause distortion or black borders. Critics also often highlight refresh rates and latency for gaming, but few realize that some projectors sacrifice input lag for richer color profiles, which might not suit fast-paced gameplay. This trade-off can adversely affect your viewing experience, especially if you’re unaware of the specifications that matter in your specific use case.
One advanced aspect often ignored is the difference between brightness measurements—lumens versus ANSI lumens—which impacts performance in daylight settings. Manufacturers might boast high lumen ratings, but these numbers can be misleading if not understood properly. For example, a projector with 3,000 lumens might perform better outdoors than one claiming 4,000 lumens but lacking in contrast ratio or color accuracy. According to experts from Home Cinema Essentials, evaluating actual performance in real-world scenarios is critical.
Additionally, many users fall into the trap of focusing solely on resolution—such as 4K—while neglecting optics and lens quality. A good lens can make a substantial difference in image sharpness and uniformity, especially in ultra short throw setups where distortion is more evident. If your projector’s lens isn’t of high quality, it can create wavy or wobbly images, which annoy even experts. This demonstrates the importance of understanding the components that contribute to image fidelity beyond just resolution.
For those aiming to optimize their home theater experience, paying attention to calibration, environmental factors, and matching your projector’s specs with your room’s size can make a big difference. Remember, a projector is only as good as its setup. For detailed insights on choosing the right 4K projector or brightening techniques in challenging lighting, check out this ultimate buying guide.
Are you currently falling into any of these common traps? Share your experiences in the comments—let’s debunk these myths together!
Maintaining your home theater setup, especially when working with advanced projectors like laser, 4K, or ultra short throw models, requires more than just initial setup. I’ve found that investing in the right tools and following a disciplined maintenance routine significantly extends your projector’s lifespan and ensures pristine image quality over time. Today, I’ll share the specific tools I rely on and best practices to keep your projector running smoothly in the long term.
How do I maintain my projector’s performance over time?
First and foremost, regular cleaning is crucial. Compressed air cans are my go-to for removing dust from vents and optical components. I prefer a high-quality, brushes specifically designed for optics to gently clear lens surfaces without scratching. I use a microfiber cloth for external surfaces, ensuring no lint is left behind. For fiber optic cleaning, I opt for special cleaning swabs to maintain clarity. These steps prevent dust buildup that can cause overheating or image dimming, especially in laser or 4K projectors where clarity is non-negotiable.
In addition, software calibration tools such as professional colorimeters help fine-tune color accuracy and uniformity, which is especially vital for ultra short throw projectors meant for cinematic experiences. For example, a quality calibration device can identify color drifts and brightness inconsistencies, prompting targeted adjustments that preserve image fidelity day after day.
Proper environmental management plays a role too. I recommend investing in a reliable air purifier with HEPA filters to reduce airborne dust in the room, combined with dehumidifiers in humid climates. These tools prevent mold and dust accumulation on your projector’s internal components, which can ultimately degrade performance.
What specialized maintenance tools can prolong my projector’s life?
For those with high-end laser or 4K projectors, I suggest having a maintenance kit that includes lens cleaning wipes, air dusters, and optical cleaning solutions approved by the manufacturer. Some models benefit from periodic interval checks of cooling fans and filters—here, a small vacuum or brush kit can be invaluable to clear any obstructions or dust that have settled over time. Monitoring software, available via manufacturer apps, provides diagnostics and alerts that help preempt failures before they happen.
Looking ahead, the trend in projector maintenance points toward smarter, integrated diagnostics. Predictive maintenance via IoT-enabled sensors might soon warn us when filters need replacement or when internal components are nearing failure, similar to smart home systems. This proactive approach minimizes downtime and surprises, ensuring your viewing experience remains uninterrupted.
Don’t overlook the importance of keeping firmware updated, either. Manufacturers release updates that fix bugs, improve picture stability, and enhance features—consider scheduling monthly checks as part of your routine.
As a final tip, document your calibration and maintenance routines. Keeping a log not only helps track your setup’s health but also builds a reference for future troubleshooting and upgrades.
Implementing these tools and practices will elevate your projector maintenance strategy, ensuring high-quality viewing through years of use. If you want actionable insights, try using a calibration device like the premium colorimeter. Remember, the key to long-term performance is vigilance and investment in the right tools. Regular care today saves costly repairs tomorrow.
< >
>
Advanced maintenance like firmware keeps your laser or 4K projector in peak condition, but it’s essential to understand your specific model’s needs. For ultra short throw projectors, pay close attention to their lens and alignment mechanics—precision tools like alignment gauges can help achieve perfect image geometry, avoiding distortions and black borders. When paired with proper cleaning, these efforts ensure your setup stays visually stunning. With upcoming innovations, expect to see more integrated diagnostics in high-end models, making maintenance even more straightforward and predictive. Stay ahead of the curve by regularly visiting your manufacturer’s support page and applying updates promptly.
In conclusion, consistent maintenance—using the right tools, environmental controls, and software calibration—is a cornerstone of long-lasting projector enjoyment. Don’t wait for issues to arise; be proactive and you’ll enjoy theater-quality visuals for years to come. For in-depth guidance, I recommend exploring this comprehensive buying and maintenance guide that covers the latest trends and tools for preserving your setup.
,
Lessons That Changed How I Approach Projector Performance
- My biggest eye-opener was realizing that even a top-tier 4K projector needs the right sound setup to truly shine. I used to rely solely on built-in speakers, but upgrading to external audio transformed my viewing experience, especially outdoors.
- Understanding environmental influences was a game-changer. Soft furnishings and strategic speaker placement made a noticeable difference in clarity and volume, proving that setup often beats hardware specs in importance.
- Overly focusing on resolution or lumens can be misleading. I learned to evaluate performance based on real-world conditions, including ambient light and screen quality, which are equally critical for an immersive experience.
- Regular maintenance and calibration, especially with advanced laser and 4K models, prevent performance dips and extend device lifespan. Investing in quality tools like colorimeters has paid dividends in image fidelity.
- My most valuable insight was that a well-calibrated, environment-optimized setup can often outperform expensive equipment in less-than-ideal conditions. It’s about making informed choices and attentive adjustments rather than maxing out specs blindly.
My Secret Weapon Arsenal for Perfecting Portable Projection
- The [ultimate 4K projector buying guide](https://projectors.homecinemaessentials.com/ultimate-4k-projector-buying-guide-for-movie-nights) has been a staple, offering detailed insights into pairing the right projector with your environment and needs.
- Trusted calibration tools like high-precision colorimeters from reputable brands have helped me achieve consistent color accuracy, crucial for cinematic color grading and gaming.
- Weatherproof, wireless, and high-lumen portable speakers and soundbars from brands I trust ensure my outdoor setups are loud and clear without fuss.
- Environmental enhancements—like soft furnishings, strategic placement tools, and ambient light control accessories—are my go-to for creating a premium, theater-like atmosphere.
Charge Forward: Elevate Your Portable Projection Journey
Embarking on mastering portable projectors means embracing continuous learning and experimentation. Whether you’re refining your outdoor cinema or perfecting a dedicated home theater, remember that the right setup, maintenance, and mindset unlock the full potential of your equipment. Keep exploring new tools, stay curious, and turn your space into a captivating visual sanctuary. Your journey towards extraordinary projection experiences starts today—so go ahead, set your sights high and bring your vision to life!
What’s been your biggest challenge in enhancing your projector’s sound or picture quality? Drop your stories below and let’s learn together!
,