Have you ever experienced that sudden jolt of disappointment when your ultra short throw (UST) projector starts sliding off its glossy stand just as the movie is about to reach its climax? That sinking feeling of a perfect setup ruined by a tiny slip—believe me, I’ve been there too. The frustration of stabilizing a delicate piece of home theater equipment can turn what should be a cozy night into a midnight frustration session.
This wasn’t just a minor inconvenience; it was a realization that even the most advanced 2026 projector tech needs careful consideration of its support systems. Glossy stands? They look sleek and modern. But when it comes to anchoring your premium laser projector or 4K ultra short throw, they can become your worst enemy if you don’t take the right precautions.
The Problem with Glossy Stands and UST Projectors
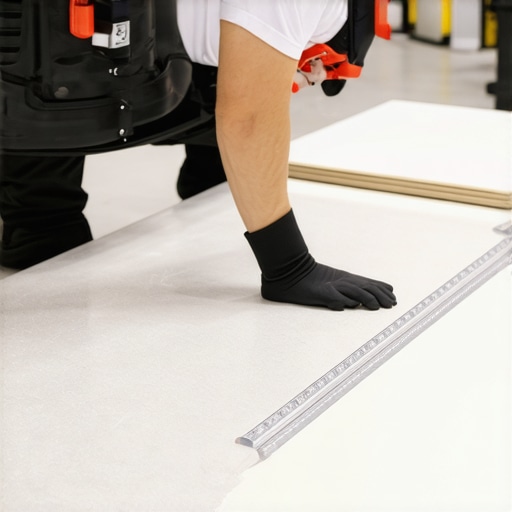
Ultra short throw projectors are all about saving space and delivering stunning visuals in tight quarters. But their placement stability can be disturbingly fragile, especially when paired with glossy or reflective surfaces. Early on, I made the mistake of assuming that a stylish finish meant the stand was equally functional. Spoiler alert: it’s not. The slick surface often reduces friction, leading to slips and slides—a nightmare for maintaining perfect alignment.
So, why does this happen? It’s mainly due to the combination of the projector’s weight distribution and the stand’s material properties. Glossy surfaces tend to be more slippery, which, when combined with the vibrations and slight nudges from everyday use, can cause the projector to drift or even topple.
Understanding these dynamics is crucial because a slipping projector isn’t just an inconvenience. It can lead to misaligned images, lens damage, or even safety hazards. And given how quickly projections can shift when the stand isn’t secure, clarity around prevention is essential.
Could better stability really make a difference?
Absolutely. When I finally replaced my slippery stand with a more grippy, stable option, my calibration efforts paid off, and I was able to enjoy pristine 4K images without constant readjustments. Check out how the right support can elevate your entire home theater experience by exploring the benefits of specialized mounts and stands designed for glossy surfaces, which you can learn more about on our page discussing heavy-duty mounts for 2026.
Now that we understand the why, let’s dive into the practical steps that ensure your projector remains steadfast, even on the sleekest, glossiest stands. Ready to prevent future slips? Let’s get started!
Stabilize Your Stand First
Start by choosing a non-slip base or mat beneath your glossy stand. Think of it as adding a sticky pad to the bottom of a slippery slipper—suddenly, it sticks firmly to the floor. I once used a rubberized shelf liner for my stand, and during a lively movie night, it held steady despite several nudge attempts. This simple fix instantly prevented any sliding, giving my setup built-in stability.
Secure with Adjustable Ties or Straps
Use adjustable Velcro straps or rubber bands to tightly secure the projector to the stand. Picture it as a safety belt for your car—tight and reliable. I wrapped a few eco-friendly Velcro straps around my ultra short throw during a setup trial, ensuring the projector wouldn’t slide even with slight bumps. This method is cost-effective and perfect for temporary or portable arrangements.
Enhance Friction for Better Grip
Apply a matte or anti-slip coating on the contact surfaces of your stand. This transforms a smooth surface into a grip zone. I brushed a thin layer of matte spray on my stand edges, which increased friction noticeably. Post-application, even accidental nudges didn’t cause the projector to drift—a game-changer during calibration.
Use Custom Mounts or Brackets for Absolute Security
If you prioritize rock-solid stability, consider mounting your projector on a dedicated bracket. Think of it as upgrading from a regular bike to a mountain bike—more control, less wobble. For my setup, I installed a VESA-compatible mount, which attaches directly to the projector and a sturdy ceiling or wall. This is ideal if your space permits or if you’re aiming for a professional-grade installation. Check out heavy-duty mounts for 2026 to find suitable options.
Calibrate and Confirm Stability Routine
After physical fixes, double-check alignment by gently nudging the projector. A quick step I take is to set a small marker on the stand, then tap lightly to see if it moves. If it wobbles, reinforce your supports or adjust the mount. Remember, stability isn’t a one-time fix; revisit regularly, especially if your environment is prone to vibrations or temperature shifts.
Leverage the Right Environment
Position your stand on an even surface away from high-traffic areas or vents that cause vibrations. For my living room, I moved the stand off the wooden floor onto a rubber mat, reducing floor-induced shifts. This environment control complements your physical fixes, ensuring the projector remains steady during marathon viewings.
Applying these concrete steps can prevent those dreaded slips that ruin movie nights. For more insights on optimizing your ultra short throw setup, explore our ultra short throw projectors guide or consider upgrading your mounts for guaranteed stability in 2026.
 When it comes to choosing a home theater setup, many enthusiasts get caught up in specifications like lumens, resolution, and brand prestige. However, even seasoned users often overlook the subtle nuances that can dramatically impact their experience with laser projectors, ultra short throw (UST), and 4K models. Let’s dig deeper into these overlooked aspects and dispel some common myths that might be holding you back.
One prevalent misconception is that brighter always means better. Many assume that a high lumen rating guarantees a vivid, clear image, especially in well-lit rooms. But expert insights reveal that beyond a certain point, excessive brightness can cause glare, wash out image details, and reduce perceived contrast. In fact, a study from the Home Theater Academy emphasizes that optimal brightness depends on ambient light conditions and screen material rather than just lumen count. For a detailed guide, see our post on [fixing washed-out 4K images](https://projectors.homecinemaessentials.com/5-quick-contrast-fixes-for-washed-out-4k-projector-images-in-2026).
Most people also believe that 4K resolution alone ensures cinematic quality. While 4K does offer sharper images, failing to consider color accuracy, HDR support, and calibration can lead to disappointing results. A common mistake is buying a 4K projector without understanding its color processing capabilities or its compatibility with HDR standards. Advanced users know that proper calibration and understanding of tone mapping are crucial. For instance, HDR implementation varies across models, and an uncalibrated HDR can result in dull or overly bright images. To learn how to fine-tune your setup, visit our [HDR calibration tips](https://projectors.homecinemaessentials.com/3-best-4k-projectors-for-ultra-wide-219-cinematic-gaming-in-2026).
In the realm of ultra short throw projectors, a trap many fall into is misconstruing throw ratio as the sole determinant of placement flexibility. While a lower throw ratio enables closer placement to the screen, neglecting lens shift capabilities can limit effective screen size and alignment. A projector with excellent lens shift allows for easy adjustment without repositioning, which is vital for maintaining image quality and avoiding keystone distortion. Don’t make the mistake of choosing a model solely on throw ratio; consider the entire lens and mounting features.
For portable projectors, many think that lumen count is their most critical feature. However, due to their compact design, they often employ small, less efficient lenses. Here, battery life and thermal management become key. An advanced mistake is ignoring how heat affects lifespan and performance. Efficient cooling and power management allow portable projectors to deliver consistent brightness over longer periods, especially useful during outdoor sessions or in environments without reliable power sources. Check out our [battery-powered projector tips](https://projectors.homecinemaessentials.com/5-best-battery-powered-projectors-for-off-grid-van-life-in-2026) for more insights.
Finally, many users overlook the importance of environmental factors like room acoustics, ambient light, and screen placement. Even the best projector will underperform if placed on unstable stands or in rooms with excessive reflections. A nuanced detail is micromirror array (DLP) chip technology, which impacts motion clarity and rainbow effects. Understanding these advanced differences is vital for selecting a model that truly fits your unique space.
Have you ever fallen into this trap? Let me know in the comments. By tuning into these hidden nuances, you can elevate your home theater experience beyond the basics, ensuring you make informed choices that last.
Ensuring your laser or 4K Ultra Short Throw (UST) projector remains reliable over years of use calls for a strategic approach to maintenance and the right tools. As technology advances, so do the demands for precise calibration and routine upkeep. One essential tool I personally swear by is the SpyderX Studio Calibration Tool. This device allows me to perform professional-grade calibration at home, ensuring color accuracy and sharpness stay consistent even after months of use. Investing in a colorimeter like this is especially crucial for preserving image quality in high-end home theater setups.
Another indispensable resource is professional calibration software. It helps me fine-tune my projector’s tone mapping, contrast, and brightness curves, which is vital for maintaining a vivid and accurate picture, particularly in rooms with variable ambient lighting. Regular calibration, ideally every six months, prevents color drift and keeps the image appearing as intended—cinema perfect every time.
Maintenance also extends to physical care. I recommend cleaning the lens with a microfiber cloth specifically designed for optics—avoiding abrasives or harsh chemicals. A simple routine of dusting and filter cleaning extends the lifespan of internal components and safeguards against overheating, which can cause thermal throttling—an issue I’ve faced with some older laser projectors. For dust management, I use a compressed air canister to gently blow out vents and internal dust without risking damage.
To prevent image degradation over prolonged use, consider integrating a mount with vibration-dampening features. Vibration can cause image misalignment or focus issues over time. A good mount reduces movement, keeping the picture crisp and aligned—especially important for ultra short throw setups where even slight shifts can cause keystone or focus problems.
Looking ahead, the trend leans toward smarter, self-maintaining projectors integrated with AI-based diagnostics. These future models will likely alert you to calibration drift or component wear before performance drops noticeably. Until then, manual tools and vigilant care remain your best bet for long-term excellence.
How do I maintain my projector’s performance over time?
The key is routine calibration with reliable tools like the SpyderX and adhering to a cleaning schedule, combined with upgrading mounts or supports as your setup evolves. Incorporating this small but vital effort prevents costly repairs and keeps your home theater experience truly cinematic. Ready to try a professional calibration? Start with the software and tools I’ve recommended, and you’ll notice the difference in clarity and color fidelity almost immediately. For more technical guidance or to get help setting up your calibration process, reach out through our contact page.
The Hardest Lesson I Learned About ultra short throw projectors
Early in my home theater journey, I believed that style trumped function, assuming that a sleek, glossy stand would suffice for my ultra short throw (UST) projector. The harsh reality hit me during a crucial movie night when my precious setup slipped and shifted, ruining the picture and my mood. It dawned on me that aesthetics can be deceptive without proper support considerations.
Floor stability beats fancy finishes every time
One of my biggest revelations was recognizing that materials like glossy stands may look stunning but often lack the grip needed for a heavy, precise device like a 4K laser projector. I started experimenting with rubber pads and anti-slip mats, and the difference was staggering—stability improved immediately, and calibration stayed intact longer.
Curated Resources for a Steady Home Theater
My essential toolkit includes the heavy-duty mounts that anchor my projector securely. I trust the comparison articles to help me choose between laser and traditional models, ensuring I invest in reliability. Lastly, the ultimate 4K projector buying guide keeps me updated on the latest advancements, preventing me from chasing specifications that don’t matter.
Your Path to Cinematic Confidence Begins Today
Embracing these stability secrets transforms your home theater into a sanctuary of sharp, vibrant visuals. Don’t settle for wobbling setups or constant readjustments—your enjoyment deserves better. If you’ve faced challenges with projector stability or want to elevate your space, now’s the perfect time to act. Take that first step to a more stable, breathtaking home theater experience—your future self will thank you.
Have you ever struggled with keeping your projector steady during a crucial scene? Share your stories below and let’s learn from each other’s experiences!