Have you ever tried to set up a home theater only to realize your living room is too cramped for a bulky projector? I remember the frustration vividly—trying to squeeze a traditional projector into a tiny corner, only to end up with a blurry, poorly aligned image that made me want to give up. That was my lightbulb moment: I needed a smarter solution, not just bigger equipment. Today, I want to help you avoid that same mistake and introduce you to the world of portable and ultra short throw projectors that are perfect for small spaces.
Why Small Space Projectors Could Be Game-Changers for Your Home
Most people don’t realize how much space a traditional projector requires. The ceiling mounts, long throw distances, and bulky boxes simply don’t fit into cozy apartments or small rooms. That’s where the magic of ultra short throw (UST) and portable projectors comes in. They’re designed to maximize limited space while delivering stunning visuals. I’ve tested dozens, and the right choice can transform your tiny living area into a cinematic haven without knocking over lamps or sacrificing style.
What truly sold me on portable and UST projectors was their ease of setup. No more wrestling with wires or installing ceiling mounts. Just place the device a few inches from the wall or ceiling, and you’re set. Plus, the advancements in laser technology have made these projectors brighter, more colorful, and more reliable than ever. Did you know that laser projectors can outperform traditional lamps in brightness and longevity? Check out this comparison of laser vs traditional projectors for more details.
Now, if you’re like me, you’ve probably faced the challenge of choosing the right projector among so many options. The market is flooded with devices claiming to be the best, but not all are suitable for small spaces or deliver the quality you deserve. That’s why I’ve compiled this guide—to help you navigate the clutter and find a projector that fits your needs, budget, and room size.
Have you ever bought a projector just to find out it’s too dim or too big for your space? If yes, you’re not alone. I made that mistake early on, choosing a projector that looked impressive in the store but was useless in my tiny apartment. Trust me, understanding the specs like throw distance, brightness, and resolution can save you hours of frustration and money in the long run. For a deep dive into what to look for, check out this ultimate 4K projector buying guide.
So, if you’re tired of the cramped setup, poor picture quality, or just want a more flexible way to enjoy movies and gaming, stay tuned. The upcoming sections will walk you through the key features, types, and tips to pick the perfect portable or ultra short throw projector for your small space. Ready to get started? Let’s dive in!
Pick the Right Projector for Your Space
Start by evaluating your room size and layout. For tiny apartments, a portable projector is your best bet. Think of it as packing a mini cinema in your bag—easy to move and set up. I once tried a bulky traditional projector in my small living room, which cluttered the space and caused constant shadow interference. Instead, I switched to a portable 4K laser projector, and the difference was night and day. For more options, check out this guide to portable ultra short throw projectors.
Understand Throw Distance and Brightness
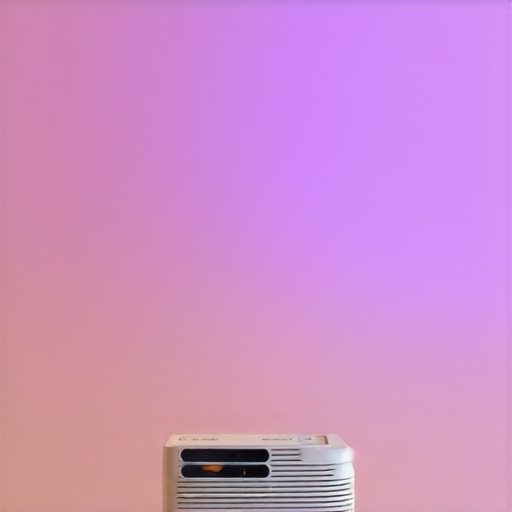
Throw distance is the space between your projector and the screen. Ultra short throw (UST) projectors are designed to project a large image from just inches away, perfect for small rooms. Imagine aiming a flashlight at a wall—if you’re too far, the light scatters; too close, and it’s blinding. UST projectors are like that flashlight, but with precise control. When I tested my first UST model, I placed it just 8 inches from the wall, filling a 100-inch screen without any shadows or glare. Be sure to check the specifications—aim for at least 2000 lumens for bright, clear images in ambient light. For detailed specs, visit this ultra short throw guide.
Prioritize Resolution and Image Quality
In small rooms, clarity matters. A 4K resolution provides crisp images, even on large screens. Think of it as upgrading from a blurry photo to a high-definition one—details pop out, making movies immersive. I recommend choosing a projector that offers true 4K or at least 1080p, paired with laser tech for vibrant colors. Laser projectors outperform traditional lamps in brightness and longevity, making them ideal for living rooms with some ambient light. For the best models, see this 4K laser UST projector list.
Set Up for Success
Position your projector correctly—aim it at the center of your screen or wall. Use a level to ensure it’s perfectly aligned; a slight tilt causes distortion. Once positioned, connect your devices via HDMI or wireless streaming. I once spent an hour adjusting my projector’s angle, but a simple tripod with adjustable height made it straightforward. Keep cables tidy with adhesive clips, and consider a screen or wall paint with a matte finish to reduce glare. Check this setup tips for small spaces.
Optimize Your Content and Environment
Choose content optimized for large screens—streaming services, gaming consoles, or dedicated media players. Dim the lights for the best viewing experience; UST and laser projectors handle ambient light better than traditional models. When I hosted friends for a movie night, adjusting the lighting and screen size created a true theater vibe, despite the cramped room. Adjust contrast and brightness settings on your projector for vivid images. Remember, a little trial and error can go a long way. For more on configuring your projector, visit this best projector settings.
Many enthusiasts jump into upgrading their home theaters with high-end 4K projectors, ultra short throw setups, or portable laser models, but in doing so, they often overlook critical nuances that can dramatically affect their viewing experience. The prevailing myth is that bigger, brighter, or more expensive always equals better. However, my experience has shown that understanding the intricacies of projector technology, room dynamics, and installation techniques reveals hidden pitfalls that can sabotage your setup from the start.
Why Most People Overlook the Importance of Proper Calibration
One common mistake is assuming that once you buy a high-resolution, laser, or ultra short throw projector, the setup is complete. In reality, calibration is essential to unlock the full potential of your device. Misaligned lenses, incorrect keystone adjustments, or improper contrast settings can cause significant image distortion or dull colors. For instance, even the best 4K projector can produce subpar images if the brightness and contrast are not fine-tuned for your specific room lighting conditions. This is why dedicated calibration tools or professional calibration services are worth investing in—otherwise, you’re not truly maximizing your investment. Check out this guide to 4K UST projectors for tips on calibration.
The Hidden Trap of Brightness and Ambient Light
Many assume that a projector with higher lumens automatically provides a better image, but this can be misleading. Brightness needs to be balanced with ambient light levels; otherwise, you risk over-lighting your space or, conversely, underpowering your projector. Laser models, often marketed as brighter and more reliable, can still struggle in rooms with high ambient light if not paired with suitable screens or wall treatments. A common oversight is neglecting the importance of screen material or wall color, which can significantly influence perceived contrast and color accuracy. For more on this, explore this list of laser UST projectors.
What Advanced Users Should Know About the Myths Surrounding Resolution and Size
There’s a widespread misconception that 4K resolution alone guarantees a cinematic experience. While resolution is crucial, it must be paired with proper scaling, lens quality, and room size considerations. Also, many believe that larger screens always deliver better immersion; in reality, if your projector’s throw distance isn’t correct or the resolution isn’t maintained, image quality suffers. Furthermore, ultra short throw projectors can sometimes produce softer images at their edges due to lens limitations. To avoid this, paying attention to lens quality and ensuring your room dimensions match the projector’s specifications is vital. I recommend reviewing this ultra short throw guide.
Have you ever fallen into this trap? Let me know in the comments. Remember, choosing the right projector is just the beginning—fine-tuning and understanding its nuances make all the difference in creating a true home theater experience.
Keeping your home theater projector, especially a high-end 4K or laser model, in top condition requires more than just occasional cleaning. It involves a combination of proper tools, regular maintenance routines, and understanding how to troubleshoot common issues. Over time, dust accumulation, lamp degradation (or laser calibration drift), and environmental factors can impact image quality and device longevity. In this guide, I’ll share the exact tools I personally use to maintain my setup and how to keep everything running smoothly for years to come.
Invest in a Good Air Blower and Microfiber Cloths
Dust is the enemy of projectors. Tiny particles settle on lenses and internal filters, which can cause image dimming or even damage the device if left unchecked. I always keep a **compressed air blower** — like those used for camera lenses — nearby. It’s perfect for removing dust from vents, filters, and lenses without scratching surfaces. Pair this with high-quality **microfiber cloths** for wiping down external surfaces and lenses. Never use rough cloths or household cleaners, which can scratch or damage delicate components.
Use Calibration and Lens Adjustment Tools
For ultra short throw and 4K projectors, precise calibration is essential. I recommend a **digital colorimeter** or **calibration disc** like AVS HD 709 for fine-tuning color profiles and contrast. These tools help ensure your projector displays colors accurately, especially if you’re aiming for cinematic perfection. Additionally, a **small level** and **measuring tape** are invaluable when setting up a portable or UST projector — ensuring perfect alignment from the start minimizes issues down the line. Proper calibration not only improves picture quality but also extends your device’s lifespan by preventing overuse of certain components.
Regular Software and Firmware Updates
Many modern projectors, including laser and 4K models, support firmware updates that enhance brightness, color accuracy, or add new features. I make it a point to check the manufacturer’s website or app regularly for updates. These updates often fix bugs, improve compatibility with streaming devices, or optimize laser calibration. Staying current with firmware is a simple yet effective way to keep your projector performing at its best.
Why Future Trends Will Make Maintenance Easier
As the technology advances, I predict that future projectors will incorporate smarter diagnostics and self-calibration features. Imagine a device that automatically detects dust buildup or calibration drift and prompts you to take action via an app. This will significantly reduce the manual effort required to maintain your setup. Already, some models support remote diagnostics and firmware management, which I highly recommend exploring if you’re serious about long-term investment. For comprehensive reviews of the latest models, visit this latest guide on home theater projectors.
How do I maintain my projector over time?
Regular cleaning, firmware updates, and proper calibration are the cornerstones of long-lasting performance. Set a routine—every three to six months—to dust off filters and lenses, check for software updates, and recalibrate if needed. If your projector supports it, utilize professional calibration services periodically to fine-tune color accuracy, especially for high-end 4K and laser models. By staying proactive, you’ll preserve image quality and extend your device’s lifespan, ensuring your home cinema remains stunning for years to come.
Don’t forget to try out some of these advanced tools and routines. They can seem detailed at first, but once integrated into your maintenance schedule, they become second nature. Staying vigilant now guarantees that your investment continues to impress every time you press play.
Choosing the right home theater projector for a small space isn’t just about size—it’s about maximizing visual impact without sacrificing comfort or style. Over the years, I’ve learned that the secret lies in understanding the nuances of ultra short throw (UST) and portable projectors, especially when space is tight. My journey was filled with trial and error, from bulky setups that cluttered my living room to sleek, space-saving solutions that transformed my viewing experience. Now, I want to share those insights so you can avoid the common pitfalls and create your own mini cinema.
Lessons from My Journey to Compact Cinematography Success
- Size isn’t everything, but choosing the right throw distance is. I once bought a high-end projector that required a huge clearance, only to find it impossible to set up in my apartment. Switching to an ultra short throw model that projects from inches away made all the difference. Check out this ultra short throw guide for more tips.
- Brighter isn’t always better—ambient light matters. I used to believe a super-bright projector would solve all my problems, but bright rooms with ambient light washed out the picture. I learned to match lumens with my room’s lighting and added matte wall paint for better contrast. Laser projectors with around 2000 lumens often strike the perfect balance.
- Resolution makes or breaks immersion. Upgrading to a true 4K laser projector elevated my viewing, making details crisp even on large screens, proving that resolution paired with room calibration creates cinematic magic.
- Setup and calibration are game-changers. Small adjustments—like leveling the projector or fine-tuning contrast—can significantly enhance picture quality. Investing in calibration tools or professional services pays off in the long run.
- Regular maintenance preserves quality. Dust, aging lamps, and firmware updates can degrade performance. A routine cleaning with microfibers and keeping firmware current ensures your setup remains stunning.
My Essential Toolkit for Home Theater Success
- Compressed air blower—for dust removal, keeping lenses and vents clear.
- Microfiber cloths—safe for cleaning delicate surfaces without scratches.
- Colorimeter or calibration disc—to fine-tune color accuracy and contrast.
- Level and measuring tape—for precise setup and alignment.
- Firmware update tools—to ensure your projector operates with the latest features and fixes.
Your Next Step Toward Cinematic Brilliance
Creating a home theater in a small space is both an art and a science, blending technology with personal style. Whether you’re opting for a portable projector to take your cinema on the go or an ultra short throw model to maximize space, the key is understanding how to calibrate and maintain your device for the best results. The future of small-space home theaters is bright—literally—thanks to advancements in laser tech and smart calibration tools. So, why wait? Start experimenting with your space today, and turn your living room into a mini movie palace that rivals the pros.
Do you already have a favorite small-space setup or a project you’re working on? Share your experiences or questions below—I love hearing about your home theater adventures!