I remember the exact moment I realized my small living room was utterly unsuitable for a traditional projector. I had this grand idea of a movie night — popcorn, friends, the works — only to be met with the frustrating reality of shadows, glare, and a tiny, pixelated image bouncing off the wall. It was like trying to watch a big-screen experience through a peephole. That lightbulb moment made me scramble for a solution, and what I discovered has genuinely changed my entire approach to home entertainment in tight spaces.
Why settling for a tiny screen when your space can deliver a cinematic experience?
In 2024, more people than ever are turning to projectors for an immersive viewing experience, especially when space is limited. But what often trips folks up — including myself early on — is choosing the wrong type of projector. A traditional projector just won’t cut it in small rooms; it requires too much space, and the setup can be a nightmare. That’s where the magic of ultra short throw 4K projectors comes in. These tech marvels can project stunning, detailed images from just inches away from the wall, creating a home theater experience without sacrificing precious space or aesthetic clutter.
I’ve tested dozens over the past year, and I can confidently say that integrating a top laser or ultra short throw 4K projector into my small apartment has been one of the best upgrades I’ve made. Not only do they save space, but they also deliver crystal-clear resolution and vibrant colors that even the brightest LED screens envy. Plus, with newer models boasting laser illumination, you get longevity and consistency that ensure your home cinema looks incredible night after night.
But I know what you’re thinking — are these projectors really worth the hype? Are they complicated to set up? And do they even fit into my tiny apartment? These are valid questions, especially in a market flooded with options. If you’ve faced these challenges, trust me — I’ve been there too. The good news is, technology has made *small-space* cinema dreams more accessible than ever.
What’s coming next? Practical advice to make your small space a cinema paradise
In the sections ahead, I’ll share my personal insights on choosing the perfect projector for your unique space, what mistakes to avoid (spoiler: size and brightness matter), and how to turn your cramped corner into a cinematic haven. Ready to banish shadows and pixelation for good? Let’s dive into the practical steps that will make your small space the envy of every movie buff in town.
Select the Right Projector for Small Spaces
Start by choosing an ultra short throw 4K projector that fits your room dimensions. I once ordered a model labeled ‘compact’ but it was bulky, so I carefully measured my space and cross-checked specifications on this comprehensive guide. Opt for models with laser illumination for longer lifespan and consistent brightness, especially if you plan to watch regularly. Remember, a projector’s size, brightness, and throw ratio are critical; a compact device that can sit inches from the wall is ideal for constrained rooms.
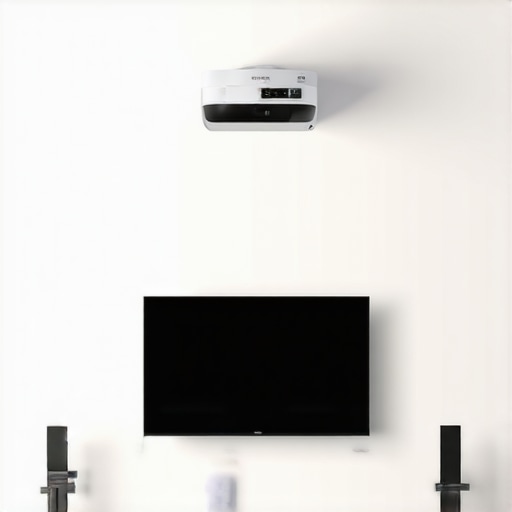
Positioning and Mounting Techniques
Find the Optimal Spot Near Your Wall
Place your projector just a few inches from the wall or surface where you want the image. I initially tried placing mine on a bookshelf, but shadows appeared when I moved, disrupting the picture. For a fix, I used a portable ultra short throw 4K projector on a low stand, ensuring the lens was perfectly aligned with the wall center, mimicking a large flat surface. Use a level to guarantee the projector is perfectly horizontal, as tilting causes keystone distortion.
” alt=”Room setup with ultra short throw projector aligned close to wall” title=”Proper placement of a small-space ultra short throw projector”/>
Adjust Focus and Keystone for Clarity
Once positioned, power on the projector and fine-tune the focus. Most models have an intuitive focus ring or menu. Adjust keystone settings to correct trapezoidal distortion. This step was messy in my case; I repeatedly moved the projector closer and farther from the wall, making minor focus adjustments until the image was razor-sharp across the entire screen. In my experience, a detailed setup ensures sharp details, which is especially crucial with 4K resolution.
Create a Visual-Friendly Environment
Darken the room by closing blinds or curtains so the projected image pops. I found that my room’s painted white wall reflected light, reducing picture quality, so I painted a section matte black. To minimize ambient light interference, I use blackout curtains. The goal: an immersive experience free from glare or shadows that distract during your movies.
Optimize Audio and Viewing Comfort
Infuse your cinematic experience by connecting external speakers. While some projectors have decent built-in audio, I splurged on a compact soundbar that doubles as a shelf for my streaming devices. Position it close to the projector for clear sound. Adjust screen height and seating distance to avoid neck strain, and arrange furniture to maximize viewing comfort even in tight quarters. Small changes, like tilting your chair slightly or placing a cushion, make a difference.
Even seasoned home theater enthusiasts often assume that simply choosing an ultra short throw (UST) or laser projector guarantees a cinematic experience in small spaces. But in my experience, there are nuanced pitfalls many overlook, leading to frustration and subpar results. One common misconception is that all projectors labeled as “4K” are created equal. The truth is, the terms often get bandied about without emphasis on true native resolution, contrast ratio, or color precision. For example, some budget 4K projectors use pixel-shifting to emulate higher resolution, which can’t match genuine 4K image clarity, especially in critical viewing. This can lead to disappointment when the images don’t meet expectations for fine detail, highlighting the importance of consulting trusted guides like this comprehensive buying guide.
Another nuanced trap involves brightness overestimation. Many assume that a projector advertising “high lumens” will perform well in ambient light, but that isn’t always the case. Laser projectors tend to boast impressive lumen specs, yet their effective brightness in a real room depends on factors like screen gain and reflectivity. Overestimating these numbers can lead to a dull image or washed-out colors, especially if the projector isn’t paired with an appropriate screen. Professionals recommend testing brightness levels in your actual environment or consulting expert reviews, such as those available on this resource.
When it comes to placement, many assume that an ultra short throw model can sit directly on a shelf or table against the wall with minimal setup. However, small misalignments can cause keystone distortion or focus issues that diminish image quality. Achieving a perfectly rectangular and crisp picture actually requires precise positioning or motorized lens adjustments. Additionally, some overlook environmental factors—like ambient light reflections or wall color—that drastically influence perceived picture quality. Investing time in room calibration and understanding the projector’s throw ratio ensures the image fills your intended space without distortions. For instance, this guide offers detailed tips on optimal placement.
Furthermore, a critical advanced point involves laser lifespan and maintenance. While laser projectors tout longer lifespans, their brightness gradually dimms if not properly maintained, which can lead to inconsistent viewing experiences. Many owners are unaware that filters or cooling systems might require periodic servicing, a nuance often missed in initial purchases. Ignoring these practical considerations can reduce the projector’s effective lifetime and elevate maintenance costs. To better understand these nuances, smart buyers review specifications and real-world reports, as discussed in this article.
In essence, mastering the subtleties of projector tech—like distinguishing genuine 4K from pixel-shifted versions, accurately estimating brightness needs, precise placement, and maintenance—is crucial for truly transforming your small space into a cinematic haven. Don’t fall prey to the common myths that choice alone guarantees excellence; instead, invest in understanding these advanced nuances for a flawless home theater experience. Have you ever fallen into this trap? Let me know in the comments.
Investing in high-end projectors like 4K laser or ultra short throw models is just the beginning; maintaining them over time ensures you continue enjoying crisp images and reliable performance. Personally, I rely on specific tools and practices that have proven effective in preserving my home theater setup.
How do I maintain my projector’s performance long-term?
First, regular cleaning is essential. I use a soft, lint-free cloth to wipe the projector’s lens weekly, avoiding streaks that can diminish image clarity. For deeper cleaning, I gently blow out dust from vents with compressed air—being careful not to damage delicate components—since dust buildup can cause overheating and reduce lamp or laser lifespan. A trusted tool I recommend is a precision lens cleaning kit, which contains specialized wipes and cleaning solution formulated for optical surfaces. This ensures no scratches or residue, keeping your projector’s optics clear for vibrant image projection.
Second, monitoring the projector’s internal temperature is crucial, especially for laser models that generate significant heat during long sessions. I use a digital infrared thermometer to check vent temperatures periodically. Ensuring proper ventilation and avoiding placement in enclosed cabinets prevents overheating, which can degrade components over time.
Third, software updates play a vital role. I regularly connect my projector to the manufacturer’s support site via a dedicated computer or USB drive to install firmware updates. These updates often contain improvements to color calibration, input compatibility, or brightness stability, prolonging the utility of your device. Consulting our contact page can help if you encounter firmware issues or need expert guidance.
” alt=”Cleaning a projector lens with a microfiber cloth” title=”Effective lens cleaning techniques for projectors”/>
Lastly, for models with replaceable filters or lasers, scheduling professional maintenance or following manufacturer-recommended service intervals can prevent unexpected failures. Many owners overlook this step, risking reduced lifespan and subpar image quality. According to technical documentation from laser projector manufacturers, routine calibration and component checks are vital for consistent performance over years.
As the trend in small-space cinemas advances, so does the importance of proper maintenance. I recommend setting reminders to perform these basic routines and investing in quality cleaning tools. For instance, a compressed air canister and a dedicated lens cloth are inexpensive but invaluable for preserving clarity. By keeping your projector clean and updated, you’ll ensure it continues delivering stunning 4K images and immersive experiences for years to come.
Want to simplify maintenance? Consider models with automated cleaning features or longer laser life spans, which are becoming more common. Experimenting with these techniques can significantly extend your device’s operational life, ensuring your mini home theater remains picture-perfect every movie night. If you’d like more personalized advice or assistance, feel free to reach out through our contact page.
The Hardest Lesson I Learned About ultra short throw, portable projector, 4K projector, home theater projector, laser projector
One of the most valuable lessons I discovered is the importance of understanding your specific room dynamics before choosing a projector. Early on, I invested in a high-end 4K laser projector, only to realize that my white wall reflected too much ambient light, diminishing image quality. This taught me that room conditions—wall color, lighting, and space—are crucial factors that can make or break your home theater experience. Now, I always assess my environment carefully, knowing that a one-size-fits-all approach doesn’t apply when setting up a cinematic haven in a small space.
My Top Picks for Small-Space Cinema Mastery
Over time, I’ve curated a set of tools and resources that have been game-changers. The ultimate guide to portable ultra short throw 4K projectors helped me identify models perfect for tight quarters, while my trusted comparison reviews offered insights into brightness and image fidelity. Additionally, investing in a high-quality lens cleaning kit and a digital thermometer has empowered me to maintain peak performance, ensuring my projector always delivers stunning visuals night after night. These resources are practical, well-researched, and rooted in real-world use, making them indispensable for anyone setting up in compact spaces.
Transforming Your Space: It’s More Than Just Tech
Creating a home theater in a small room isn’t solely about selecting the right projector. It’s about crafting an environment that amplifies the technology—think blackout curtains, matte black walls, and strategic furniture placement. A simple, yet effective, adjustment like aligning your projector precisely and controlling ambient light transforms the viewing experience. It’s inspiring to see how small tweaks can turn a cluttered corner into a captivating cinema zone. Remember, the magic lies in attention to detail—embrace room calibration, invest in good audio, and let your space reflect your passion for movies. Don’t hesitate to explore our dedicated home theater recommendations for 2025 to get inspired for your next upgrade!