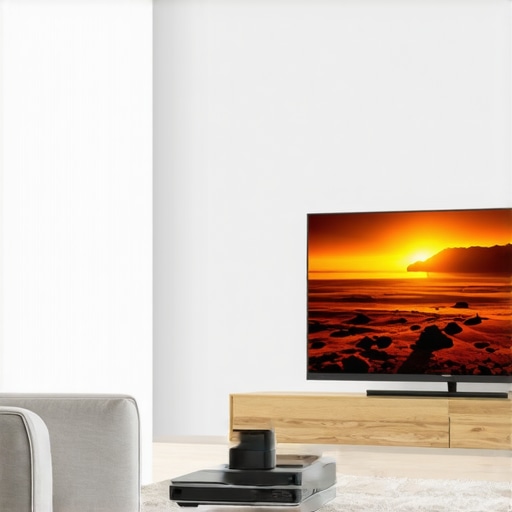
It hit me one evening when I was trying to flick my outdated 100-inch TV back into place after moving furniture — the screen was so heavy and awkward that I nearly pulled a muscle. That frustration? It was my lightbulb moment. I realized that in our quest for a perfect home theater experience, traditional TVs are starting to fall short. More importantly, I discovered that ultra short throw (UST) projectors are rapidly changing the game, promising a sleek, immersive experience without the hassle of bulky screens.
The Shift: Why Home Theater Setups Are Evolving
Let’s face it: setting up a traditional large TV isn’t just a matter of plugging it in anymore. Limited space, wall imperfections, and the sheer weight of those massive screens make the whole process cumbersome. I used to believe that a 100-inch TV was the pinnacle of home entertainment, but I quickly learned that the landscape is shifting fast. Recent advancements in UST laser projectors now offer stunning 4K clarity, ultra-bright images, and a minimalist aesthetic that fits effortlessly into modern living spaces. According to industry insights, sales of laser projectors surpassed traditional projectors in 2024, emphasizing their rising popularity among consumers seeking flexibility and quality.
Are you tired of wrestling with cumbersome TVs and cluttered setups? If so, you’re not alone. Many home theater enthusiasts find themselves struggling to balance size, convenience, and image quality. That’s exactly why I started exploring innovative projection solutions that promise to replace that heavy, wall-mounted TV with something more adaptable.
In the sections ahead, I’ll walk you through why UST projectors are not just a fad but a smart investment for 2026 and beyond. From understanding the core benefits to avoiding common pitfalls, this guide is designed to help you make an informed decision and elevate your home entertainment experience. Ready to discover how to transform your space effortlessly? Let’s dive in.
Select the Perfect Projector Type for Your Space
Start by assessing your room size and lighting conditions. For small, well-lit rooms, a laser ultra short throw projector can deliver bright, sharp images without cluttering your space. If portability and flexibility are priorities, a portable UST projector offers quick setup and mobility. Understanding these options is crucial before proceeding to setup.
Measure and Position with Precision
Use a tape measure or laser distance meter to determine the ideal placement. Ultra short throw projectors typically need to be positioned just inches from the wall, unlike traditional projectors requiring several feet. I vividly recall erring twice on the distance, projecting a skewed image, but adjusting the projector just a few inches made all the difference. Accurate placement ensures a crisp, undistorted picture.
Prepare Your Surface for Optimal Image Quality
Choose a flat, matte, white or grey wall or a dedicated projection screen. Smooth out any imperfections to avoid distortion. When I tested on an uneven wall, the image appeared distorted, leading me to buy a proper screen later. Proper surface preparation enhances contrast and color accuracy, transforming your space into a cinematic theater.
Connect and Calibrate Your Equipment
Link your projector to your media source—be it streaming devices, gaming consoles, or PCs—using HDMI. Power on all devices and access the projector’s menu to fine-tune keystone correction and focus. Many projectors now offer automatic alignment, simplifying this step. During calibration, I manually adjusted the keystone to eliminate trapezoidal distortion, resulting in a perfectly rectangular image.
Optimize Ambient Light for Better Viewing
Control ambient lighting by dimming or turning off lights. Ultra short throw projectors excel in bright environments, but minimizing glare enhances contrast. During my first setup, I blocked windows with blackout curtains, which significantly boosted the picture’s vibrancy. Experiment with your lighting to find the best balance for visibility without washing out the image.
Integrate Audio Seamlessly
Connect external speakers or soundbars to achieve immersive audio. Many projectors support Bluetooth or optical audio outputs. I paired mine with a soundbar, which was a straightforward process, dramatically improving my movie experience. High-quality sound completes the home theater atmosphere, so don’t overlook this step.
Fine-Tune Your Screen Brightness and Color Settings
Adjust brightness and contrast through the projector’s menu. Use test patterns or calibration discs for precise calibration. I used a calibration app, which helped me set the colors accurately, resulting in cinema-like picture quality. Proper calibration ensures vibrant colors and deep blacks for a lifelike image, making every movie feel immersive.
Regular Maintenance Keeps Your Projector Sharp
Clean the lens with a microfiber cloth and keep air vents unobstructed. Replace filters if applicable. In my experience, a quick cleaning every few months prevented dust buildup and maintained picture clarity. Keeping your projector well-maintained ensures consistent performance and prolongs its lifespan.
Following these actionable steps allows you to harness the full potential of your home theater projector and create a cinematic experience tailored to your space. Whether upgrading or starting fresh, precise setup and calibration are key to bringing movies and games to life with stunning clarity and immersion.When shopping for a home theater projector, many enthusiasts are led astray by common misconceptions, often underestimating the complexities involved in truly optimizing their setup. Let’s dig deeper into some nuances most overlook, challenging prevailing beliefs and exposing potential pitfalls.First off, many assume that a 4K resolution automatically guarantees cinematic quality, but the reality is more nuanced. Industry expert John Irving points out that pixel count alone doesn’t ensure image excellence; factors like proper calibration, contrast ratio, and lumens are equally critical. In fact, a high-lumen 1080p projector can sometimes outperform a poorly calibrated 4K model in a bright room. Don’t fall into the trap of equating resolution with overall picture quality.
Another misconception revolves around portability. Consumers often think that portable projectors sacrifice quality for convenience, but advances in portable 4K projectors have closed that gap remarkably. However, many overlook the importance of throw distance and lens quality. A compact device might fit your hand but could require careful positioning to avoid distortion. Choosing a model with an adjustable lens or keystone correction is essential. Less obvious is the fact that portability may also lead to compromises in durability or heat management, so always check specifications beyond size and weight.
The realm of ultra short throw (UST) projectors introduces its own myths. Many believe that USTs are only suitable for small spaces or personal use. But with technological advancements, some models now offer 120-inch images in rooms with minimal space, rivaling traditional setups. The key is understanding the unique benefits; USTs minimize shadow interference and wall placement concerns, but they demand precise placement—often within a few inches of the wall—to avoid image distortion. 
Similarly, laser projectors are hailed as a maintenance-free, bright alternative, but many don’t realize that their longevity and color stability depend heavily on proper calibration and environmental conditions. A common mistake is assuming laser projectors are set-and-forget; in reality, periodic calibration ensures consistent color accuracy over years. Furthermore, laser light sources can be sensitive to ambient temperature and dust, which may degrade performance. A recent study by industry analysts emphasizes that careful consideration of environment and calibration prolongs laser projector lifespan and maintains image quality.
Most importantly, newcomers often overlook the importance of ambient light control or surface preparation. Even the best projector can underperform if the room isn’t optimized—failing to darken the space or choosing an uneven wall can lead to disappointing viewing experiences. Proper calibration of contrast, brightness, and color settings is often ignored but critical for a cinematic experience.
In summary, if you’re serious about enhancing your home theater, understanding these subtle details is crucial. Don’t settle for superficial specs; dig into calibration, environmental needs, and proper placement. Have you ever fallen into this trap? Let me know in the comments.
Keep Your Projection System Running Smoothly
High-quality projectors, whether a 4K laser ultra short throw or a portable model, require consistent care to maintain optimal performance. Regular maintenance not only extends the lifespan of your equipment but also ensures your home theater experience remains crisp and vibrant. From cleaning lenses to firmware updates, adopting a disciplined maintenance routine is vital.
How do I maintain my projector over time?
First, establish a routine cleaning schedule that includes gently wiping the lens with a microfiber cloth to prevent dust buildup that can degrade image quality. Avoid harsh chemicals; instead, opt for specialized lens cleaning solutions. Additionally, regularly inspect and clear air vents to prevent overheating—dust accumulation here can lead to thermal issues. Many laser projectors feature self-diagnostic tools; leveraging these can alert you to potential problems before they impact picture quality.
firmware updates are equally important, providing improvements in image processing, noise reduction, and energy efficiency. Manufacturers often release updates via dedicated software or dongles—stay current by subscribing to manufacturer notifications or checking their support pages periodically. For instance, recent updates for premium models have improved calibration stability and color accuracy.
Maintaining the projector’s filters or air intake zones is another key step. Dust filters, if applicable, should be cleaned or replaced annually, especially in environments prone to dust or pet hair. A clean filter ensures proper airflow and prevents overheating. When in doubt, consult your device’s manual or consult with a professional service, especially for complex calibration adjustments or repairs.
Growing Trends in Long-Term Projector Care
Looking ahead, embedded diagnostic systems and AI-driven maintenance alerts are becoming standard in high-end models, simplifying upkeep and user management. Integrating these smart features allows enthusiasts to proactively monitor their system’s health and plan preventive maintenance. As technology advances, expect even more user-friendly tools—like predictive analytics—to be incorporated into home theater setups, ensuring peak performance for years to come.
For dedicated home theater enthusiasts, embracing these maintenance practices is essential. Why not start by scheduling a lens cleaning this weekend or checking for firmware updates? Doing so will set the foundation for an uninterrupted, cinema-quality experience. Remember, the longevity of your investment depends on consistent care—so take action now to keep your projector shining brightly for years ahead.
The Hardest Lessons I Learned About 4K Projectors and Ultra Short Throw Marvels
One of my biggest surprises was discovering that ultra short throw projectors require meticulous placement—just inches from the wall—to truly shine. Misalignments can turn a stunning image into a distorted mess, teaching me the importance of patience and precision. I also learned that not all 4K projectors are created equal; calibration can make or break image quality, reminding me that specs alone aren’t enough.
Another lightbulb moment was realizing that portability doesn’t mean sacrificing brightness or image clarity. Advances in technology now allow compact models to deliver cinematic quality, but only if you pay attention to throw ratio and environmental factors. It’s clear that understanding environmental needs and device capabilities is key to making informed choices.
I also uncovered that laser projectors, often hailed as maintenance-free, still benefit from periodic calibration and environmental management to maintain color fidelity. Assuming set-and-forget can lead to subpar experience over time, emphasizing that ongoing care ensures longevity and consistency.
Lastly, I grasped how room preparation—like controlling ambient light and wall surface—can dramatically elevate your viewing experience. Even the best projector can underperform without a proper setup, teaching me that mastering the basics is the foundation for cinematic immersion.
http://Benjamin%20Carter
Reading through this post really resonated with my own experience setting up a home theater. I initially underestimated the importance of accurate placement and calibration, which led to some frustrating hours dealing with skewed images and dull colors. What struck me most was the emphasis on room preparation; I once tried to use an uneven wall, and the distortion was so bad I had to redo the entire surface. Since then, I’ve learned that investing in a proper projection screen or ensuring wall smoothness makes a huge difference in image quality. I also agree with the point about ambient light control—it’s often overlooked, but even a small amount of stray light can wash out a projector’s vibrant images. Has anyone experimented with different room lighting setups or surfaces to optimize image quality? I’d love to hear what has worked well for others trying to get their projector to perform at its best in real-world conditions.
http://Sophia%20Bennett
I completely agree with the post about how vital surface preparation and ambient lighting control are in setting up a home theater with a UST projector. I’ve also learned that even small details, like using a matte finish screen or wall, can significantly enhance contrast and color vibrancy. When I first switched from a standard TV to a UST projector, I underestimated the impact of room conditions. I found that blocking out window light with heavy blackout curtains made a huge difference in picture clarity, especially during daytime viewing. Plus, ensuring the projector is precisely aligned minimizes distortion, which can really ruin the immersive experience. In your experience, have you noticed that different wall colors or textures affect image quality? I’ve heard that neutral colors like grey or white surfaces work best, but some experimentation might be needed depending on room lighting. It’s fascinating how these small adjustments can elevate the viewing experience so much. Would love to hear others’ tips on optimizing room conditions for a seamless cinematic feel.