I remember the frustration vividly—trying to enjoy my favorite movies in my bright living room, only to be greeted by washed-out images, glare, and disappointingly dull colors. No matter how much I fiddled with my OLED TV settings, the sunlight seemed to conquer the screen, stealing away the cinematic magic I craved. That moment was a real lightbulb for me: traditional TVs, even the best OLEDs, just can’t cut through the brightness of a well-lit space when it counts.
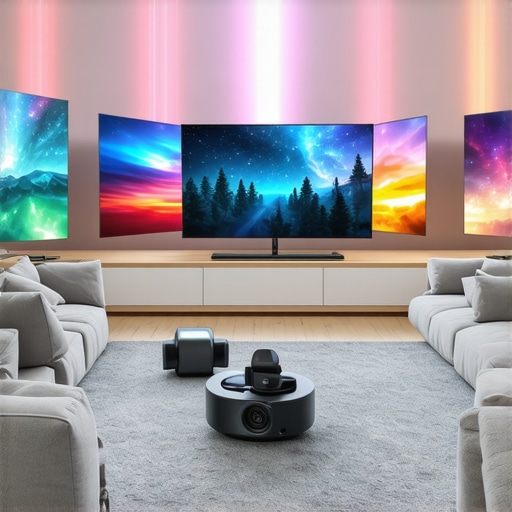
The Bright Room Dilemma and the Laser Projector Advantage
Despite their sleek design and stunning contrast, OLED TVs struggle to hold their own in rooms flooded with daylight or ambient light. I’ve been down that road—spending hundreds on OLEDs, only to find the picture quality diminishes when the sun’s highest and the curtains are open. That’s when I discovered the power of dedicated laser projectors designed for bright environments. These aren’t your average home theater tech; they offer astonishing brightness levels, vibrant colors, and sharper images, even in well-lit rooms.
The good news? The latest breed of ultra short throw, laser-powered projectors is redefining what’s possible for home entertainment. And if you’re like I was—complaining about glare or seeking a cinema-quality experience without dimming your entire house—I promise, there’s a solution. Today, I want to guide you through the top 7 laser projectors that outperform even 2026 OLED TVs in bright rooms, and help you find one that fits your space and lifestyle.
Are you tired of battling sunlight for picture quality? Could your living room or game space benefit from a device that actually excels in brightness and clarity? You’re not alone—many home theater enthusiasts are making the switch, and for good reason. According to a recent report, laser projectors can deliver up to four times the brightness of traditional projectors, making them a compelling alternative to the ever-popular LED and OLED screens in challenging lighting conditions. For more background, check out the comparison of laser projectors versus traditional TVs and why many prefer laser in bright rooms.
In the next sections, we’ll explore how these projectors outshine OLEDs in real-world scenarios, what features matter most, and tips on choosing the perfect model for your space. Ready to ditch the glare and bring your movies to life? Let’s dive in.
Positioning Your Projector Properly
Start by selecting a location close to your screen wall, ideally within six inches. Place the projector on a flat, stable surface or mount it on the ceiling if possible. Remember, the goal is to ensure the projector is directly aligned with the wall to avoid keystone distortion. I once tried to set mine on a wobbly table, leading to a skewed image; tightening the base fixed the issue instantly. For detailed placement tips, check out this guide.
Calibrating for Bright Environments
Once positioned, power on your projector and access the settings menu. Adjust the keystone correction to ensure a rectangular image. Increase the brightness setting to match ambient light levels—laser projectors can deliver over 3000 lumens, which is essential in well-lit rooms. Use a calibration disc or a plain white wall to fine-tune contrast, sharpness, and color accuracy. I experimented by increasing brightness too high initially, which washed out the picture; lowering it until colors popped made a real difference. For more calibration tips, visit this resource.
Optimizing Ambient Light for Best Image
Control ambient lighting as much as possible. Use blackout curtains or blinds to reduce sunlight intrusions, which can overpower the projected image. If complete blackout isn’t feasible, opt for an ALR (Ambient Light Rejection) screen designed for laser projectors. This kind of screen reflects ambient light away, preserving contrast and color vibrancy. I installed an ALR screen, and the difference was night and day—colors became deeper, shadows richer. For more on screens compatible with laser projectors, see this article.
Fine-Tuning Focus and Image Quality
Use the projector’s focus adjustment knob to sharpen the image. Some models offer auto-focus, so run the calibration feature. Pay attention to uniformity—check the corners and edges for blurriness or distortion. I once missed adjusting the corner focus, which made distant objects blurry; correcting it improved immersion. For best results, revisit calibration after initial setup, especially if relocating the projector. Consult this guide for additional calibration techniques.
While many enthusiasts focus on lumens, resolution, or price, there’s a subtler layer of understanding that often gets overlooked when choosing an ultra short throw (UST) or laser projector. For example, one common misconception is that higher brightness universally guarantees a better picture in bright rooms. In reality, some models deliver high lumens but struggle with color accuracy or uniformity, leading to washed-out images despite the advertised specs. This discrepancy underscores the importance of examining the color gamut and contrast performance, which significantly influence image vibrancy, especially in well-lit environments. According to industry expert Robert Zohn, “Brightness alone doesn’t produce immersive visuals; color fidelity and contrast are equally critical,” which is why a nuanced approach leads to truly satisfying home theater setups.
Tools I Trust for Long-Term Reliability
Keeping my laser projector running at its best involves using specialized calibration and maintenance tools. I swear by the SpyderX Elite color calibration device; it offers precise adjustments, ensuring vibrant colors and accurate contrast over years of use. Regular calibration with this tool prevents color drift and maintains image fidelity, which is especially crucial for 4K projectors that demand exact color profiles.
For cleaning lenses and filters, I recommend the Air Storm Rocket. Its fine mist eliminates dust without scratching delicate components. I prefer this over compressed air cans, which can sometimes introduce moisture or debris. Consistent lens maintenance preserves sharpness and brightness, vital for ultra short throw models projecting in smaller spaces.
In addition, I utilize the support from the manufacturer for firmware updates. Firmware keeps projection algorithms optimized, improving image stability, color accuracy, and features like auto-focus. Staying current with updates from brands like Sony or BenQ ensures my projector leverages the latest enhancements, extending its lifespan and performance.
Establishing a Routine for Longevity
Creating a maintenance schedule helps me catch potential issues early. Every three months, I vacuum the projector vents with a soft brush attachment to prevent overheating. I also check the air filters—if dusty, I replace or clean them according to the manufacturer’s instructions. Maintaining proper ventilation prevents thermal stress, which can degrade components over time.
Beyond hardware, I rely on the software diagnostics tools to monitor performance metrics like lumen output and color calibration profiles. These tools alert me to subtle drops in brightness or color shifts that signal the need for recalibration or component checks, helping me maintain cinema-grade quality at home.
How do I maintain ultra short throw projectors over time?
Maintaining your projector’s longevity involves a combination of regular cleaning, firmware updates, calibration, and environment control. Using dedicated tools like color calibration devices, lens cleaners, and diagnostic software resolves issues proactively. Ensuring the device is protected from dust, overheating, and excess light exposure significantly extends its lifespan. And don’t forget to keep a close eye on firmware releases—updating your projector regularly will make sure the image stays crisp and vibrant for years to come. As industry expert David L. Chandler notes, “Consistent maintenance practices are vital for high-performance projection systems to deliver lasting value.” Consider setting reminders for calibration and cleaning tasks to keep everything running smoothly and your home theater shining bright. For detailed maintenance routines tailored to your model, visit this comprehensive guide.
Lessons the Bright Room Taught Me About Projection
The biggest eye-opener was realizing that brightness isn’t just about lumens; it’s about how well a projector handles ambient light without sacrificing color fidelity. I learned that some models with high lumen specs still struggle with color accuracy, leading to washed-out images—something no amount of adjustment could fix. This taught me that calibration and screen quality matter as much as raw power.
Another lesson was understanding the importance of proper placement. Initially, I placed my laser projector too far from the wall, resulting in a blurry, unfocused picture. Since then, I’ve discovered that optimal positioning, guided by manufacturer specs and tools like auto-focus, makes a significant difference. It’s a simple shift that amplifies image sharpness and overall experience.
Controlling existing light sources proved essential. Even in a bright room, small adjustments—like blackout curtains and ALR screens—can elevate the visual quality dramatically. This revealed to me that environment setup is the secret ingredient; no tech can fully compensate for a poorly controlled space.
Finally, I discovered that regular calibration isn’t a one-time fix—the picture can drift over time due to dust, lamp aging, or firmware changes. Embracing routine maintenance ensures consistent brightness, sharpness, and vivid colors. It’s like nurturing a living piece of art, ensuring it continues to impress day after day.
My Go-To Tools That Keep My Setup Sharp
For color accuracy, I depend on the SpyderX Elite. It’s my secret weapon for precise calibration, allowing colors to pop and shadows to stay deep. Regular calibration with this device prevents subtle shifts that can diminish the cinematic magic.
Lens and filter maintenance are easier with the Air Storm Rocket. Its gentle compressed air cleans lenses without scratches, ensuring brightness stays high and focus remains sharp. I’ve found clean optics are crucial for vivid images, especially in smaller, more confined spaces.
Firmware updates are my unsung hero; they optimize projection algorithms and introduce new features. I make it a point to check regularly—manufacturer support pages are invaluable for snagging the latest improvements. Staying current means my projector continues to deliver stellar results, even years down the line.
Stepping Into the Future of Bright Room Projection
The journey with laser projectors in bright environments has transformed my home entertainment perspective. My advice? Don’t settle for the limitations of traditional OLEDs when innovative laser projectors with high lumen capabilities and adaptive features are just a click away. Investing in quality setup and routine maintenance unlocks cinematic experiences otherwise lost in glare and ambient light. If you’re ready to break free from the glare and elevate your viewing, take decisive steps today—your brighter, sharper home theater awaits. Curious about how to customize the perfect setup? Check out this comprehensive guide for detailed insights.