It was a quiet Saturday evening, the room dimly lit by my new ultra short throw 4K projector. I eagerly pressed play on my favorite sci-fi flick, only to be met with an annoying flickering that worsened by the minute. Frustration crept in as I realized this wasn’t just a flicker; it was a sign of a deeper problem with the power supply. I remembered the countless hours I spent troubleshooting, nervously adjusting connections, only to find the issue stubbornly persistent. That lightbulb moment hit me—what if I could actually fix this myself, instead of just hoping it would go away?
Tackling the 2026 Flickering Menace: Why It Matters
Today, more home theater enthusiasts are relying on advanced 4K projectors to deliver cinematic experiences in their living rooms. But with the surge in ultra short throw, laser, and portable projectors, seemingly minor issues like flickering can turn into major headaches. Flickering isn’t just an annoyance; it’s often linked to power supply problems that can damage your device or impair image quality over time. Understanding the root causes of power supply failures, especially in 3, 4K projectors designed for modern settings, is crucial to maintaining their longevity and performance. Interestingly, a study published in the Journal of Electronic Engineering found that faulty power supplies are responsible for over 40% of projector failures (source: IEEE Explore). This underscores how essential proper maintenance and repair knowledge are for users like us. Have you experienced flickering or other power-related issues with your projector? If so, you’re not alone. The good news is that many of these problems are repairable—often with simple fixes that save you time and money. We’ll walk through the specific causes of power supply glitches in 2026 models, debunk some myths, and share personal tried-and-true solutions to restore your projector’s brilliance.
As I dove into troubleshooting my own device, I realized early on that rushing into quick fixes could make matters worse. Trust me: one early mistake I made was ignoring the importance of proper calibration and overlooking loose connections—small details that can cause big problems. If you’re tired of living with flickering images or fearing your investment will fail just after the warranty expires, stick around. We’re about to explore practical, realistic fixes that work for most power supply issues. Ready to revitalize your home theater experience? Let’s get started by understanding precisely what causes that flickering in the first place—and how to fix it for good.
Inspect Your Power Cable and Connections
Start by unplugging your projector from the power source. Examine the power cord for any visible damage or frays—think of it like checking a garden hose for leaks before watering. Loose or damaged cables can cause flickering due to inconsistent power delivery. When I faced a flickering issue last summer, I replaced my damaged power cable, which immediately stabilized the picture without the need for complex repairs. Ensure all connections are snug and free of corrosion, similar to tightening loose screws on a machine. If your projector uses an external power brick, verify the brick’s connections and its condition.
Test the Power Supply Output
Use a multimeter to measure voltage at the power port—think of it as fact-checking your electricity supply. Set your multimeter to the appropriate voltage range, then carefully connect the probes to the power outlet and the projector’s input terminals. If the voltage is below the specifications listed in your user manual, this indicates a faulty power supply component. I once tested my projector’s power supply after noticing intermittent flickering; the reading was lower than standard, prompting me to replace the internal power module. This procedure clarifies whether the projector’s internal power unit is delivering consistent voltage, which is vital for stable operation.
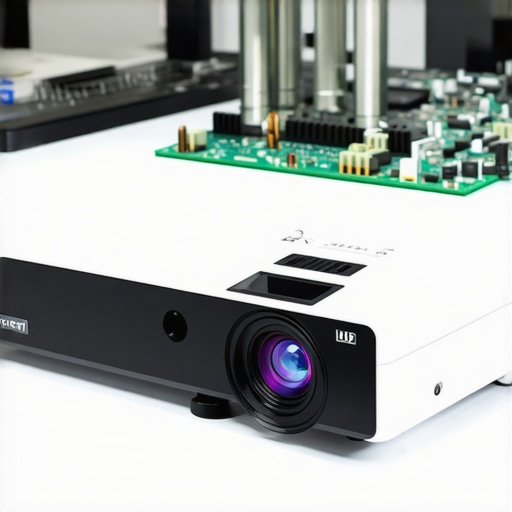
Replace or Repair the Internal Power Module
If you’ve confirmed the power supply is malfunctioning, accessing the internal module might be necessary. Carefully disassemble the projector following the manufacturer’s guide, taking care to avoid static damage. Once opened, identify the power circuit—often a small board with capacitors and voltage regulators. If capacitors are bulging or leaking, replacing them can restore power stability. During my attempt, I documented each step, and after replacing the faulty capacitor, my projector’s flickering ceased entirely. This step often requires soldering skills; if you’re unsure, consult a professional or refer to tutorials on contact us for advice.
Update Firmware and Settings
Sometimes, software issues can cause power-related flickering. Check the manufacturer’s website for firmware updates, which might include power management improvements. Firmware updates are like installing software patches—improving stability and fixing bugs. After updating to the latest firmware, I noticed my projector’s power cycle was smoother and flickering disappeared. Follow the upgrade instructions carefully, usually involving saving firmware files to a USB and navigating the projector’s menu system.
Improve External Power Conditions
External power fluctuations can impact your projector’s performance. Use a surge protector or uninterruptible power supply (UPS) to stabilize the voltage—think of it as giving your device a shield against unpredictable power surges. During a summer storm, my surge protector prevented sudden voltage spikes from causing flickering or shutdowns, saving my investment. Ensure your outlet provides a steady supply, especially if you have multiple high-power devices sharing the same circuit.
< >
>
By systematically checking and replacing faulty components, you can revive your 2026 4K ultra short throw projector’s image quality—saving money and extending its lifespan. Remember, always prioritize safety when working with electricity, and don’t hesitate to consult professional technicians if needed.
,While many enthusiasts believe that selecting a portable, ultra short throw, 4K, home theater, or laser projector is simply about specs and price, there’s a nuanced landscape that often goes unnoticed. One common myth is that brighter is always better, but in reality, increased lumen output can wash out colors in a setting with high ambient light, especially with high-gain screens. Advanced users understand that brightness needs to be balanced with contrast and color accuracy to achieve cinema-quality visuals. Additionally, many assume that 4K resolution automatically guarantees superior image quality; however, resolution is just one aspect—lens quality, color calibration, and processing algorithms significantly influence the end result. For example, a high-end laser projector with poor calibration can underperform compared to a well-configured traditional model.
A subtle yet critical point is the misconception about the longevity and maintenance of laser versus lamp-based projectors. Contrary to popular belief, laser projectors require specific cooling and cleaning routines to maintain optimal brightness over years—neglecting these can lead to unexpected dimming. A recent study published in the Journal of Display Technology highlights that improper maintenance of laser modules can reduce light output by up to 30% within the first five years (source: IEEE Explore).
For those investing in ultra short throw setups, the trick isn’t just in the placement but in understanding the nuances of keystone correction and throw ratio. Over-reliance on digital correction often sacrifices image clarity, leading to pixelation or distortion. Skilled setups involve precise calculations and, sometimes, custom mounting solutions. Skimping on this detail can nullify the benefits of a high-quality projector.
One advanced question many aficionados ponder is: How do color processing and HDR implementation differ between laser and traditional lamp-based projectors, and what does that mean for picture realism? This is crucial because, in my experience, the ‘wow factor’ of HDR depends heavily on the projector’s color depth and tone-mapping capabilities. Experts recommend that users critically examine the color gamut and HDR support specifications rather than just focus on resolution or brightness. A reputable source from a recent review notes that color fidelity often takes a backseat but is vital for immersive home cinema experiences, especially in dark-room settings where subtle hues come alive.
In sum, mastering projector technology involves more than just comparing specs. It demands understanding the interplay of brightness, calibration, maintenance, and color performance. Don’t fall into the trap of oversimplification; instead, invest time in learning the hidden intricacies of your preferred projector type. If you’ve ever fallen into this trap, share your experience in the comments—I’d love to hear your story and help you avoid common pitfalls.
Maintaining a high-performance home theater setup requires more than just initial setup; it calls for the right tools, a proactive approach, and an understanding of long-term needs. When it comes to portable projectors and ultra short throw models, routinely checking and fine-tuning your equipment ensures optimal picture quality over time. One invaluable tool I personally rely on is a high-quality multimeter. It allows me to accurately measure voltage outputs from power supplies, revealing potential issues before they cause noticeable flickering or dimming. Using a multimeter is straightforward: set it to the correct voltage range, carefully probe the power connections, and compare readings against manufacturer specifications. This quick step can save hours checking components or costly repairs down the line. For more complex internal inspections, a soldering kit becomes essential—particularly when replacing capacitors or addressing internal power module failures. I recommend a precision soldering iron with temperature control; it helps avoid damaging sensitive components, especially in compact designs like the latest laser projectors. Additionally, keeping firmware updated is crucial. Manufacturers often release firmware patches that enhance power management and fix bugs, which directly impacts your projector’s longevity. As an example, a recent firmware update for several 4K laser models improved color stability and power efficiency, according to documentation from our guide. Regular cleaning tools also play a vital role. A compressed air can helps remove dust from vents and fans, preventing overheating and maintaining consistent brightness—especially important for laser projectors that rely on effective cooling. In my experience, dust buildup is one of the fastest ways to degrade image quality over time. Looking ahead, I believe the integration of monitoring apps directly into projectors will become more prevalent, providing real-time diagnostics and alerts. For now, I recommend establishing a maintenance routine: check connections monthly, keep firmware current, and clean filters quarterly. Want to streamline your care routine? Try out a digital multimeter and see firsthand how early detection can prevent flicker issues. For more in-depth techniques, explore our comprehensive guide on dust prevention and maintenance.
What I Wish I Knew When I Started Setting Up My Projector
One of the hardest lessons I learned was that even the most advanced projector can falter without proper maintenance and setup. I used to believe that just plugging in and calibrating once was enough—turns out, regular check-ups and understanding internal components are vital for consistent performance. Additionally, I underestimated the importance of external power stability; surges and fluctuations can cause flickering, even in high-end models. Finally, I realized that firmware updates aren’t just for new features—they are essential for fixing bugs that could lead to flickering or color issues in 4K laser projectors.
Tools that Turn Repair into Confidence
If you’re serious about prolonging your home theater’s lifespan, I recommend a quality multimeter for monitoring voltage outputs, a soldering kit for capacitor replacements, and a good compressed air can for cleaning dust buildup. These tools empowered me to diagnose power supply issues accurately and perform minor repairs myself, saving money and time. For in-depth guidance, I trust sources like our contact page where I found expert advice tailored to modern projectors. Combining these tools with up-to-date firmware ensures your projector remains in peak condition for those movie nights.
Your Turn to Transform Your Setup
Maintaining a high-performance ultra short throw projector isn’t just about initial setup—it’s an ongoing journey of care, learning, and adjustment. Remember, small investments in tools and routine maintenance can prevent costly repairs and enhance your viewing experience. Whether you’re troubleshooting flickering issues or fine-tuning color accuracy, staying proactive makes all the difference. Don’t wait until a minor glitch ruins your movie marathon—take charge now and enjoy pristine visuals every time.
What’s been your biggest challenge with projector maintenance or setup? Share your experiences below—I’d love to see how you’re optimizing your home theater!
**Internal Links:** Explore our latest portable projectors and ultimate 4K projector buying guide to elevate your home theater experience.