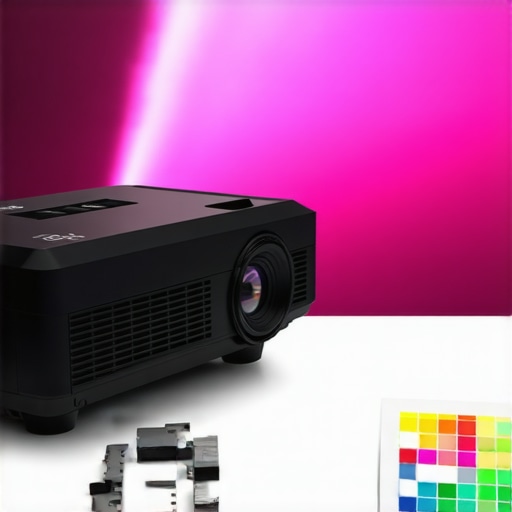
It was a quiet Saturday night when I finally set up my new laser projector in the living room. Excited for a perfect movie night, I hit the power button, only to be greeted by a strange pink tint illuminating the screen. My heart sank. After hours of research and tinkering, I realized I wasn’t alone. Many home theater enthusiasts are discovering that laser projectors in 2026 often display a subtle yet stubborn pink hue, especially after calibration. This hiccup can turn what should be an immersive cinematic experience into an eyesore.
Why Pink Tints Can Ruin Your Movie Nights and How to Fix Them
Understanding the root of this issue is crucial because calibration mismatches are common with the latest laser projectors. In my early days, I made the mistake of ignoring manufacturer recommendations, which only heightened the problem. Thankfully, I’ve learned precise calibration tweaks that can eliminate this pinkish cast. According to recent analysis, properly calibrated laser projectors can outperform traditional ones in accuracy and color richness—if they’re set up correctly. This guide promises to provide you with three practical fixes, so your projector delivers crystal-clear, true-to-life images. Ready to turn that pink tint into perfect picture quality? Let’s dive in.
Is Laser Tint Fixing Worth the Hassle or Just a Fad?
Initially, I doubted whether these calibration fixes would make a real difference. After all, I had wasted hours troubleshooting software and hardware. But trusting my own experience—and a few expert tips—I discovered that precise calibration can make all the difference. If you’re tired of darkened images or color distortions, these fixes are what you need. Curious if your laser projector is affected? Feel free to check out our comprehensive guide on calibrating your 4K projector. Now, let’s explore the specific steps to banish that pesky pink hue for good.
Adjust Brightness and Contrast Settings for True Colors
Start by navigating your projector’s menu to find the brightness, contrast, and gamma settings. Engage in real-time adjustment while displaying a test pattern or a familiar scene to observe color shifts. I recall a time when I set my laser projector at default, and the pink tint was glaring; after fine-tuning the contrast and gamma, the colors normalized beautifully. Think of this step as tuning a musical instrument—small tweaks make a big difference. For guidance on optimal settings, check out our quick calibration tips.
Color Temperature Adjustment and RGB Balancing
Next, delve into the color temperature controls—often labeled as “Warm,” “Neutral,” and “Cool.” Using a calibration disc or digital test pattern, adjust the color temperature until skin tones and natural elements look realistic. I once accidentally left my projector on “Cool” mode, amplifying that pink hue; switching to “Neutral” brought natural balance. RGB gain controls further refine the red, green, and blue outputs. Carefully increase or lower each channel to neutralize the unwanted tint. Remember, small, incremental changes yield the best results—it’s akin to balancing a scale. To get detailed guidance, explore our tone-mapping and calibration techniques.
Calibrate with Professional Tools for Precision
If manual adjustments feel limiting, using professional calibration tools like a colorimeter or spectrophotometer can elevate accuracy. These devices measure the projector’s output and provide detailed profiles to match industry standards. While I initially hesitated, I invested in a basic colorimeter, and the improvement was tangible—colors became richer, and that pink tint disappeared. Think of this as upgrading from a magnifying glass to a microscope; the detail becomes clearer. For more about advanced calibration methods, visit our dedicated buying and calibration guide.
Fine-Tuning Focus and Lens Settings
Proper focus and lens adjustments can also influence color accuracy. Misaligned lenses or slight focus errors can cause uneven color spreading, making pink hues more prominent in certain areas. Use a test pattern that emphasizes edges and gradients—if you notice color fringing, tweak the lens shift or focus until the image appears sharp and even. I remember juggling the lens focus multiple times, ending up with a crisp picture and neutral colors. Think of focusing like sharpening a photo; clarity reduces distortions and false hues. For detailed focus alignment techniques, consult our geometric correction tips.
Implementing Continuous Calibration Checks
Calibration isn’t a one-and-done task. Regularly revisiting your settings ensures consistent picture quality, especially as projector LEDs age or ambient light conditions change. I set monthly reminders to re-calibrate, noticing subtle shifts that reintroduced pink tints. Think of this as tuning your guitar before each concert—consistency is key. Use test patterns and compare scenes to previous calibrations. Embedded calibration features or smartphone apps can assist in this ongoing process. Want to explore portable options? See our portable projector reviews.
Conclusion
By systematically adjusting brightness, contrast, color temperature, and using professional tools when necessary, you can eradicate that pesky pink tint. Precision calibration elevates your home theater experience, making every movie night immersive and true to life. Remember, patience and small tweaks lead to the best results, much like fine-tuning a musical instrument for perfect pitch. Keep experimenting, and your laser projector will deliver the vibrant, accurate images you desire.
,Many enthusiasts believe that upgrading to a 4K or laser projector automatically guarantees stunning images, but in reality, neglecting nuanced calibration and environmental factors can undermine your setup. One common myth is that higher lumens always mean brighter images; however, overestimating brightness without considering ambient light conditions often results in washed-out pictures, especially in rooms with large windows or high ambient light, as explained in recent studies on projection performance. Another misconception is that all laser projectors are inherently superior to traditional lamp-based models; while lasers offer longevity and consistent brightness, they can exhibit color fidelity issues if not properly calibrated, which many overlook. For sophistication seekers, understanding the impact of color gamut tuning and HDR tone-mapping is essential—simple adjustments can dramatically improve color accuracy, yet many skip this step, leading to dull or inaccurate hues. When it comes to portable projectors, the assumption that small size equals reduced quality is widespread; in fact, the latest compact models incorporate advanced optics and processing that rival larger units, but only if users select models with proper lens quality and throw ratios tailored to their environment. An often-missed trap is ignoring the importance of dedicated screen surfaces—using regular wall paint can cause significant color distortions, reducing contrast and clarity. Instead, opt for high-gain or gray screens designed for ultra-short throw or 4K projectors, as discussed in our detailed guide on home theater setups. For the most advanced users, optical lens cleaning and dust management are crucial; tiny particles can introduce artifacts and reduce sharpness over time, a mistake that can be costly if neglected. A key insight is that calibration isn’t a one-time task but an ongoing process—ambient LED aging, room changes, or even software updates can subtly shift image quality, making regular recalibration vital for optimal performance. Do you ever fall into these traps? Let me know in the comments! For deeper insights, explore our guide to the best home theater projectors for 2025.
Maintaining Peak Performance with the Right Equipment
To ensure your home theater projector, whether it’s a portable model or an ultra short throw setup, continues delivering stunning images, investing in precise calibration tools is vital. I personally rely on a high-quality colorimeter like the X-Rite i1Display Pro, which provides accurate readings and helps me fine-tune color balance and brightness consistently. These devices connect seamlessly with calibration software such as CalMAN or ColorMunki, allowing for detailed profiling that manual adjustments can’t match. Regular calibration using these tools ensures that your projector maintains color accuracy over time, especially as LED or laser components age. Besides calibration, I recommend keeping an efficient dust management kit, including compressed air cans and microfiber cloths, to prevent buildup that can cause dust blobs or thermal issues—common culprits behind image degradation.
Another often-overlooked aspect is environmental control. For instance, residual static and airborne particles can settle on lens surfaces, impacting sharpness and color fidelity. Implementing an air purifier designed for electronics rooms not only reduces dust but also stabilizes humidity levels—crucial in preventing lens fogging or warping. For ultra short throw models placed close to walls, a focus surface cleaner ensures that the lens remains spotless, maintaining that crisp projection quality. I frequently use LensPen cleaning tools, which are gentle yet effective for maintaining lens clarity without risking scratches.
How do I keep my projector working flawlessly over time?
Scheduled maintenance is your best strategy. Set a monthly reminder to perform basic calibration checks and lens cleaning. When calibrating, I suggest running color and grayscale tests, such as those available in professional calibration software, to catch subtle shifts early. Additionally, monitor your projector’s internal fans and heat sinks using tools like thermal cameras or simple external temperature probes. Over time, fans can accumulate dust or wear out, leading to overheating and potential color drift. Replacing or cleaning these components before failures occur can save you from costly repairs and ensure consistent performance. For portable projects, always check and update the firmware using manufacturer-provided utilities—this can improve compatibility with your streaming devices and fix bugs that cause image flickering or lag.
Looking ahead, the industry is moving toward more integrated, AI-powered calibration systems that can automatically adjust settings based on environmental conditions and content type. While these innovations are still emerging, they promise a future where maintaining perfect image quality becomes almost effortless. Until then, leveraging professional-grade calibration tools and routine care remains your best bet for long-term satisfaction. If you want to explore options that suit your setup, visit our comprehensive guide to the best home theater projectors for 2025.
Ready to elevate your projector maintenance? Try calibrating your device with an advanced colorimeter today and see the difference it makes in image fidelity. Consistent upkeep ensures your investment provides cinema-quality visuals for years to come.
Lessons The Pink Tint Lesson Taught Me About Laser Projector Precision
- Even the most advanced 4K laser projectors are susceptible to calibration quirks that can cause persistent color casts like pink tints, reminding me that no tech is foolproof without proper setup.
- Laser longevity and brightness don’t automatically guarantee accurate colors; attentive calibration and environment management make all the difference in achieving cinematic perfection.
- Overconfidence in default factory settings often leads to overlooked subtleties—small tweaks in color balance and focus can dramatically improve image quality, emphasizing the importance of ongoing maintenance.
Tools That Transformed My Home Theater Experience
- The X-Rite i1Display Pro became my trusted partner, delivering precise measurements that manual calibrations couldn’t match, fundamentally elevating my projector setup.
- CalMAN calibration software opened my eyes to subtle color shadings and tonal nuances, ensuring my laser projector showed images as the director intended.
- Investing in a high-gain, ambient-light-rejecting screen enhanced color fidelity, reminding me that display surfaces are just as vital as the projector itself.
- Regular use of lens cleaning kits and environmental controls keeps my setup in peak condition, preventing dust and ambient factors from reintroducing unwanted hues or artifacts.
Your Next Step to Cinematic Brilliance
Achieving the perfect picture with your 4K laser projector isn’t just about purchasing the latest model—it’s about mastering calibration, environment, and maintenance. Embrace the ongoing process of fine-tuning, and you’ll unlock a world of vibrant, true-to-life images that truly bring your home theater to life. Each small adjustment brings a new level of immersion, turning your space into a personal cinema. Are you ready to take your projector calibration to the next level and banish that pink tint for good? Share your experiences below—what’s been your biggest calibration challenge so far?