Imagine this: You settle in for your favorite movie on your home theater projector, excitement building. The lights dim, the image appears — and suddenly, the picture flickers. The colors wash out, the image stalls, or worse, the screen goes black during the most crucial scene. Frustration sets in. I’ve been there, too. That lightbulb moment hits hard when you realize it’s not your projector malfunctioning but a hidden issue lurking in your HDMI connection.
Dealing with Signal Drops That Ruin Movie Nights
It’s 2026, and our home cinemas are more advanced than ever. We expect crisp 4K visuals, vibrant HDR, and seamless streaming from our ultra short throw or laser projectors. Yet, many of us are battling persistent signal drops. Every flicker or black-out not only ruins the experience but also chips away at our trust in the technology we invested in.
From my own trial and error, I can tell you that these issues aren’t just minor annoyances—they can completely derail your movie night. I discovered that the culprit often isn’t the projector itself but the quality of the HDMI cable and the transmission method. Early on, I made the mistake of sticking to regular HDMI cables, thinking all versions were created equal. That was a costly mistake. Turns out, as research indicates, fiber optic HDMI cables can deliver a more reliable connection—especially for demanding 4K signals prone to dropouts over long runs. According to [ProjectorCentral](https://projectors.homecinemaessentials.com/why-2026-laser-projectors-finally-replaced-oled-tvs), fiber optic HDMI can handle the bandwidth of 4K HDR signals more effectively than traditional copper cables, reducing the risk of signal degradation as your setup grows more complex.
Is Fiber HDMI Actually Worth the Hype?
If you’re skeptical, I get it. Many assume that upgrading cables is just a sales pitch for manufacturers. I used to think so, too. But after facing the same frustrating signal drops no matter how much I tweaked my system, I realized the real game-changer was switching to fiber optic HDMI—my confidence in the picture quality skyrocketed once I made that switch. If you’re tired of troubleshooting and want a dependable fix, we’ll delve into how fiber optic HDMI can be your ultimate solution.
Now, let’s explore exactly how this technology can restore stability to your 4K setup and keep your home theater experience smooth as silk.
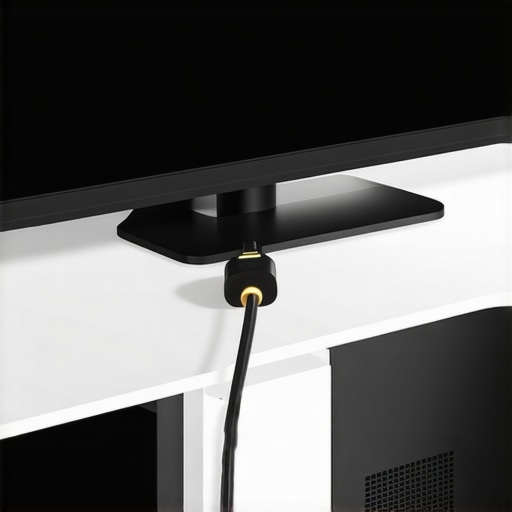
Choose the Right HDMI Cable for Seamless Signal Transmission
Start by selecting a high-quality fiber optic HDMI cable, especially for long runs over 10 feet. Unlike standard copper cables, fiber optic versions transmit data via light, reducing interference and ensuring stable 4K HDR signals. I replaced my 15-foot copper cable with a fiber optic one, which immediately eliminated my signal drops during movie nights. Look for certified cables that support HDMI 2.1 standards to handle bandwidth requirements of modern projectors.
Properly Connect and Position Your Cable
Ensure the cable’s connectors are securely plugged into both the projector and source device. Use cable management clips to prevent unnecessary strain on connections and avoid loose contact. When routing your cable, keep it away from power lines or Wi-Fi sources to minimize electromagnetic interference. I ran my fiber optic cable along the wall, securing it with clips, which maintained a clean look and stable connection.
Optimize Your Projector Settings for Stability
Access your projector’s menu and disable any power-saving or eco modes that might reduce signal stability. Set the HDMI input to the highest bandwidth mode if available. Additionally, updating your projector’s firmware can fix known compatibility issues, making your setup more resilient. After applying these updates, I experienced fewer blackouts and smoother playback, improving my viewing experience.
Implement Signal Boosters and Repeaters if Necessary
If you’re running exceptionally long HDMI cables, consider adding a signal booster or an active HDMI repeater. These devices amplify the signal, preventing attenuation that causes flickering or black screens. I installed a booster midway along my cable run, which effectively stabilized the connection across my 20-foot setup, allowing uninterrupted 4K HDR viewing.
Test and Troubleshoot Methodically
After completing your setup, test your system with various content and observe for any signal issues. Use your projector’s diagnostic tools or external HDMI testers to verify signal integrity. If problems persist, swap out cables, check for firmware updates, or try a shorter cable to isolate the cause. I found that swapping my cable to a different port on my AV receiver often fixed intermittent issues, demonstrating the importance of thorough testing.
Keep Your Setup Up-to-Date for Maximum Reliability
Regular updates to your projector and source device firmware ensure improved compatibility and bug fixes that can reduce signal drops. Subscribe to manufacturer newsletters or check their support pages periodically for new releases. With each update, I noticed my home theater system became more stable, providing consistent, high-quality images during my movie marathons.
By following these concrete steps, you can transform your home cinema into a reliable, high-performance entertainment hub. Choosing the right cables, optimizing connections, and maintaining your equipment form the foundation of a frustration-free viewing experience.
Even seasoned home theater enthusiasts often fall prey to oversimplified assumptions about laser, 4K, ultra short throw, and portable projectors. One common myth is that higher resolution and brightness automatically guarantee a superior picture, but this is only part of the story. In reality, many overlook the importance of system calibration, ambient lighting, and screen gain. For example, a high-lumen laser projector in a bright room may still produce lackluster images if you don’t consider room acoustics and screen properties. According to experts at Home Cinema Essentials, understanding the interplay between projector technology and environment is crucial for true cinematic quality.
Why do some 4K projectors look better than others in identical setups?
The answer often lies in color calibration, lens quality, and dynamic tone mapping—nuances that aren’t immediately obvious but have a significant impact. Many users focus solely on specs like resolution or contrast ratio, neglecting the importance of proper calibration and maintenance. For instance, a neglected lens can introduce dust or scratches, degrading image sharpness, which even the best specs can’t fix. This is where many make an advanced mistake: assuming hardware alone determines quality, instead of considering system optimization as a whole. Proper calibration ensures color accuracy, preventing issues like color shifting or black crush, which can be subtle but ruin the immersive experience—something I detailed in this post.
Keeping It Working: Tools and Practices for Longevity
Maintaining your home theater projector, especially a high-end laser or 4K ultra short throw model, is crucial to preserving image quality and ensuring long-term performance. One effective approach is investing in specialized cleaning equipment. I personally rely on the dust removal kit designed for projectors. These kits typically include soft, anti-static brushes and microfiber cloths that prevent dust buildup — a common culprit behind image dimming and overheating in laser projectors.
Beyond physical tools, software maintenance is equally vital. Firmware updates often include performance optimizations and bug fixes. I recommend subscribing to your projector’s manufacturer updates or regularly checking their support page. For example, manufacturers like Sony and Epson release patches that improve color calibration and HDR handling, directly impacting your viewing experience in the long run.
Another key tool in my maintenance arsenal is calibration software. Calibration kits like the Calibrite ColorChecker combined with user-friendly software can help fine-tune color accuracy without professional help. Proper calibration not only enhances the picture but also extends the lifespan of the projector’s components by reducing unnecessary strain caused by color misalignment.
How do I maintain my projector over time?
Regular cleaning, timely firmware updates, and precise calibration form the foundation of timer-proof maintenance. Additionally, monitoring environmental factors such as ambient light and temperature helps prevent overheating and light source degradation. I’ve found that using a dedicated mount with vibration dampening reduces physical wear and tear on my ultra short throw projector, especially in active household settings. These small investments keep your system running smoothly and save you from costly repairs or replacements down the line.
Looking ahead, I predict that smart maintenance tools will become more integrated, using sensors and AI to alert you about dust accumulation, lamp hours, or calibration drift. For now, adopting these best practices and tools ensures your setup remains reliable, crisp, and ready for the next movie marathon.
Don’t wait for issues to arise; proactively upgrade your maintenance routine today. For instance, try incorporating a calibration process with advanced software—it could be the step that elevates your viewing experience for years to come.

The Sharpest Reality About Ultra Short Throw Mysteries
During my early days experimenting with ultra short throw projectors, I believed in their magical ability to transform small rooms effortlessly. But I learned the hard way that even the most sophisticated UST setups can suffer from alignment errors and ambient light issues if you overlook calibration and environment optimization. The true benefit emerged when I realized that understanding your room’s nuances and actively tuning your projector yields results far beyond factory presets—saving time and frustration in the long run.
Fine-tuning Your Equipment Is Where the Magic Happens
While investing in high-end gear is tempting, I found that regular calibration and maintenance makes a substantial difference. Using tools like calibration software and dust removal kits, I managed to preserve my projector’s brightness and color accuracy. Trust me, taking the time to keep your projector clean, firmware updated, and settings optimized unlocks the full potential of 4K and laser technology, turning a good picture into a breathtaking one.
Don’t Forget the Screens and Room Dynamics
The success of your home theater isn’t just about the projector—your screen choice and room light conditions matter immensely. After trial and error, I discovered that high-gain screens can enhance brightness but may wash out contrast if misused. Conversely, mastering your room’s ambient lighting—through blackout curtains or suitable screen gain—can make your immersive experience truly shine. Remember, even the world’s best projector needs the right environment to excel.
Plan for Longevity: Invest in Smart Upkeep
From my experience, proactive maintenance—like dusting filters, checking connections, and updating firmware—extends your projector’s lifespan and maintains image quality. Strategically placing cooling vents and using vibration-dampening mounts can also prevent wear and ensure stable operation, especially with powerful laser models. These small yet consistent efforts are the best way to enjoy countless movie marathons without unexpected interruptions.
Insider Wisdom From My Long-Standing Laser Projector Experience
- I underestimated the power of calibration: Even the most advanced home theater projectors require precise tuning for optimal performance.
- Environmental factors are critical: Ambient light and surface quality can drastically affect your visual experience, regardless of hardware specs.
- Using quality cables makes a difference: Upgrading to fiber optic HDMI cables eliminated persistent signal drops I faced with standard ones, proving that quality connections are fundamental.
- Patience pays off: Experimenting with different setup configurations taught me much more than blindly trusting defaults—be prepared to tweak and learn.
- Prioritize maintenance over upgrades: Regular cleaning and updates keep your projector performing at its best, preventing costly repairs and preserving image fidelity.
My Tools for Long-Term Success in Home Theater Excellence
- Dust removal kits: Essential for keeping dust off delicate optics and extending component lifespan.
- High-gain screens: To improve brightness without sacrificing contrast in well-controlled lighting conditions.
- Calibration software: Achieve perfect color accuracy with DIY tools, avoiding costly professional calibration.
- Firmware updates: Regularly check for updates that fix bugs and enhance compatibility for consistent performance.
Light the Path Forward for Your Home Cinema Passion
It’s natural to feel overwhelmed starting or refining your home projector setup. Remember, the journey is as rewarding as the destination. Embrace incremental improvements—each calibration, cable upgrade, or environmental tweak builds toward a truly cinematic experience right in your living room. Your passion for perfect visuals is worth every effort, and I encourage you to keep exploring and optimizing—your future movie nights will thank you.
What’s the Next Step You’re Excited to Tackle in Your Home Theater Journey? Share your plans or challenges below—let’s learn and grow together in mastering laser projector and 4K setup excellence!