Have you ever tried to set up a home theater only to realize your massive TV just isn’t cutting it anymore? I remember the moment I crammed my couch into a tiny corner, desperately trying to get the projector to work without glare or distortion. It was frustrating, and honestly, I felt like I was back in a 90s movie theater—only worse. Then, I had a lightbulb moment: the right projector could change everything, turning my cramped space into a cinematic paradise.
Why Upgrading to a 4K Ultra Short Throw Projector Matters
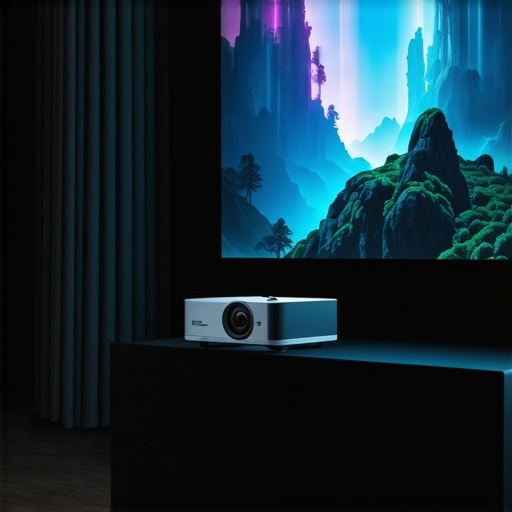
Fast forward a bit, and I discovered that the right setup isn’t just about size. It’s about clarity, convenience, and creating a true home theater experience. With the new wave of 4K projectors for 2024, you can enjoy stunning picture quality without sacrificing space. These projectors pack a punch, offering crisp, detailed images that rival the best cinemas — all in your own home.
Is the hype about ultra short throw models really justified?
That’s the biggest question I hear, and honestly, I was skeptical at first. I made the mistake early on of thinking all projectors are created equal. Spoiler alert: they’re not. My first attempt involved a traditional long throw projector that kept casting shadows and cluttering my room. It was a nightmare. It wasn’t until I switched to a laser ultra short throw projector that everything changed. Now, I can have a large screen right in front of me—no clutter, no shadows, just pure cinematic magic.
If you’ve faced similar frustrations, you’re not alone. Many people struggle with space constraints and poor image quality, but the good news is, the right projector can fix all that. The secret is understanding what makes a model suitable for your space and needs. That’s exactly what I’ll help you with in this guide. We’ll explore the best models for 2024 and learn how to choose the perfect one for your home.
Assess Your Space and Brightness Needs
Start by measuring your room dimensions and evaluating ambient light levels. If your space is small or has lots of windows, opt for a laser ultra short throw projector with high brightness ratings to combat glare and ensure a vivid picture. I once tried setting up a projector in a bright living room without considering brightness, resulting in washed-out images. After switching to a brighter model, my viewing experience dramatically improved.
Match Your Resolution and Image Size
Next, decide on the ideal screen size based on your seating distance. For a true cinematic feel, aim for at least 100 inches diagonally. Focus on 4K resolution to get sharp, detailed images. I learned this the hard way when I initially used a 1080p projector for a large screen; everything looked pixelated. Upgrading to a 4K model transformed my movie nights.
Evaluate Connectivity and Compatibility
Identify which devices you’ll connect—smartphones, gaming consoles, streaming devices—and ensure your chosen projector has the necessary ports or wireless capabilities. I once bought a projector with only HDMI, only to realize my streaming stick lacked an HDMI port. Now, I prefer models with multiple inputs or wireless streaming options, making setup seamless.
Compare Models and Features
Use comprehensive guides like this buying guide to compare top models. Focus on features like keystone correction, throw ratio, and lens shift, which help customize the image placement. I tested several models before settling on one with excellent keystone correction, which made mounting and alignment much easier.
Test the Setup and Fine-Tune
After installation, calibrate your projector’s settings—brightness, contrast, color balance—to optimize picture quality. Play around with the focus and zoom to achieve a crisp image. I once ignored calibration, and my picture was blurry; after adjusting, everything looked stunning. Don’t hesitate to revisit settings periodically to maintain quality.
Following these steps ensures you pick the perfect 4K ultra short throw projector that fits your space and elevates your home cinema experience. For more detailed insights, check out this comprehensive guide.
Many home theater enthusiasts believe that simply choosing the latest 4K ultra short throw projector guarantees a perfect setup. However, this is a misconception that can lead to costly mistakes. One prevalent myth is that all projectors with 4K resolution offer the same image quality. In reality, factors like contrast ratio, color accuracy, and lens quality greatly influence the viewing experience. For example, some models might boast 4K resolution but have poor contrast, resulting in dull images especially in rooms with ambient light. It’s essential to look beyond resolution and consider the projector’s overall performance, which you can find detailed in this comprehensive buying guide.
Keeping your home theater projector in top shape requires more than just occasional cleaning. Regular maintenance ensures vibrant images, reliable operation, and extends the lifespan of your investment. I personally swear by a few specific tools and methods that make this process straightforward and effective.
How do I maintain my projector over time?
First, invest in a high-quality microfiber cloth and a gentle lens cleaning solution. I use a specialized lens cleaning kit that includes a blower brush, which I gently use to remove dust from the lens and vents without scratching delicate surfaces. Dust accumulation can cause overheating and image degradation, so regular cleaning is crucial. I recommend doing this every 3-6 months, depending on your environment.
Next, keep the air filters clean. Many projectors come with filters that trap dust and debris. I set a reminder to check and replace or clean these filters every quarter. For models without washable filters, a soft brush or compressed air can help remove dust buildup. Proper airflow prevents overheating, which can damage internal components.
Firmware updates are often overlooked but are essential for optimal performance. I regularly check the manufacturer’s website or contact customer support to ensure my projector runs the latest firmware, which can fix bugs and improve image processing. This simple step can significantly enhance your viewing experience and compatibility with new devices.
Tools I recommend for ongoing maintenance
- Microfiber cleaning cloths: Essential for lens maintenance, preventing scratches while removing dust and fingerprints.
- Compressed air canisters: Perfect for cleaning vents and hard-to-reach areas without dismantling your projector.
- Soft brushes: Use for dusting filters and exterior surfaces gently.
- Firmware update utilities: Always use official software provided by the manufacturer for updates, which I find is often downloadable from their support pages.
In the future, I predict that smart maintenance alerts integrated into projectors will become more common, reminding us when to clean or update. This automation will make it even easier to keep our setups running smoothly without guesswork.
If you want to maximize your projector’s lifespan and performance, start implementing these maintenance routines today. Also, don’t hesitate to contact support teams when in doubt—many brands offer personalized advice to keep your device in prime condition.
Remember, a little effort goes a long way in preserving that stunning picture quality for years to come. Happy viewing!
After spending months tinkering, reading reviews, and testing different setups, I’ve uncovered some invaluable insights that go beyond the typical buyer’s guide. These lessons have truly transformed my home theater experience and can do the same for you.
How I Discovered the Power of Proper Calibration
Initially, I thought setting up my projector was just about plugging it in and hitting the auto-adjust button. Big mistake. I soon realized that fine-tuning contrast, brightness, and color settings makes a huge difference. The moment I calibrated my 4K ultra short throw projector properly, every movie looked more vivid and lifelike. Trust me, don’t skip this step—your eyes will thank you.
The Myth of Size Over Quality
Many assume that bigger screens automatically mean a better experience. I learned the hard way that resolution, contrast ratio, and lens quality matter more. A 100-inch screen with dull colors or poor contrast can ruin the immersion, no matter how large it is. Focus on the overall picture quality and features like keystone correction to enhance your viewing pleasure.
Why Regular Maintenance Pays Off
It might seem tedious, but cleaning dust filters and lenses, updating firmware, and checking connections regularly keeps your projector running smoothly and preserves picture clarity. I made the mistake of neglecting maintenance once, which caused overheating and image dullness. Now, I set a quarterly reminder—small effort, big payoff.
Embracing Smart Connectivity for Seamless Streaming
Integrating your projector with wireless streaming devices or smart home systems can elevate your experience. I found that models with multiple input options and robust Wi-Fi connectivity let me switch between platforms effortlessly. It’s a game-changer for spontaneous movie nights or gaming marathons.
Lessons I Wish I Knew From the Start
- Don’t buy the most expensive model without checking real-world reviews on contrast and color accuracy.
- Invest in a good calibration kit; it’s worth every penny.
- Regularly update your projector’s firmware to unlock new features and fix bugs.
- Keep your room dark and free of dust to maximize image quality.
Applying these insights has made my home theater setup more enjoyable and reliable. Remember, a great projector isn’t just a purchase—it’s an ongoing relationship of care and fine-tuning. To dive deeper into the best models and tips, check out this comprehensive guide.
My Essential Toolkit for Maintaining Your Projector
- Microfiber cloths: For gentle cleaning of lenses and vents, preventing scratches and dust buildup.
- Compressed air: Keeps vents and filters dust-free, improving airflow and cooling.
- Firmware update utility: Use official software from the manufacturer to keep your device current and secure.
- Calibrating tools: Basic color and image calibration kits can dramatically improve picture quality.
Step Into the Future of Home Cinema
It’s an exciting time to upgrade your setup. With the right knowledge and routine maintenance, your 4K ultra short throw projector can deliver a cinematic experience that rivals commercial theaters. Don’t wait—start fine-tuning today and enjoy the magic of home theater like never before. What’s the biggest challenge you’ve faced in setting up your projector? Share below—I’d love to hear your story!
http://James%20Anderson
This post hits home for me! I recently upgraded to a 4K ultra short throw projector and it really transformed my small living room. I used to struggle with glare and shadows, especially when watching during the day, but choosing a brighter model made a huge difference. I also underestimated the importance of calibration at first — dialing in the settings took my picture quality to the next level. Personally, I found that regular cleaning of the lens and filters keeps the image sharp and prevents overheating. Has anyone tried using calibration tools for color accuracy? I’d love to hear what works best for others or if there are any hidden tricks to get that perfect picture in a space with some ambient light. It’s amazing how much of a difference proper setup and maintenance can make in creating a true home theater experience. Does anyone have recommendations for budget-friendly calibration kits or maintenance tips that have worked well for them?
http://Laura%20Bennett
This post really resonates with me! I recently switched to a 4K ultra short throw projector in my small apartment, and it made a notable difference in my viewing experience. One thing I learned early on is the importance of ambient light control—using blackout curtains made my movies much clearer, especially during the day. I also found that investing in a budget-friendly calibration kit helped me fine-tune the color accuracy without breaking the bank. Does anyone have experience with adjusting settings for rooms with lots of natural light? It seems like sometimes even the brightest projectors still struggle in such environments. Also, regular cleaning of the lens and filters has kept my projector running smoothly and prevented overheating issues, which I initially overlooked. For those just starting out or on a tight budget, what affordable maintenance tools or calibration methods would you recommend? I’m eager to hear tips from others who’ve mastered the art of small-space home theaters—any shortcuts or tricks to make the setup easier?