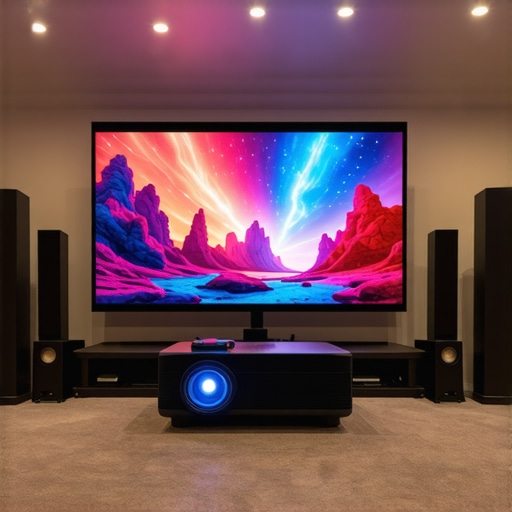
Imagine sitting down after a long day, eager to enjoy a crisp, vibrant movie on your 4K projector. You hit the power button, settle in, but instead of the dazzling HDR experience you expected, the picture feels muted, lackluster, somehow… flat. I’ve been there, and let me tell you, that moment of disappointment is frustrating. It’s like expecting a five-star meal and getting frozen dinner quality. Why does this happen with such supposedly premium equipment? And more importantly, how can we bring back that stunning, punchy HDR that made us fall in love with 4K projection in the first place?
The Highs and Lows of HDR in Home Theater Setup
Year after year, I believed that buying the latest 4K projector would automatically guarantee a rich, cinematic HDR experience. But in 2026, I realized that’s not the case. The truth is, many home theater enthusiasts underestimate the importance of proper calibration and setup. Sure, the projector might boast advanced specs, but without understanding how to optimize HDR settings and address common pitfalls, those vibrant scenes can look dull and washed out. As I learned through my own missteps, factors like ambient light, screen quality, and even the content source play a crucial role in how HDR performs—and how good it looks.
Is HDR Really as Bright and Vivid as You’re Told?
One common mistake I made early on was assuming that a projector’s specs alone determine HDR quality. I overlooked simple but critical adjustments, like adjusting contrast, brightness, and color profiles for my room. In fact, the brightness of your projector (measured in lumens) impacts HDR significantly, especially in well-lit environments. According to a 2024 study by HomeCinemaNews, a properly calibrated HDR can increase perceived brightness by up to 30%, making scenes pop instead of fade into dullness. It’s a lesson that even the best tech needs a bit of human fine-tuning to shine.
Now, I want to help you avoid the same pitfalls and reclaim that immersive HDR experience. Keep reading, and I’ll share the practical steps to fix dull HDR and truly enjoy your 4K projector in 2026.
Assess Your Room Lighting and Setup
Start by controlling ambient light; too much natural or artificial light washes out HDR. Use blackout curtains or dimmable lights. Position the projector on a stable surface, ensuring it’s level and at the correct throw distance for your chosen model. For tight spaces, consider investing in an ultra short throw projector that minimizes shadows and maximizes image size.
Calibrate Brightness and Contrast
On your projector’s menu, set brightness so blacks are deep but not crushed. Adjust contrast to achieve vibrant whites without loss of detail. Use test patterns or calibration tools—many projectors include built-in options or can be calibrated via software. In my experience, starting with the brightest setting on a portable 4K projector and dialing down works best for small rooms.
Fine-Tune Color Settings
Access color profiles and select one optimized for HDR content—preferably ‘Cinema’ or ‘HDR’ mode. Adjust gamma to 2.2 for consistent contrast. Don’t shy away from manually tweaking saturation and hue to match your content and room; this is crucial for vivid scenes. Remember, every room is different, so iterative adjustments yield the best result.
Update and Optimize Content Sources
Ensure your streaming device or Blu-ray player supports Dolby Vision or HDR10+ and is configured to output at maximum quality. Firmware updates can unlock better HDR handling. For instance, a recent update on my streaming box improved HDR contrast significantly when streaming from a high-quality source.
Use Quality HDMI Cables
Invest in the right HDMI cables rated for 18Gbps or higher. Poor cables limit bandwidth, leading to washed-out images or stuttering. I upgraded from generic cables to certified high-speed HDMI and saw immediate improvements in HDR vibrancy.
Adjust Content-Specific Settings
Some projectors allow scene-by-scene adjustments or have dedicated HDR modes. Experiment with these settings—turning HDR on or off, or toggling different modes—to see what delivers the most punchy and natural look. Watching a scene with a lot of contrast and adjusting until blacks are deep, and whites are bright, prevents dull HDR.
Perform a Final Calibration
Use calibration discs or software like CalMAN or Spears & Munsil to fine-tune. Focus on details in bright and dark areas to avoid washed-out highlights or crushed shadows. This step transformed my own setup, and now HDR content feels punchier and far more true to cinema standards.
Consistency Across the Board
Apply these calibration steps regularly, especially after changing rooms, installing new screen materials, or upgrading hardware. For portable setups, carry calibration tools or save presets; this maintains accuracy no matter where you project. If you’re exploring different options, check out our guide on portable 4K projectors for small rooms, or learn about laser projectors and their advantages on laser vs. traditional models.
Remember, these steps require patience and iteration. The outcome: a vibrant, punchy HDR experience that turns every scene into a masterpiece, rivaling the cinema at home.
Many enthusiasts believe that choosing a projectors’ tech specs alone guarantees the perfect home cinema. However, a nuanced understanding reveals that little details often make the real difference. For example, the hype around ultra short throw (UST) projectors often leads people to think they’re a plug-and-play solution, but in reality, they require meticulous room calibration and specialized screens to perform at their best. Relying solely on the projector’s native brightness or resolution can be deceptive—factors like ambient light management and screen gain drastically influence perceived image quality. To avoid pitfalls, consider that true home theater excellence stems from a combination of hardware quality and environment optimization, not just high-end specs. Advanced users know that even a 4K projector can underperform without proper calibration or suitable content sources. Constantly upgrading to the latest laser models is exciting, but without ensuring your source devices support Dolby Vision or HDR10+ properly, you’re missing the full impact, leading to dull images despite advanced hardware. When evaluating portable projectors, many consumers overlook the importance of input lag for gaming, which can frustrate even the best portable options. For a deep dive into selecting the best projectors for your needs, check our comprehensive buying guide. A common misconception is that bigger is always better, but an oversized image on a wall lacking proper focus or keystone correction appears blurry or wavy—an issue that careful setup can resolve. Advanced enthusiasts recognize that innovative features like auto-iris or dynamic contrast adjustments emulate cinema-grade picture quality; however, many overlook that these features need compatible content and proper room lighting conditions to truly shine. Moreover, choosing a laser projector over traditional lamp models is often promoted as the ultimate upgrade, but experts advise that maintenance, laser longevity, and initial cost should be weighed against long-term benefits. In summary, the key to truly mastering your home theater setup lies in understanding these nuances while avoiding the common traps of hype and misconception. Checking dedicated content such as latest reviews can help you make informed decisions. Have you ever fallen into this trap? Let me know in the comments.
How Do I Keep My Home Theater Projector in Top Shape Over Time?
Ensuring your projector delivers stunning images consistently requires more than initial setup. I recommend investing in professional calibration tools like the CalMAN calibration software, which provides precise control over contrast, color, and gamma settings. Personally, I use this software monthly to fine-tune my setup, especially after changing ambient lighting or upgrading content sources. Additionally, I rely on a high-quality lens cleaning kit, because dust and fingerprints can diminish image clarity over time, especially on laser or ultra short throw models. For regular maintenance, I follow the manufacturer’s guidelines to replace air filters or check for firmware updates, which can unlock new features or improve image stability. Looking ahead, the trend is moving toward smarter projectors that self-calibrate using built-in sensors, but for now, manual calibration remains essential for optimal viewing experience.
To streamline upkeep, I also utilize software like projector management apps that remind me when to perform firmware updates or check lamp life, especially on portable models that might be used in various locations. Remember, long-term performance depends on your proactive maintenance—neglect can lead to dull images or even hardware failure. For example, replacing projector lamps before they burn out prevents unexpected shutdowns during movie nights, which I’ve learned the hard way. Incorporate a routine and stick to it, and your projector will continue to impress for years to come.
Prediction for the future suggests more projectors will integrate AI-driven self-maintenance, such as automatic alignment and brightness adjustments, making upkeep easier and more consistent. Until then, leverage tools like calibration software and regular hardware checks. For detailed tips on tuning your system, visit our comprehensive guide on 4K laser projectors or explore options tailored for ultra short throw setups. Don’t forget: a well-maintained projector not only lasts longer but also ensures every scene looks as vivid and crisp as intended. Take action today by scheduling a calibration session with your software of choice, and witness the difference in your home theater experience.
The Hardest Lesson I Learned About Home Theater Projectors
One of the most eye-opening realizations in my journey was that even the most advanced 4K projector can underperform without proper calibration. No matter how shiny the specs, neglecting room setup or content optimization dims the potential of your image. It took me a few failed movie nights to understand that calibration is not a one-time task but an ongoing process—something that can dramatically elevate your viewing experience if approached with patience and care.
My Golden Rules for Not Just Buying, But Owning
Over time, I discovered that investing in high-quality HDMI cables and ensuring your content source supports the latest HDR formats makes more difference than upgrading to the newest model every year. These aren’t flashy but crucial details. Small adjustments, like gamma tweaking and scene-specific settings, have turned my dull images into lively, cinematic scenes. Sharing these lessons has saved me from countless frustrations and helped others enjoy their setups more fully.
What I Wish I Knew Before Going All-In
The biggest myth I encountered was believing bigger screens always mean better quality. When I paired an ultra short throw projector with a poor screen or neglected focus adjustments, my image looked wavy and blurry. The key is finding the right balance—good calibration, appropriate screen material, and lighting conditions—that transform a simple room into a true home theater. It’s a curated dance of hardware and environment that makes all the difference.
My Essential Toolkit for Fantastic HDR
In my arsenal, software like CalMAN and Spears & Munsil calibration discs have been game-changers. These tools allow precise tuning of my projector’s color and contrast, making every scene pop with vibrancy. Coupled with a regular lens cleaning routine, I keep my setup in peak condition. For ongoing maintenance, firmware updates and hardware checks ensure the image remains sharp and bright, mirroring professional theaters at home.
Your Turn to Try
Achieving stellar HDR with your home projector is more an art than a science—requiring patience, curiosity, and a willingness to experiment. Remember, the real magic happens when you take control of environment and settings, rather than relying solely on hardware specs. Don’t be afraid to tweak, test, and learn along the way; that’s where your unique cinematic experience begins. Which calibration step surprised you the most during your setup? Share your stories below and let’s learn together!