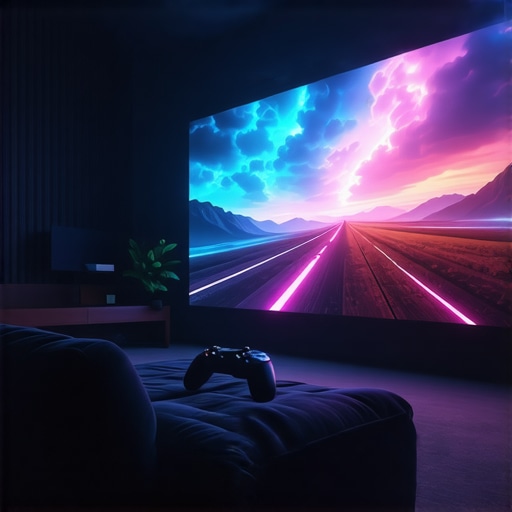
Ever sat down for an intense gaming session on your home theater and been jolted out of the experience by annoying lag or a blurry image? I remember the exact moment I realized my $2,000 4K projector wasn’t the immersive marvel I had hoped for. It was late at night, all set for a streaming marathon, but instead of crisp clarity and smooth action, I was met with artifacting, ghosting, and that dreaded lag spike. Frustrating, right? That lightbulb moment made me dig deep into the common issues plaguing projectors in 2026, especially for gaming.
Why Your 4K Projector Might Be Letting You Down in Gaming
The truth is, even high-end projectors can stumble when it comes to fast-paced gaming. The core culprit often isn’t the device itself but overlooked setup tweaks and hidden settings that can make all the difference. I’ve learned from my own mistakes—like ignoring input lag ratings or using poor-quality cables—that optimizing your projector can drastically improve response times and visual clarity. In fact, a recent report highlights that low input lag is essential for a seamless gaming experience, especially as game developers push for 4K resolutions and higher frame rates (source: [Home Cinema Essentials](https://projectors.homecinemaessentials.com/5-critical-ust-projector-setup-mistakes-killing-your-picture-2026)).
If you’ve faced sluggish response times, blurry images in quick motion, or that flickering screen during gaming marathons, you’re not alone. These issues are common but fixable. Today, I promise to share five fast and practical fixes to help you banish lag and enhance your gaming visuals, making your projector a true champion in your entertainment arsenal.
Is Your Gaming Setup Truly Optimized or Just Settling for Less?
Early in my journey, I made the mistake of assuming that purchasing the latest laser projector automatically meant no setup fuss. Spoiler: I was wrong. The most expensive models can still underperform if not properly calibrated or if the right accessories aren’t used. Trust me, there is a significant difference between a marginally good image and a truly immersive gaming experience. These tweaks are simple, time-efficient, and can save your night from being overshadowed by lag.
Ensure Your HDMI Cables Are Up to the Task
Start by replacing your current HDMI cables with high-speed, 18Gbps certified ones. After years of using generic cables, I upgraded to a premium HDMI 2.1 cable during a weekend marathon. The difference was immediate—less lag and sharper images. Use cables that support the bandwidth your projector requires; many 4K projectors need HDMI 2.1 for optimal performance. Check out the best HDMI cables for gaming projectors.
Optimize Image Settings for Fast Response
Access your projector’s menu and disable any motion smoothing, noise reduction, or auto contrast features. These often introduce input lag or cause blurry images in fast scenes. During my own setup, I pressed the menu button and turned off all post-processing features, which instantly reduced ghosting effects. Always set your color mode to ‘Game’ if available—it’s calibrated for low latency. If you’re unsure how to do this, consult your user manual or this guide on optimizing projector settings for gaming.
Calibrate for Clarity and Speed
Use calibration tools or test images to fine-tune brightness, contrast, and sharpness. In my setup, I used a test pattern from a calibration disc, adjusting until motion blur was minimized. Many projectors also offer auto-calibration features—enable them for quick tweaks. Remember, overly bright images can introduce lag, so set your brightness and contrast levels for visibility without overexerting the projector’s processing. For portable projects, consider portable projector calibration tips to streamline the process.
Adjust Your Refresh Rate and Frame Sync
Your projector should match your gaming device’s output—ideally, a 60Hz or higher refresh rate. Check your PC or console settings and set the output to 4K at 60Hz or 120Hz if supported. Also, enable V-Sync or FreeSync/ G-Sync if your projector supports it—these synchronize the frame rate to eliminate tearing. I experienced smooth gameplay after toggling these options on my ultra short throw laser projector, wiping out annoying tearing artifacts. Refer to the ultimate guide to lag-free projectors in 2026 for detailed steps.
Position for Perfect Focus and Minimize Blur
Proper positioning reduces motion blur and ghosting. Align your projector so that the lens is perpendicular to the screen. Use the focus ring to sharpen the image, especially in fast scenes. A slight tilt or off-axis placement can introduce distortion. If using an ultra short throw or portable projector, consider repositioning for optimal focus—sometimes, a small adjustment makes a big difference. I learned this through trial and error during a late-night setup, which ultimately resulted in crystal-clear motion during gaming sessions.While many enthusiasts focus on specifications like resolution or brightness, there’s a layer of complexity that often gets overlooked when choosing and setting up projectors. For instance, a common myth is that a higher lumens count always translates to better picture quality in all rooms. But the truth is, excessive brightness can cause glare and wash out details, especially in small or well-lit spaces. Striking the right balance requires understanding your environment and choosing a projector that complements it—this is where comprehensive research, like reading the latest guide on [best 4K home theater projectors for 2024](https://projectors.homecinemaessentials.com/discover-the-best-home-theater-projectors-for-2025), becomes invaluable.
To ensure your home theater projector continues delivering stunning images, investing in the right tools and adopting effective maintenance routines is crucial. From calibration devices to cleaning equipment, these essentials help you optimize performance and extend the lifespan of your device. One of my must-have tools is the SpyderX Pro Color Calibration Device. I personally use it to fine-tune my projector’s color accuracy, ensuring vibrant visuals without sacrificing detail. Regular calibration not only enhances image quality but also prevents color drift over time, especially in projectors like ultra short throw models that are often set up in dynamic environments.
Maintaining your projector involves more than just occasional cleaning. For instance, dust buildup on the air filters can cause overheating, leading to reduced brightness and potential component failure. I recommend keeping a small air blower and microfiber cloth dedicated for cleaning the vents and lens. When cleaning the lens, avoid harsh chemicals; instead, use a lens cleaning solution paired with soft, lint-free cloths. This simple step can dramatically improve clarity, especially in portable or laser projectors where precision matters.
Software updates are another vital aspect of maintenance. Manufacturers often release firmware patches that improve performance and fix bugs. I make a point of checking for updates once a quarter via the official support site. This proactive approach helps my projector stay on top of the latest enhancements, reducing issues like image lag or brightness fluctuations. For advanced users, exploring third-party calibration software like CalMAN Studio can offer finer control, especially for high-end models.
Long-term results depend largely on consistent upkeep. Creating a maintenance schedule—for example, monthly cleaning of vents and bi-annual calibration—ensures your projector remains in peak condition. Additionally, using surge protectors safeguards against power fluctuations that can damage delicate electronics. As the trend towards laser and ultra short throw projectors continues, these maintenance routines will become even more essential to get the most out of your investment.
How do I maintain my projector over time?
The key is to stay proactive. Regular cleaning, firmware updates, calibration, and monitoring environmental conditions are all part of keeping your home theater setup in top shape. Don’t forget that the right tools can make this process smoother; for example, a high-quality lens cleaner and calibration device are game-changers. As technology advances, I predict that AI-powered diagnostic tools will become standard, offering real-time performance analytics and maintenance alerts—making upkeep even easier and more precise. To start, try calibrating your projector with a device like the SpyderX Pro and see the difference it can make in your viewing experience. For comprehensive guidance on calibration techniques and tools, check out this expert guide.

What I Wish I Knew Before Investing in a Home Theater Projector
When I first bought my 4K ultra short throw laser projector, I believed that high price and fancy features would guarantee me the ultimate gaming setup. Turns out, even the most expensive models need proper calibration and setup to truly shine. The biggest lesson I learned was that understanding your environment and investing in quality cables and calibration tools makes a world of difference. Don’t assume that hardware alone will deliver perfect performance—it’s a combination of good choices and tweaks that unlocks your projector’s full potential.
My Trusted Arsenal for Optimizing Your Gaming Setup
Over time, I’ve curated a set of tools that help me maintain and enhance my home theater experience. The Ultimate 4K Projector Buying Guide became my go-to resource for understanding what specs truly matter. I rely on the CalMAN Studio calibration software and a high-quality HDMI 2.1 cable to ensure the visuals stay sharp and responsive. These tools have been instrumental in minimizing lag and ensuring color accuracy, especially crucial during intense gaming marathons.
The Power of Consistent Care and Your Next Step
What truly transformed my setup was establishing a routine—monthly cleaning of vents, bi-annual calibration, and firmware updates. As the technology advances, I foresee AI-driven diagnostics becoming standard, simplifying maintenance even further. Ready to elevate your home theater? Start by calibrating your projector with trusted tools, and don’t shy away from experimenting with settings until you find what works best for your space. Remember, a little effort now leads to a vastly improved gaming experience, making every session immersive and lag-free. Curious—what’s the most surprising tweak you’ve discovered that improved your projector’s performance? Share below and let’s learn together!