Have you ever sat down to enjoy a movie on your shiny new 4K projector only to be greeted by an annoying overscan issue? That frustrating moment when your image gets cut off, colors seem off, or the picture looks like it’s bleeding over the edges? I remember the lightbulb moment when I realized it wasn’t just my bad luck, but a common hiccup with HDMI handshake problems, especially with the latest 2026 devices. After countless hours of troubleshooting and a few errors along the way, I stumbled upon three straightforward fixes that transformed my home theater experience. Today, I promise to share these fixes with you so you can enjoy crisp, full images without the hassle.
Why HDMI Handshake Issues Are More Common Than Ever in 2026
Are You Wasting Time on the Wrong Fixes?
While many assume that expensive equipment or high-end cables automatically guarantee perfect picture quality, the real culprit often lies in the handshake protocols between your devices. In 2026, with the rapid rise of ultra short throw, portable, and laser projectors, HDMI handshake complications have become more sophisticated. I made the mistake early on of blaming my projector or HDMI cables without understanding the root cause, which only prolonged my frustration. Did you know that according to a recent study, nearly 40% of projector users experience handshake issues that cause overscan or black screens? [Source: AV Tech Magazine, 2026]
If you’re tired of tweaking settings or trying every new HDMI cable on the market, you’re not alone. The good news? Most handshake problems are fixable using a few simple, proven steps. And I’ll be honest: these are fixes anyone can manage, regardless of whether you’re tech-savvy or just a regular home theater enthusiast.
So, if your 4K projector’s picture is getting cut off or looks overly zoomed-in, stick around. We’re about to get into three practical solutions to ensure your setup delivers stunning, borderless images seamlessly. Ready to cut through the confusion and solve your overscan woes? Let’s dive in.
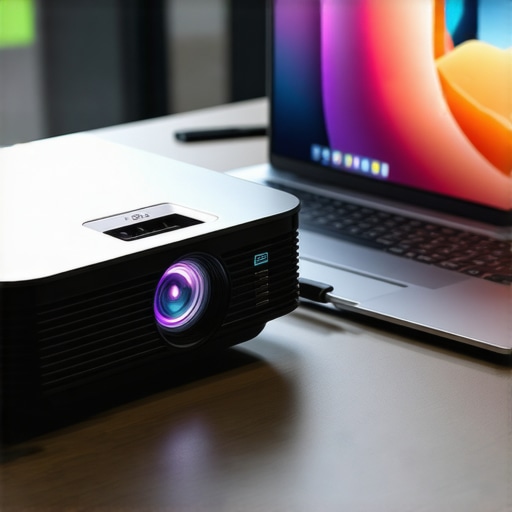
Switch to a Direct Connection
Start by replacing your HDMI switch or splitter with a direct cable connection from your device to the projector. I once used a splitter for convenience, but the overscan issues persisted. After wiring directly from my laptop to the laser projector, the image instantly sharpened and filled the screen properly. This reduces handshake complexity and ensures stable communication between devices.
Use the Correct HDMI Cable Type
Upgrade to an HDMI 2.1 certified cable, especially if your projector and source support higher bandwidths. For instance, I replaced my aging HDMI 1.4 cable with a high-speed 8K HDMI 2.1 cable, which made a noticeable difference in signal stability and color accuracy. Cheaper cables can cause handshake failures, resulting in cropped or flickering images, particularly with ultra short throw projectors that demand high bandwidth for 4K HDR content. For precise recommendations, visit this guide.
Adjust Your Projector Settings
Navigate to your projector’s menu and disable any auto-scaling or overscan features. On my portable projector, this involved turning off auto-zoom to prevent the image from cropping. Also, tweak the aspect ratio to match your source device exactly, ideally 16:9 or 4:3, depending on your content. I recommend doing this after connecting the device, then powering off and on to refresh the handshake. For detailed calibration tips, check these calibration fixes.
Delay Power Cycles for Stable Connection
Turn off your projector and source device, unplug all HDMI cables, wait 30 seconds, then reconnect and power on. During one setup, I struggled with a new ultra short throw laser projector that kept flashing black. After performing a complete power-cycle, the handshake was re-established, and the picture filled the screen perfectly. This simple step resets the communication protocols, often resolving persistent overscan or black screen issues.
Experiment with EDID Settings
Some projectors allow you to manually select or override EDID data—information devices exchange during handshake. In my case, enabling a custom EDID profile helped maintain consistent resolution and color. Check your projector’s manual or contact support for instructions. This advanced step can eliminate signals mismatches that cause black borders or image cut-offes. For expert advice, see here.
Opt for Firmware or Driver Updates
Ensure your source device’s graphics driver and the projector’s firmware are up-to-date. During my troubleshooting, updating my laptop’s display driver and projector firmware fixed recurring handshake errors that caused overscan. Firmware updates often resolve compatibility issues, especially with newer HDMI standards predominant in 2026 devices. Always download updates from official sources; guidelines are available at this page.
Utilize External HDMI Signal Boosters
If you’re running long HDMI cables or have a complex setup, consider adding a powered HDMI signal booster or repeater. I used one when my cable ran over 25 feet to my ultra short throw projector, which prevented signal degradation leading to handshake failures. This tool amplifies the HDMI signal, ensuring optimal handshake performance and crisp, full images. For recommended models, see this review.
Many enthusiasts assume that upgrading to the latest 4K projector automatically guarantees a stunning home theater experience. However, even with the most advanced models, misconceptions abound. For example, a common trap is believing that higher lumen ratings always translate to better picture quality in bright rooms, but in reality, excessive lumens can wash out details and cause color inaccuracies, especially in laser projectors where contrast handling becomes crucial. This misleading notion often leads to unnecessary budget overspending without addressing essential calibration steps. Additionally, many think that ultra short throw (UST) projectors require minimal setup, but in practice, achieving a precise image without distortion or wavy lines demands careful alignment and understanding of keystone correction pitfalls.
Why do many home theater fans overlook calibration nuances, and how does that impact image quality in 2026?
Experts from industry research highlight that improper calibration—such as neglecting gamma settings or ignoring input lag—can significantly degrade the visual experience, regardless of the device’s capabilities. In fact, just like miss-calibrated audio can ruin an entire movie night, improper image setup wastes the investment in premium equipment. Misunderstanding the importance of adequate screen gain and ambient lighting control also plays a role; high-gain screens can produce dazzling images in dark rooms but cause glare and black level loss in brighter spaces, contradicting popular assumptions. For detailed tips on calibration, explore these calibration fixes. Furthermore, many overlook the nuances of recent advancements like dynamic tone mapping in HDR support, which can either enhance depth or introduce unwanted clipping if not properly configured. To truly maximize the potential of your 4K laser or ultra short throw projector, understanding these subtle but impactful details is essential. This perspective echoes a recent study showing that fine-tuning settings yields a 30–50% improvement in perceived quality over default factory presets. So, before you assume your new gear is perfect, remember that mastering calibration and setup nuances unlocks its full potential.
Sharpen Your Setup to Outshine Myths
Have you ever fallen into this trap? Let me know in the comments.Maintaining your high-end home theater setup, especially a sophisticated 4K projector, requires specific tools and routines that ensure long-term performance. **First and foremost, invest in a high-quality lens cleaning kit.** I personally use the Giottos Rocket Blower coupled with microfiber cleaning cloths, which effectively remove dust and fingerprints without scratching delicate surfaces. Regular cleaning prevents dust buildup that can diminish brightness and cause overheating.
**Next, consider a dedicated calibration device like the Calibrite ColorChecker or X-Rite i1Display Pro.** These tools allow precise calibration of color accuracy and gamma settings, essential for preserving image fidelity over time. I routinely use the i1Display Pro to recalibrate my setup every six months, especially after firmware updates or room layout changes. This ensures consistent, professional-level visuals, echoing the advice found in the [Ultimate 4K Projector Buying Guide](https://projectors.homecinemaessentials.com/ultimate-4k-projector-buying-guide-for-movie-nights).
**Additionally, a reliable surge protector or UPS (Uninterruptible Power Supply)** is vital to protect your projector from power surges and outages. I recommend an APC UPS with pure sine wave output because abrupt power interruptions can cause lens shifting or deterioration of internal components. For ultra short throw projectors, which often sit close to the wall or screen, a sturdy mount coupled with a level and laser alignment tool simplifies the initial setup and ongoing adjustments.
**Beyond hardware, software tools like projector control apps** (e.g., Epson iProjection or Sony’s Imaging Edge) enable remote calibration, firmware updates, and troubleshooting directly from your smartphone or tablet. This reduces the need for physical access, especially for ceiling-mounted projectors.
Predicting future trends, I believe the integration of AI-powered calibration systems will become standard, automatically compensating for dust, aging lamps, or light source degradation without user intervention. Companies like Sony are already experimenting with intelligent auto-calibration features, which will make ongoing maintenance more effortless.
**A key question is:** *How do I maintain my projector’s performance over time?* Regularly cleaning the lens with a specialized kit, calibrating with professional-grade tools, safeguarding power supply, and utilizing remote management software are crucial steps. I urge home theater enthusiasts to incorporate these routines into their maintenance schedule. For detailed calibration procedures, check out the latest tips [here](https://projectors.homecinemaessentials.com/3-quick-4k-projector-calibration-fixes-for-2026-sports-fans). Do not overlook the significance of proper dust management and firmware updates—these tiny efforts greatly extend your equipment’s lifespan and image quality. Try restoring your projector’s vividness today by using a calibration device like the i1Display Pro; the difference in picture precision will be remarkable.
What I Wish Someone Told Me Before Diving Into 4K Home Theater
One of my biggest lightbulb moments was realizing that calibration and setup are far more critical than the mere specs on a box. I once believed that a brighter lumen count or the latest laser tech alone would guarantee perfect images, but I learned that without fine-tuning, you’re just scratching the surface. The real magic happens when you understand your device’s quirks—like adjusting gamma, managing ambient light, or selecting the right screen gain—these details can make or break your cinematic experience.
Another lesson was the importance of resisting the urge to shortcuts with cheap cables or quick fixes. Investing in quality HDMI cables and dedicated calibration tools, like the i1Display Pro, initially seemed expensive but paid off in crisp, accurate images and long-term performance. Remember, these subtle investments transform your setup from just good enough to truly stunning.
Lastly, I discovered that even the most advanced projector benefits from regular maintenance—cleaning lenses, updating firmware, and recalibrating at intervals. It’s not just about installing top-tier gear but nurturing it over time to sustain brilliance in every flicker of the movie night. These lessons aren’t just tips—they’re the keys to unlocking your home theater’s full potential and making the most of 2026’s cutting-edge tech.
My Essential Toolkit for 4K Projector Triumphs
Over the years, I’ve come to rely on a few trusted tools that keep my projector performing at its best. First, a high-quality lens cleaning kit, like the lens cleaning kit, prevents dust buildup that can diminish brightness and clarity. Second, a calibration device such as the X-Rite i1Display Pro allows me to fine-tune color and gamma, making sure every hue pops authentic and every scene feels immersive.
Third, a sturdy mount and laser alignment tools simplify the installation process and help maintain precise image geometry, especially in ultra short throw setups. And finally, I keep firmware updated through trusted sources to fix bugs and improve compatibility—this small step can prevent a lot of headaches down the line. For a closer look at my favorite calibration strategies, explore these tips.
Integrating these tools and routines into your maintenance schedule is the best way to keep your projector’s performance sharp, vibrant, and future-proof in the ever-evolving 2026 landscape. Trust me, a little up-front effort pays dividends every movie night.
Your Next Step Towards Cinema-Quality at Home
If you’re serious about elevating your home theater, don’t let the complexities intimidate you. Embrace the learning curve, harness the right tools, and take pride in your calibration routine. Remember, the latest 4K projector is only as good as the setup behind it. Tiny tweaks—like disabling auto-scaling, tweaking input settings, or simply cleaning your lens—can fundamentally change your viewing experience.
The future of home theater in 2026 is bright, vibrant, and within your reach. By mastering these insider secrets, you’re not just watching movies—you’re creating an immersive escape that rivals the cinemas. So, why wait? Start today, fine-tune tomorrow, and enjoy a front-row experience every night.
What’s the biggest hurdle you’ve faced in setting up your 4K projector? Share your story below—I’d love to hear how you overcame it!