I remember the moment clearly. I had just unboxed my shiny new 4K laser projector, dreaming of cinematic weekends and immersive gaming nights. But as I tried to mount it on the ceiling, frustration kicked in. The projector was hefty—far heavier than I anticipated—and my existing mounts wobbled dangerously, causing flickering and misplaced focus. That sinking feeling of having invested so much money into quality visuals, only to realize I might ruin everything with a shaky mount, was eye-opening.
After several failed attempts and a few nail-biting moments, I learned a crucial lesson: not all mounts are created equal, especially for powerful, heavy projectors like the 2026 heavy 4K laser models. Ensuring a secure, stable mount isn’t just about avoiding cosmetic issues; it’s essential for safety, image quality, and long-term durability.
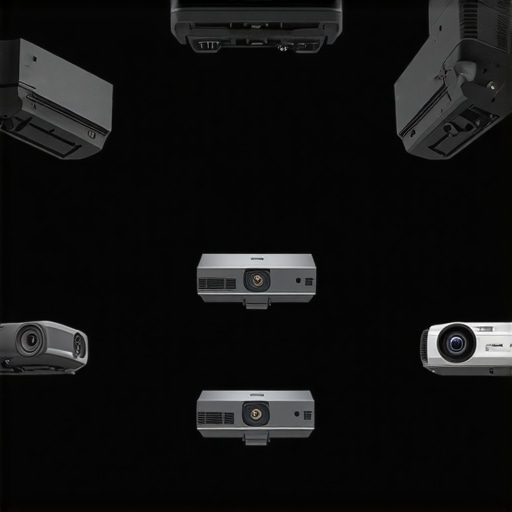
Today, I want to share my journey and the solutions I found. If you’re like me—struggling to find the perfect ceiling mount that can handle your heavy 2026 4K laser projector—I promise this guide will set you on the right path. We’ll explore the top five ceiling mounts designed specifically for these demanding devices, so you can enjoy your home theater without constantly worrying about your setup.
Why Choosing the Right Ceiling Mount is a Big Deal in 2026
The advancement in projector technology over recent years means heavier, more powerful models are now the norm. With 4K laser projectors pushing the envelope, their weight and size increase, making incompatible or poorly rated mounts a significant safety risk. A flimsy or incorrectly installed mount could lead to damage, expensive replacements, or worse—injuries if it crashes unexpectedly.
Research shows that improper mounting can cause image instability, affecting your viewing experience and potentially shortening the lifespan of your projector. In fact, according to [Home Cinema Essentials](https://projectors.homecinemaessentials.com/why-your-4k-laser-projector-focus-drifts-3-permanent-2026-fixes), even slight vibrations or mount failures can lead to focus drift or image wobble, ruining your movie night.
The good news? There are specialized ceiling mounts engineered to handle the big weight and dimensions of these advanced projectors. Selecting the right one isn’t just about weight capacity—considering durability, ease of installation, and adjustability is equally vital.
But how do you tell which mounts truly deliver? That’s what I’ll help you figure out next. If this resonates with your current frustration, keep reading—because the perfect mount is out there, and I’ll guide you through finding it. For more insights, check out our comprehensive [home theater projector setup guide](https://projectors.homecinemaessentials.com/ultimate-4k-projector-buying-guide-for-movie-nights) but let’s start with what matters most: secure, reliable mounting solutions.
Ready to elevate your setup? Let’s dive into the top five ceiling mounts that can confidently bear the weight of your 2026 heavy 4K laser projector and keep your cinematic dreams safely perched overhead.
Prepare Your Mounting Space and Tools
Before any installation, clear the ceiling area of obstacles and determine the exact location for your projector to achieve optimal viewing angles. Gather essential tools like a drill, stud finder, level, measuring tape, and appropriate anchors. As I did, double-check the weight capacity of your chosen mount to handle the heavy 2026 laser projector—it’s like investing in a sturdy foundation for a skyscraper; strength here prevents catastrophe later.
Identify Ceiling Support and Mark Anchor Points
Use a stud finder to locate ceiling joists or support beams capable of bearing the mount’s weight. Mark the precise spots for drilling, ensuring the mount will be secured into solid support rather than drywall alone. I once attempted to mount a lightweight portable projector on drywall; it wobbled dangerously, emphasizing why support validation is critical. Proper support guarantees stability and safety.
Drill and Install Anchors Securely
Drill holes into the marked support points, using the right drill bits for your ceiling material—masonry bits for concrete, for example. Insert heavy-duty anchors into the holes; these act as the bones anchoring the mount. Improper anchoring can cause wobbling or even falling, especially with laser projectors that can weigh over 20 pounds. Think of this step as setting the roots for your projector’s stability.
Attach the Mount and Level It Precisely
Secure the mount to the anchors, tightening bolts evenly to prevent tilting. Use a level to ensure the mount is perfectly horizontal; even minor misalignments can lead to distorted images or focus issues. I learned this lesson the hard way when my first attempt resulted in a skewed image—correcting it required re-mounting, which wasted time but improved the viewing experience.
Adjust and Fine-Tune the Projection Angle
Once mounted, adjust the projector’s tilt and swivel features to align with your screen or wall. For ultra short throw or laser projectors, precise angle adjustments are vital for sharp focus and minimal keystone distortion. Remember, small tweaks can make a big difference—take your time to avoid future readjustments. I once hurried this step, leading to blurred images that took hours of recalibration to fix.
Test Stability and Image Quality
Finally, gently shake or push the projector to test stability. Check the image for wobble, focus, and alignment. If issues appear, revisit the mount’s securement or support support. Ensuring a fixed mount prevents vibrations that can cause flickering or blurry images, which is especially frustrating when viewing 4K content or during intense gaming sessions. A solid foundation ensures your investment in a high-end projector is protected.
This hands-on approach, reinforced with proper support and precise installation, is the key to enjoying crisp, stable visuals without the risk of accidental damage or injury. Remember, prioritizing safety and stability during installation pays off in picture quality and peace of mind.
When it comes to selecting and optimizing 4K projectors, especially laser, ultra short throw, or portable models, many enthusiasts fall prey to misconceptions that hinder their viewing experience. Let’s dig deeper into some of these overlooked nuances, which can make a significant difference in performance and longevity.
**The Myth of Lumen Brightness as the Sole Indicator** is widespread. Many believe that a higher lumen count guarantees a brighter, better image. However, this overlooks factors like screen gain, ambient lighting, and contrast ratios, which are just as critical. For instance, a 2000-lumen laser projector with a high contrast ratio can outperform a 3000-lumen model in a typical living room. To truly understand your options, explore comparisons between laser and traditional lamp-based projectors, and see why laser technology often provides more consistent brightness over time.
**Overlooking the Impact of Color Accuracy and Black Levels** is another common mistake. High-resolution content benefits immensely from accurate colors and deep blacks, yet many assume 4K resolution alone creates superior quality. This oversight leads buyers to focus solely on pixel counts, ignoring that imperfect color calibration can result in dull images, especially in dedicated home theaters. Advanced users should consider calibration tools or models with broader color gamuts, such as those supporting HDR standards, to maximize visual fidelity.
**Ignoring the Importance of Proper Setup for Ultra Short Throw Models** can result in blurry images or keystone distortion. A frequent trap is treating UST projectors like standard models without accounting for their unique installation needs. For example, a slight misalignment can cause significant image wavy effects. This underscores the importance of precise placement and using specialized mounts, which is detailed in our guides on ultra short throw setup. Have you ever fallen into this trap? Let me know in the comments.
**Beware Assuming Portability Means Compromise**. Portable projectors are often thought to deliver lower quality due to their size. But modern advancements, especially in battery technology and lens quality, have allowed portable models to rival larger units, especially for outdoor or on-the-go scenarios. Noticing overlooked features like high lumens, good contrast, and robust connectivity can help you pick a portable projector that fits your needs without sacrificing quality. Check out our portable projector guide for more.
**Misjudging the Role of Environmental Factors** can also sabotage your viewing experience. For example, many neglect the effect of ambient light or the placement of reflective surfaces in their rooms. Even the best projector can’t overcome poor room conditions, leading to washed-out images or glare. Using proper screens, like ambient light rejecting (ALR) models, can dramatically enhance picture quality, especially in bright rooms. For detailed solutions, see our review of UST and ALR benefits.
In summary, concentrated on resolution alone is a mistake. Realizing the nuances—such as calibration, installation, environmental conditions, and understanding technological specifications—can elevate your home theater setup. Remember, investing time into proper setup and understanding these subtleties will save you from costly mistakes and deliver a stunning viewing experience.
Have you ever fallen into this trap? Let me know in the comments, and let’s keep the conversation going!Maintaining your high-end 4K laser or ultra short throw projector is crucial to preserve image quality and extend its lifespan. One of my go-to tools is a compressed air can, which I use regularly to blow out dust from vents, filters, and lens areas—preventing overheating and color distortion. Additionally, a microfiber lens cleaner ensures your lens stays free of smudges, maintaining sharp focus and vibrant visuals. For software, I rely on calibration utilities like CalMAN, which help fine-tune color accuracy and gamma settings, especially important for laser projectors with HDR support. Regular firmware updates from the manufacturer also enhance performance and fix known bugs, so I keep an eye on official support sites.
Looking ahead, I predict that AI-powered calibration and predictive maintenance systems will become standard—using sensors to alert you of dust buildup or component wear before issues arise. Staying proactive about these factors will keep your setup running smoothly.
How do I keep my projector performing at its best over time?
Maintaining your projector involves more than just cleaning; it’s about systematic upkeep. I suggest creating a maintenance routine that includes cleaning filters bi-monthly, checking lamp or laser source longevity, and inspecting mounting stability. For ultra short throw and portable models, ensure the mounting brackets are secure and free from vibrations, which can misalign the image—especially in high-humidity environments. When you’re confident with basic checks, consider investing in a light meter or colorimeter for precise calibration, particularly if you demand professional-grade image fidelity. Cheap calibration tools don’t offer the same accuracy, but I swear by the X-Rite i1Display for its reliability.
One often-overlooked aspect is environmental control. Minimize dust and humidity, and keep your projector in a temperature-stable room. Sudden shifts in climate can affect internal components and LED or laser life expectancy. A small dehumidifier or air purifier can dramatically reduce buildup of particles and mold, which impede cooling.
For managing ongoing updates and troubleshooting, I recommend bookmarking the [support page](https://projectors.homecinemaessentials.com/contact-us) of your projector’s manufacturer. Regularly checking for firmware updates fixes bugs and sometimes unlocks new features, keeping your device at peak performance.
To keep things simple yet effective, I use a combination of compressed air, microfiber cleaning, and periodic calibration with the right tools. This approach has kept my setup consistent, allowing me to enjoy cinematic quality night after night. Also, don’t forget to review your setup periodically—tiny adjustments can dramatically improve image stability, especially for ultra short throw projectors prone to wobble if not mounted securely.
Given the trend toward smarter projectors, expect future models to incorporate AI diagnostics that automatically alert you to maintenance needs. For now, try adopting a routine with these recommended tools and checks. It’s the best way to keep your investment shining bright for years to come.
What I Didn’t Expect About Heavy Projectors
One of the biggest surprises in setting up my 2026 heavy 4K laser projector was realizing that even the best mount could falter without proper installation. I learned the hard way that weight capacity isn’t enough; support into ceiling beams is critical. The DIY advice I found online often overlooked the importance of support placement, leading me to reinforce my mount with additional brackets—an eye-opening choice that saved me future headaches.
Another lesson was how vital precise leveling is. A small tilt—even a few millimeters—can distort the entire picture or cause focus drift. Investing in a high-quality level made a significant difference, and now I always double-check before locking the mount in place. This attention to detail transformed my viewing experience from shaky to cinematic.
Lastly, I discovered that the environment influences mount stability. High humidity and temperature swings can weaken mounting materials over time. I started consistently inspecting my setup every few months, replacing any worn anchors and tightening bolts. Small preventive steps like these extend your projector’s lifespan and maintain picture quality, a practice I highly recommend for any enthusiast.
Tools and Resources That Elevated My Setup Experience
My toolkit includes a heavy-duty drill and a stud finder—basic but essential for secure mounting. For calibration, I rely on the X-Rite i1Display, which has helped me fine-tune color accuracy and gamma settings, ensuring vibrant, true-to-life images. When researching mounts, I trust the [discover the best home theater projectors for 2025](https://projectors.homecinemaessentials.com/discover-the-best-home-theater-projectors-for-2025) page, as it offers in-depth reviews of hardware designed specifically for heavier, high-performance projectors.
Additionally, I follow insights from the [ultimate 4K projector buying guide for movie nights](https://projectors.homecinemaessentials.com/ultimate-4k-projector-buying-guide-for-movie-nights), which helps me stay updated on the latest technological advances and mounting solutions. Combining reliable tools with expert advice has been transformational in enjoying a seamless home theater experience.
Take the Leap and Elevate Your Home Theater Game
Embracing expert advice and personal experience has drastically improved my projector setup. If you’re ready to upgrade your home theater or improve your current installation, remember that attention to detail and ongoing maintenance are key. The right ceiling mount, installed correctly, can turn your space into a cinematic sanctuary where every detail is crystal clear and stable—making all those evenings of investment worthwhile.
Don’t hesitate to experiment and refine your setup over time; technology evolves, and so should your strategies. Your dream home theater awaits, and with a little patience and the right knowledge, you can enjoy stunning visuals every night.
Have you ever struggled to find the perfect mount for your projector? Or maybe a setup tip that turned your experience around? Share your story below—I’d love to hear how you’ve tackled your projector challenges!