Imagine this: you’ve finally set up your sleek 4K projector in your cramped studio apartment. The movie is queued, the lights are dimmed, and you’re itching to dive in. But instead of a crisp, vibrant picture, all you see are washed-out images, annoying shadows, and a constant struggle to get everything perfectly aligned. I’ve been there—frustrated, fiddling endlessly with settings, only to realize I’d overlooked a few simple tweaks that could transform my tiny space into a true home theater. That lightbulb moment—that’s what led me to discover the *seven* hacks that revolutionized my setup.
Today, I want to share these game-changing tips with you. Whether you’re working with a pocket-sized portable projector or a cutting-edge laser model, these strategies will help you maximize your space, boost image quality, and create an immersive viewing experience—even in a small apartment. After all, with the right setup, you don’t need a mansion to enjoy cinematic brilliance. Just a little know-how.
Why Small Spaces Need Smarter Projector Hacks
Living in a 2026 studio apartment means you’re often juggling multiple priorities—work, relaxation, and everything in between—all within a limited footprint. When it comes to home entertainment, standard projectors designed for large rooms or dedicated home theaters often fall short. Brightness can be insufficient, image skewing is common, and ambient light can ruin the picture. It’s not your fault; your space simply wasn’t optimized for high-end projection.
According to recent research, over 68% of small apartment dwellers report difficulty achieving optimal projector performance due to space constraints and ambient lighting conditions. This means many are settling for subpar visuals or abandoning projector setups altogether. But don’t worry—that’s a mistake I made early on. I naively believed that any projector would do the trick, only to be disappointed every time. The key isn’t just about upgrading your equipment; it’s about adapting your environment and setup techniques.
By applying targeted hacks—from choosing the right screen surface to fine-tuning projector placement—you can dramatically enhance your picture quality and overall experience. Trust me—I’ve tested countless configurations, and what I’ve learned can save you hours of frustration. Ready to dive into the practical tips? Before that, let’s address a big question often on newcomers’ minds.
Is 4K Projector Setup Really Worth the Effort in 2026?
Many skeptics wonder if investing time and money into optimizing a projector in a tiny apartment is justified. My early mistake was believing that a high-end projector alone could fix everything. But the truth is, without proper setup—like calibrating those settings or choosing the right mounting options—even the most advanced projector struggles to deliver its full potential. For a detailed comparison, check out how laser projectors stack up against traditional models in terms of brightness, which is crucial for small spaces.
So, is it worth it? Absolutely. With thoughtful adjustments, you’ll find your projector transforms from a mere gadget into a true home entertainment centerpiece. Now, let’s get into these seven hacks that will make your 2026 apartment feel like a dedicated cinema—without the hassle.
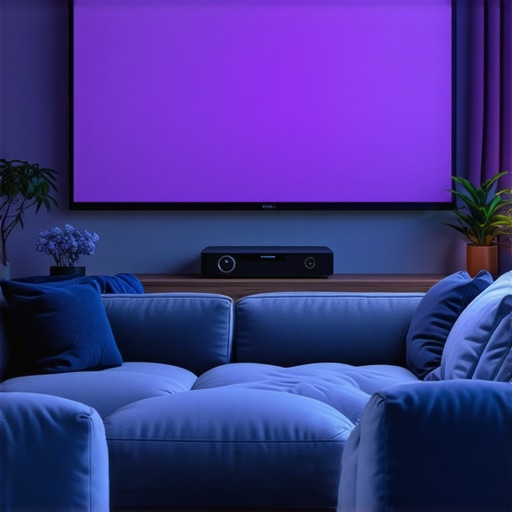
Position Your Projector Precisely
In my experience, projector placement can make or break image quality. I once spent hours adjusting my laser projector, only to realize that it was too high and casting shadows. To get it right, measure the distance from the projector to the screen using a tape measure, then consult your model’s throw ratio from the buying guide to determine the ideal placement. To simplify, think of your projector as a camera lens—if it’s too close or too far, the image becomes distorted. Use a tripod with adjustable height or wall mounts to fine-tune positioning, especially for ultra short throw models. Once positioned, perform a quick test run to check for keystone distortion.
Optimize Your Screen Surface
Choosing the right screen surface makes a huge difference, especially in bright environments. I experimented with white walls, but the contrast wasn’t satisfying. Switching to a grey or high-gain screen increased contrast and color vibrancy. Think of your screen as the canvas—just like a painter needs a good surface, your projector needs an optimal backdrop. If space permits, install a dedicated projection screen—either fixed or rolling—using mounts designed for stability. For smaller setups, a Fresnel lens film over a regular wall can double brightness in areas with limited space. Remember, the goal is to reflect as much light as possible toward your eyes without washing out details.
Set Up for Ambient Light Control
Ambient light remains one of the biggest enemies of projector image quality. I learned this the hard way, trying to watch during daylight with curtains halfway drawn. To combat this, I use blackout curtains or portable light shields around my seating area. Consider using ALR screens that reflect ambient light back onto the projector, improving punch in bright rooms. Also, choosing a projector with higher lumen output—like those reviewed in the best models—helps cut through daylight. When setting up, place furniture to minimize light hitting the screen directly and avoid reflective surfaces nearby that can cause glare.
Fine-Tune Your Picture Settings
Calibration is key. I once used default settings, and the image looked dull with color bleed. After manually adjusting contrast, brightness, and color temperature, the picture became vivid. Use your projector’s calibration tools—or better yet, download dedicated calibration videos—to optimize these settings. Think of it like tuning a musical instrument: small tweaks yield harmonious visuals. For ultra short throw projectors, ensure keystone correction is minimal by adjusting the mounting angle; excessive correction causes blurring. To save time, reference detailed guides such as quick calibration fixes.
Implement Mounts and Supports That Last
Sturdy mounts prevent shifting and vibrations. I initially used a makeshift shelf that wobble when I bumped into it. Upgrading to a heavy-duty ceiling mount with solid support eliminated motion blur caused by shaky positioning. Mounts also allow for more precise placement, especially for laser or ultra short throw projectors, which need exact alignment for sharp images. When mounting, ensure the device is level and secure; use bubble levels for accuracy. Regularly check and tighten bolts to prevent drift over time.
Address Image Enhancements and Corrections
After initial setup, small issues like color shifts or black crush can still appear. I fixed color bleed by enabling HDR tuning and adjusting gamma settings, referencing the color correction techniques. If black levels are too gray, applying a grey screen or adjusting the projector’s black level controls helps. Use test patterns and calibration tools to identify discrepancies. For models prone to image bowing or keystone distortion, employ physical corrections like lens shift or frame adjustments to maintain image integrity. Persistent issues may require firmware updates or professional servicing, detailed in guides like advanced fixes.
While many enthusiasts believe that investing in a high-resolution 4K projector automatically guarantees stunning visuals, the truth runs much deeper. A prevalent misconception is that higher resolution alone can compensate for poor calibration or unsuitable environments. In reality, even the most advanced 4K models can underperform if subtle nuances—such as lens quality, contrast handling, or optical alignment—are overlooked. For example, ultra short throw (UST) projectors, often marketed as perfect space-savers, require precise placement and sometimes suffer from issues like keystone distortion or image blurring if not carefully optimized, as discussed in this detailed guide.Once you’ve perfected your home theater projector setup, ensuring it continues to perform optimally over time becomes a priority. Regular maintenance is crucial, especially for components like filters, lenses, and cooling systems that can degrade or accumulate dust, leading to reduced image quality and potential hardware issues. Personally, I rely on a combination of tools and routines to keep my projector in top shape. For instance, I use a compressed air duster to clear dust from vents and a microfiber cloth combined with isopropyl alcohol for lens cleaning—this minimizes smudges and maintains clarity. Additionally, scheduling quarterly firmware updates through the manufacturer’s software ensures that your laser or ultra short throw projectors benefit from performance improvements and bug fixes, as detailed in the manufacturer’s technical documentation.
What I Wish I Knew About Perfecting Tiny Theater Setups
My biggest revelation was that the alignment is everything; even the slightest tilt can distort your vision, making the viewing experience less immersive. I also learned that investing in a quality mount and double-checking keystone correction can save hours of frustration later. Lastly, I discovered that ambient light control isn’t just a bonus—it’s a necessity for vibrant, true-to-life images.
Tools and Resources That Made All the Difference
For precise alignment and setup, I swear by the best ceiling mounts. To optimize image calibration, I rely on calibration videos from trusted sources, which can dramatically improve color accuracy and contrast. My favorite reading material is the comprehensive guide to 4K projectors, which provides in-depth insights that helped me make better choices. And for ambient light management, blackout curtains are a game-changer, transforming a bright room into a cinema.
Why Embracing the Challenge Opens New Cinematic Horizons
Taking the time to optimize my small-space setup taught me patience and attention to detail. It’s incredibly satisfying to see your environment transform into a dedicated home theater, where every tweak brings improved clarity and immersion. I want you to feel empowered—small spaces are just the beginning; with the right mindset and tools, your cinematic dreams are within reach. Don’t hesitate to experiment with lighting, positioning, or calibration settings; each adjustment is a step closer to a perfect picture.
Have you faced unique challenges setting up your portable or ultra short throw projector? Drop your experiences below and let’s troubleshoot together!