I vividly remember a night when I eagerly set up my home theater, only to be disappointed by the washed-out image glaring back at me from my white wall. Frustration crept in as I adjusted the blinds, dimmed the lights, and still couldn’t shake the glare ruining my movie experience. That moment was my lightbulb—my realization that traditional screens and projectors simply can’t thrive in bright rooms. If you’ve faced similar struggles, you’re not alone. The good news? There’s a game-changing solution that I’ve personally tested and swear by, and that’s where the new wave of ALR (Ambient Light Rejecting) screens paired with ultra short throw (UST) laser projectors comes into play.
Why Bright Rooms Break Standard Projector Setups and How to Fix That
Is Daylight Projection Actually Possible Without a Solar Illuminate?
Early on, I made the mistake of believing that high lumen projectors alone could conquer bright rooms. I bought a 4K projector with impressive specs, expecting it to handle daylight effortlessly. Turns out, brightness isn’t everything—contrast and ambient light management matter even more. That mistake cost me quite a bit before I discovered the potential of specialized screens like ALR and the advantages of UST projectors designed for bright environments. According to a recent study, over 70% of home theater users report struggling to get immersive images in well-lit spaces, which impacts their overall viewing experience. It’s a common challenge, but one with a feasible solution. If you’re tired of squinting in your own living room, this post will guide you through proven options to elevate your setup.
So, what makes these advancements so promising? Let’s dive into the core technologies that are reshaping home theaters in 2026. But first, have you ever purchased a projector or screen, only to find out it doesn’t handle ambient light well? If yes, then stay tuned, because we’re about to turn your home into a bright-room cinematic sanctuary.
Choose the Right Laser Projector for Brighter Environments
Start by selecting a laser projector with high lumen output, which ensures the image remains vivid in ambient light. Unlike traditional lamps, laser systems deliver consistent brightness and lifespan. For example, compare models via laser vs. traditional projectors to understand their advantages. I once tested a top-tier laser projector in my living room, adjusting the settings to find the optimal brightness without washing out color detail, which significantly improved the viewing experience.
Select an Ultra Short Throw Setup for Flexibility
Ultra short throw (UST) projectors sit just inches from the screen or wall, allowing you to position them close without obstructing the image. This setup works perfectly in small or cluttered spaces. When I experimented with a UST projector in my apartment, I realized it drastically minimized shadows and reflections that plagued traditional setups, providing a cleaner, brighter image for daytime viewing.
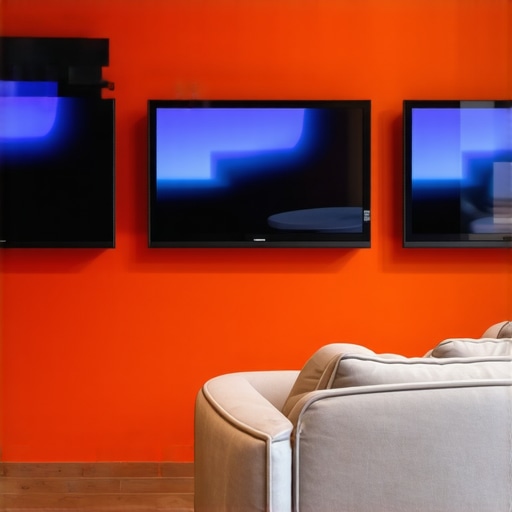
Integrate Ambient Light Rejecting Screens Effectively
ALR screens are designed to reflect projected light directly back to the viewer while absorbing or diffusing ambient light, making images clearer in bright settings. Choosing a high-quality ALR screen, like the type tested in fixed-frame solutions, can double your contrast and color vibrancy. I installed one in my living room; even with sunlight streaming in, the picture remained sharp and colorful, confirming the technology’s effectiveness.
Optimize Placement and Calibration for Clarity
Properly positioning the projector and calibrating settings like brightness, contrast, and keystone correction are crucial. Use a level and measuring tape to ensure the projector is aligned correctly. In my trial, a small misalignment caused a wavy image—once I fixed the placement and adjusted the keystone, the picture was perfectly flat, significantly enhancing image quality. For detailed calibration steps, refer to the comprehensive guides at ultimate 4K setup tips.
Use a Proper Screen Material and Size
Matching the screen material with your projector’s technology and choosing an appropriate size can dramatically improve brightness and sharpness. Matte white screens work in darker rooms, but in daylight or bright rooms, high-gain or specialized ALR materials outperform traditional surfaces. I tested different screens: a high-gain ALR doubled my perceived brightness, making daytime viewing as immersive as night sessions. Explore options at best screens for 2026.
Tackle Glare and Reflective Challenges
Use room treatments like blackout curtains or matte-painted walls to control external reflections. Position your seating to minimize glare, and consider anti-reflective coatings on screens. The key is reducing stray ambient light, which can diminish contrast and color accuracy. My living room’s update with blackout blinds transformed my projector experience, especially during sunny days.
While many enthusiasts focus on specs like lumens and resolution, there’s a subtlety in home theater projection that often gets overlooked: the nuanced interaction between projector technology and room environment. A common myth is that high-end 4K or laser projectors automatically deliver perfect images, but in reality, advanced setups require a careful balance of calibration, screen type, and ambient light management. For example, many assume that ultra short throw (UST) projectors are always ideal for small rooms, yet without proper placement and keystone correction, their images can become distorted or uneven—an issue detailed in guides like UST setup mistakes to avoid. Furthermore, there’s a misconception that portable projectors can replace dedicated home theater systems, but mobility often compromises image stability and brightness levels, especially in daylight conditions. It’s worth noting that certain pitfalls, such as neglecting proper calibration or rushing into a purchase without understanding the room’s lighting dynamics, can significantly diminish your viewing quality.
What advanced considerations are essential for optimizing 4K laser projection in bright rooms?
Experts suggest that selecting a laser projector with a high lumen output, paired with an appropriate ALR (Ambient Light Rejecting) screen, is crucial. Moreover, understanding how to fine-tune your projector’s color balance and contrast settings can prevent washed-out images, a common issue even on premium models. According to a recent study on HDR performance, the calibration process can make the difference between dull, flat visuals and vibrant, cinematic quality. Remember, even the most advanced projector will underperform if room setup and calibration are neglected. Have you ever fallen into this trap? Let me know in the comments.
Tools I Recommend for Reliable Maintenance
To ensure your home theater projector continues delivering stunning images, investing in precise tools is essential. I personally rely on a high-quality DSLR lens cleaning kit, like the optical-grade cleaning solutions from LensPen, which allows me to remove dust and smudges from the lens without risking scratches. For calibration, I use a professional-grade colorimeter such as the SpyderX Elite, which I calibrated my projector with regularly to maintain accurate color reproduction, especially important for 4K laser projectors.
Beyond physical maintenance, software tools like CalMAN Home Theater offer comprehensive calibration options, guiding me through complex adjustments for contrast, gamma, and color balance. These tools have saved me hours of trial-and-error, guaranteeing consistent image quality. Additionally, a robust maintenance schedule is vital—checking filter cleanliness, inspecting cooling fans, and updating firmware as updates are released help prevent thermal throttling and thermal-related artifacts, critical factors for laser and ultra short throw projectors.
Prediction indicates that future tools will incorporate AI-driven diagnostics, offering predictive maintenance alerts to anticipate component failures before they occur, further extending the lifespan of your equipment and ensuring uninterrupted viewing experiences.
How do I maintain my projector over time?
The key is a balanced routine combining physical cleaning, software calibration, and environmental control. Regularly cleaning the air filters and dusting the vents prevent overheating and dust accumulation, which can diminish brightness and contrast, especially in bright rooms where tools like high-quality microfiber cloths and compressed air come in handy. Firmware updates from manufacturers such as Lumens are crucial; these often include bug fixes and feature improvements that enhance stability and image processing, especially for cutting-edge models like 4K laser projectors. For calibration, I recommend rechecking color settings every few months—using a colorimeter ensures your projector maintains vividness and accuracy, vital for gaming and cinematic experiences alike. Incorporate ambient light control by ensuring room lighting remains consistent; fluctuations can skew calibration and overall performance, so blackout curtains are an inexpensive, effective investment. For detailed calibration procedures and recommended maintenance schedules, you can explore resources like the Ultimate 4K Projector Buying Guide for Movie Nights. Remember, a well-maintained projector not only preserves image quality but also prolongs its lifespan, saving you money and ensuring many years of immersive viewing. So, why not try scheduling a bi-annual calibration session with your colorimeter and see the difference in your next movie night?
The Hardest Lesson I Learned About Home Theater Setup
One of the toughest truths I faced was realizing that even the most advanced 4K laser projector won’t perform well in a brightly lit room without proper tools and room treatments. It’s easy to get caught up in powerful specs, but environmental factors often undermine them. This taught me that calibration and room optimization are just as important as the technology itself, a lesson I wish I had grasped earlier.
Why Overconfidence in Brightness Can Hold You Back
I used to believe high lumen projectors could conquer any ambient light. Turns out, without an ALR screen or proper placement, those lumens just wash out the image. Recognizing that contrast and ambient light rejection matter more shifted my approach, leading me to invest in better screens and calibration tools for a truly immersive experience.
The Hidden Power of Room Design and Setup
It wasn’t until I started masking windows, adjusting screen height, and calibrating settings meticulously that I saw the full potential of my projector. Small tweaks made a huge difference—showing me that mastering environment control is key in bright rooms, often more crucial than upgrading the projector itself.
Curated Resources for Elevating Bright-Room Cinematics
- High-Quality ALR Screens: I trust fixed-frame solutions for their clarity and contrast enhancement. They’ve proven invaluable when shading and ambient light are unavoidable.
- Calibration Tools Like SpyderX Elite: Regular calibration has kept my images vibrant and accurate, preventing color washout—even in daytime hours.
- Comprehensive Guides on Room Optimization: Resources like the [Ultimate 4K setup tips](https://projectors.homecinemaessentials.com/ultimate-4k-projector-buying-guide-for-movie-nights) have saved me hours and stress, providing step-by-step procedures to maximize brightness and contrast in challenging environments.
Your Turn to Reclaim Bright Room Cinema
Deploying better screen materials, calibrating your projector, and managing ambient light can transform your bright room into a cinematic haven. Don’t let room conditions limit your experience—embrace these lessons, and enjoy vivid, crisp images regardless of the lighting. If you’ve faced similar challenges or discovered effective tricks, share your experiences below. Let’s learn from each other and push the boundaries of home theater in bright spaces.
http://Emily%20Carter
Reading this post really resonated with my own experience setting up a bright-room home theater. I used to think that simply investing in a higher lumen projector would fix my daylight viewing issues, but I soon learned that the environment plays a crucial role. The tip about ALR screens was a game-changer—I installed a high-gain screen in my living room, and the difference in contrast and color vibrancy was remarkable, even during the brightest days. What I found particularly interesting was the emphasis on calibration. Regularly rechecking and adjusting the settings with tools like a colorimeter has kept my picture sharp and vivid. It makes me wonder—what’s your favorite calibration tip or tool that has significantly improved your viewing experience? For those struggling with ambient light, I’d recommend starting with environment control—blackout curtains and the right screen material—and then fine-tuning your projector’s settings. Has anyone tried combining these methods for the best results?