Ever tried to set up a home theater in a tiny apartment or a cramped bedroom, only to be faced with constant shadows, limited space, and a TV that just isn’t the immersive experience you crave? I remember the first time I pulled out my old projector, thinking I could turn my cluttered corner into a cinematic oasis. Instead, I ended up with a blurry, awkwardly positioned image that made me rethink everything. That lightbulb moment led me to discover the magic of Ultra Short Throw (UST) and Portable Projectors designed specifically for small spaces in 2024.
Why Small Spaces Need a New Kind of Projector
Modern living means maximizing every square inch, but our entertainment setups often get the short end of the stick. Traditional projectors require enough distance and a dark room, which isn’t feasible in tiny apartments or bedrooms. That’s where the advancements in ultra short throw projectors and portable options step in. These devices sit just inches from the wall or screen, making them the perfect solution for limited spaces. The best part? They deliver stunning 4K clarity, transforming even the smallest corner into a home cinema.
Ever Faced the Frustration of Small Space Limitations?
If you’ve been battling with bulky projectors, unsightly wires, or subpar image quality that ruins your movie night, you’re not alone. Early on, I made the mistake of ignoring size and installation ease, only to regret it when my setup took up half the room. This mistake is all too common, and I want to steer you clear of it. There’s a world of sleek, powerful projectors out there built precisely for tiny spaces, and I’ll guide you through the best options for 2024.
Now that you’re ready to ditch the bulky TV and cumbersome projectors, let’s explore how to choose the right one for your needs, so you can finally enjoy cinematic movies without leaving your apartment feeling cramped.
,
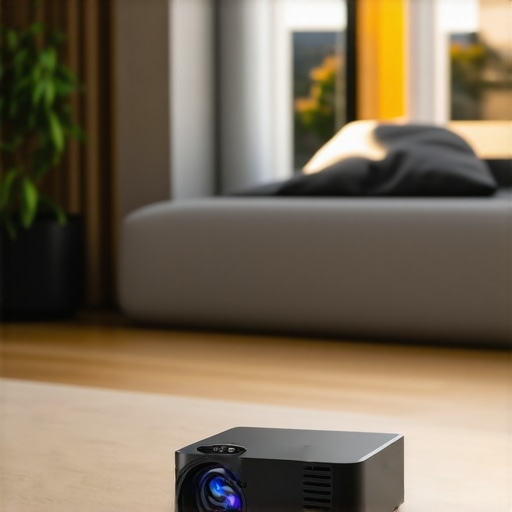
Identify Your Space and Surface
Measure your available area to determine the ideal projector size and placement. Opt for a flat, white wall or a dedicated screen surface that will reflect the projected image evenly. Use a tape measure to note the distance from where you’ll position your projector to the wall; this helps in selecting the right model, especially for ultra short throw options that sit just inches away.
Choose the Right Projector Model
Decide between a 4K laser projector, portable projector, or ultra short throw model based on your needs. For tiny rooms, 4K laser projectors provide vivid clarity and brightness, perfect for small spaces without darkening the room excessively. Remember, laser projectors often deliver superior color accuracy and longevity compared to traditional lamp-based models.
Position the Projector Correctly
If you select an ultra short throw projector, place it within a few inches of the wall, aligning it centrally for even image distribution. For portable models, set them on a sturdy surface aligned with your viewing area. Ensure the projector’s lens height matches the center of your screen or wall for optimal image geometry. A quick test run will reveal if adjustments are needed.
Configure Your Setup for Best Quality
Connect your devices—laptop, streaming box, gaming console—using HDMI or compatible cables. Use the projector’s menu to calibrate keystone correction and focus, especially crucial for ultra short throw models, which can be sensitive to misalignment. Tweak the image size to fit your wall while maintaining sharpness.
Optimize Ambient Light Conditions
Darken the room effectively by closing curtains or blinds, but avoid completely blocking natural light if your space benefits from ambient daylight. Use blackout curtains or dimmable lights selectively. Remember, even the best projectors perform better in low-light environments.
Seal the Deal with Sound and Accessories
External speakers or a soundbar will vastly improve audio quality. Position them near your seating for immersive sound without echoes. Consider mounting the projector on a ceiling mount if you want a clutter-free setup or if you plan to use it regularly. Always keep your cables organized using clips or conduits to prevent tangled wires and accidents.
Applying these steps was a game-changer when I set up my own tiny room. I initially struggled with placement and image clarity, but after carefully measuring and adjusting, I achieved a sharp, bright picture that rivals much larger setups. Remember, patience and precise positioning often make the difference in small spaces.
Stay Within Your Budget and Make Smart Choices
Invest in a projector that fits your room size and viewing needs. For detailed comparisons and the latest models, visit this guide. Keep in mind that sometimes, a small upgrade in brightness or resolution can greatly enhance your experience.
If you’re unsure about specific models or setup nuances, reaching out to experts can save you time. You can contact us through our contact page. Proper planning and execution ensure your tiny space is transformed into a captivating home cinema.
While many enthusiasts focus on resolution or brightness when choosing a home theater projector, there are subtle misconceptions that can undermine your entire setup. One common myth is that higher pixel count alone guarantees better image quality. In reality, factors like projector calibration, lens quality, and color accuracy matter just as much—if not more—than resolution. For instance, a poorly calibrated 4K projector can produce a fuzzy image despite its high pixel count. Experts suggest that proper calibration and lens quality can significantly enhance perceived sharpness, making your viewing experience truly immersive. Moreover, I often see people overestimating the capabilities of affordable portable projectors, assuming they match premium models in brightness and clarity. But these devices typically compromise on contrast ratios and color depth, which are critical for cinematic experiences. You need to look beyond specs—evaluate real-world performance in rooms similar to yours, especially considering ambient light. Also, don’t fall into the trap of believing that ultra short throw (UST) projectors are ideal for all small spaces. They excel in limited areas, but their effectiveness hinges on precise placement and calibration. An improper setup can lead to distorted images or uneven focus, sabotaging your viewing pleasure. A crucial nuance often overlooked is the difference between laser and lamp-based projectors. Many think lasers are inherently better, but studies show that laser projectors usually excel in brightness and lifespan, however, they can be more expensive and sensitive to ambient lighting conditions. Considering your room environment and usage habits is essential before making a choice. This is where understanding the distinctions can help prevent costly mistakes. Are you aware that some advanced models incorporate AI-based image processing to optimize clarity and color in real-time? These features can elevate your experience but require proper understanding and setup. To master these nuances, I recommend consulting comprehensive guides like this one, which offer deep dives into the technology behind top-rated models. If you want to explore more about choosing the right projector for your specific needs, visit our detailed reviews and buying guides. Remember, the goal isn’t just high resolution but a harmonious balance of performance, calibration, and environment—set up correctly, and your small space can rival the biggest theaters. Have you ever fallen into this trap? Let me know in the comments. For personalized assistance and tailored recommendations, don’t hesitate to reach out via our contact page. Mastering these details ensures your investment pays off, transforming your viewing area into a true cinematic haven.
Maintaining your 4K home theater projector and ensuring it continues to deliver stunning visuals requires the right tools and a bit of routine care. Over time, dust, bulb degradation, and calibration drift can impact image quality. That’s why I rely on specific equipment and methods to keep my projector performing at its best. One indispensable tool I use is a dedicated lens cleaning kit, which includes microfiber cloths, blower brushes, and isopropyl alcohol. Regularly cleaning the lens prevents dust accumulation that can cause haziness or color distortions, especially in laser projectors that demand high precision. Additionally, a compressed air can is perfect for gently removing dust from vents and internal components—just ensure the device is unplugged and the air is used sparingly to avoid damage.
For calibration, I recommend investing in colorimeters like the X-Rite i1Display Pro or, for more advanced users, the Datacolor SpyderX Elite. These tools allow you to perform custom calibration, adjusting gamma, color temperature, and brightness. Regular calibration is essential, as projectors tend to drift over time, especially with aging lamps or laser modules. I personally calibrate my projector every 6 to 12 months, depending on usage, to maintain optimal performance. Software such as CalMAN or DisplayCal interfaces with these devices and provides user-friendly guides to streamline the process.
To monitor long-term results, I log calibration data and image quality parameters, which helps identify trends or the need for component replacements. Upgrading certain parts—like a new lamp or filter—can extend your projector’s lifespan significantly. For laser projectors, ensuring their cooling systems are functioning properly is crucial. Regularly inspecting fans and vents prevents overheating, which can shorten component life.
How do I maintain my projector over time?
Developing a maintenance routine that includes cleaning, calibration, and component checks can go a long way in preserving image quality. Keep the projector in a climate-controlled environment, away from excessive dust, humidity, and direct sunlight. Firmware updates from manufacturers also often contain improvements in image processing and stability, so check your projector’s menu or manufacturer’s website periodically. For ultra short throw models, especially, calibration and alignment are critical—misalignment can cause focus and geometric issues, reducing image sharpness. Reference the detailed guides on ultra short throw projectors to fine-tune your setup and maximize longevity. Regular maintenance not only preserves image quality but also protects your investment, ensuring your small-space cinema remains breathtaking for years to come. Don’t forget, consulting with professionals or contacting us through our contact page can provide personalized advice tailored to your specific model and environment. Remember, a well-maintained projector is key to enjoying a cinematic experience that rivals much larger setups—so, commit to routine upkeep and keep your visuals crisp and vibrant for the long haul.
Top Lessons That Transformed My Home Theater Experience
- Don’t Overlook Calibration: I learned the hard way that even the most advanced 4K projector needs meticulous calibration—focusing on color accuracy and geometry—to truly shine in small rooms. Investing in a colorimeter elevated my picture quality beyond expectations.
- Size Isn’t Everything: A compact, ultra short throw projector outperformed bulky models because it fit snugly into my space and minimized shadows. Choosing the right form factor can make or break your setup’s success.
- Ambient Light Control Is Key: I discovered that even the best projector struggles in bright rooms. Implementing blackout curtains and dimmable lighting created the ideal environment, turning my tiny corner into a cinematic haven.
- Sound Matters Just as Much: Upgrading to a quality soundbar transformed my viewing from decent to immersive. Great visuals deserve equally great audio, especially in confined spaces where speakers can be close to your ears.
- Patience Pays Off: I spent extra time measuring and adjusting my projector placement, which paid off with a clear, bright, and evenly focused image. Rushing setup can lead to frustrating results—take your time for the best outcome.
Tools and Resources That Made My Setup Shine
- This comprehensive guide opened my eyes to the latest ultra short throw options optimized for small rooms, ensuring I chose a model that fits perfectly.
- My calibration journey was significantly smoother with the recommendations from respected experts. Their insights helped me understand calibration tools and techniques I now swear by.
- For sound, I relied on a top-rated soundbar picks that perfectly complement small-space setups, delivering immersive audio without clutter.
- My ongoing maintenance routines are guided by this dedicated resource, which emphasizes cleaning, calibration, and regular upgrades to keep visuals pristine over years.
Embrace Your Cinematic Adventure Today
Small spaces shouldn’t limit your entertainment dreams. With the right projector choices, proper setup, and continuous care, you can transform even the tiniest corner into a stunning home theater. Remember, it’s not just about the equipment—your patience and willingness to learn make all the difference. So, why wait? Dive into the world of ultra short throw and portable projectors — your perfect cinematic escape awaits. Are you ready to elevate your small-space home theater experience? Share your thoughts or questions below and join the community of enthusiasts making their space cinematic.
http://Emily%20Johnson
This article really hits home for me, especially the emphasis on choosing the right projector size and calibration. I recently upgraded to an ultra short throw projector for my small apartment, and the difference in image clarity and setup ease was incredible. One thing I found particularly helpful was the suggestion to use tools like a colorimeter for calibration; it made a noticeable difference in color accuracy. I also appreciate the reminder about ambient light conditions—I’ve learned that even the best projector can struggle in a brightly lit room, so blackout curtains have become a game changer for me. Has anyone experimented with different ambient lighting setups to optimize image quality without sacrificing natural light? I’d love to hear some practical tips from others who have mastered their small space setups. Overall, this guide makes me feel more confident that I can keep my home theater both compact and stunning.
http://Daniel%20Walker
Great insights in this post! I recently plunged into the world of ultra short throw projectors, and I agree that placement and calibration are game-changers. In my experience, matching the projector’s placement with the room’s lighting conditions made all the difference. I found that using smart dimmable lights enhances the viewing experience without the need for complete blackout curtains, which can be quite restrictive when natural light is appreciated during daytime viewing. Has anyone experimented with specific types of ambient lighting that work well with ultra short throw projectors? I’d love to hear about techniques that allow ambient daylight while still maintaining good contrast and clarity. Additionally, I’ve noticed that robust sound setups make a huge difference in small spaces—soundbars or even compact speakers can truly elevate the cinematic atmosphere. What are everyone’s favorite audio accessories for tiny rooms? I’m curious to see how others optimize both picture and sound in limited space environments.