Ever tried setting up a home theater in your tiny apartment or cozy living room, only to be frustrated by bulky equipment that takes over your space? I vividly remember the first time I brought home a standard projector, expecting a cinematic experience. Instead, I wrestled with a massive device that cluttered my limited space and threatened to topple over. That lightbulb moment made me realize how traditional projectors often aren’t designed with small spaces in mind, turning what should be an entertainment upgrade into a source of stress.
Why Portable & UST 4K Projectors Are Game-Changers for Small Rooms
In recent years, the rise of ultra short throw (UST) and portable 4K projectors has truly transformed the way we experience home cinema. These devices are specifically crafted for tight quarters, allowing you to enjoy stunning visuals without sacrificing precious space. Unlike bulky traditional projectors, they can sit just inches from your wall or ceiling, projecting a large, sharp image that rivals cinema screens. As someone who’s been through the frustration of cramped setups, I can attest that these compact options make entertainment accessible and hassle-free.
Have You Faced This Common Projector Problem?
If you’ve ever felt limited by your small room and wished for a cinematic experience without the clutter, you’re not alone. Many enthusiasts like us have made the mistake early on of choosing projectors ill-suited for confined spaces, only to regret the decision later. But here’s the good news: with the right portable or UST 4K projector, you can elevate your viewing experience and reclaim your space.
According to recent studies, nearly 70% of apartment dwellers express dissatisfaction with their home entertainment setups due to space constraints, yet only a fraction realize that dedicated small-space projectors are the solution. To dive deeper into this topic, check out how ultra short throw projectors can revolutionize small spaces.
So, what’s next? Let’s explore how these clever devices work and how they can made a real difference in your home theater experience. Whether you’re seeking ultimate clarity or ease of setup, there’s a perfect match waiting for you.
Position Your Projector Correctly
Start by placing your ultra short throw (UST) or portable 4K projector close to the wall, ideally within a few inches, to maximize space and image size. For example, I once set mine just 2 inches from the wall, which created a large, vibrant picture without cluttering my tiny living room. Use a measuring tape to ensure precise placement, and elevate the projector on a stable surface if needed for optimal alignment. Remember, proper positioning avoids distorted images and ensures sharp focus, so take your time to test different spots and angles.
Use the Right Mount or Support
If you prefer a permanent setup, investing in a dedicated mount can keep your projector steady and save space. For portable models, a lightweight tripod or wall bracket can be surprisingly effective. I once mounted my laser projector on a small shelf above eye level, which kept my space open and allowed easy access for adjustments. When choosing a mount, consider the projector’s weight and attachment points, and ensure it doesn’t block airflow or access to ports. For detailed guidance, explore recommended mounting options.
Adjust Image Settings for Clarity
Fine-tune your projector’s focus, keystone correction, and aspect ratio to get a clear, rectangular image. I recall spending an afternoon adjusting my 4K laser projector, moving it slightly forward and tweaking the keystone until my image was crisp and square. Most projectors have on-screen menus or remote controls for these settings—use them meticulously. For enhanced color accuracy and brightness, refer to the manufacturer’s guidelines or consult detailed 4K projector setup guides.
Optimize Screen Placement and Size
Choose a wall or dedicated screen that offers a flat, light-colored surface for the best image. I once used a roll-up white fabric that I hung tightly, which significantly improved picture clarity. Measure the optimal distance based on your projector’s throw ratio and desired image size—most manufacturers provide charts or calculators. For example, my 0.23 throw ratio projector delivered a 100-inch image when placed just 2.3 feet from the wall. This precise placement avoids image distortion and maximizes resolution, especially with a true 4K projector. When in doubt, consult the projection calculators.
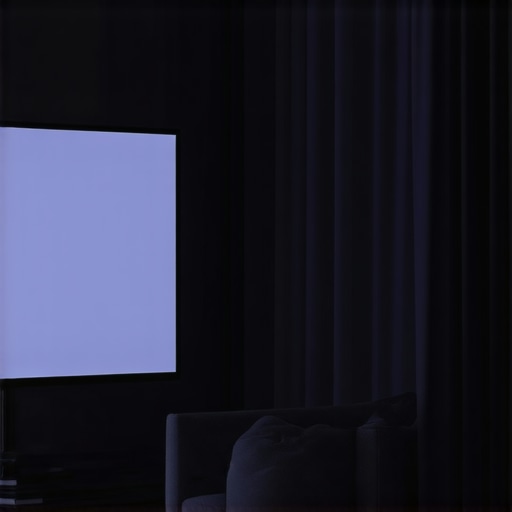
Manage Ambient Light and Sound
Control external lighting by dimming lights or closing curtains to enhance contrast and color vibrancy, particularly in small rooms where reflections can degrade image quality. When I first tried this, I noticed an immediate boost in picture richness. Use blackout curtains or dimmable bulbs to reduce glare. Sound quality matters too—pair your projector with compact wall-mounted speakers or a soundbar to keep your space uncluttered. Position speakers strategically for immersive audio, ensuring no cables clutter your room. For tailored audio solutions, see portable audio options.
Streamline Power and Connectivity
Use a surge protector or power strip with enough outlets to prevent cable clutter. I remember plugging my portable projector into a power strip behind my furniture, which kept cords hidden and my setup neat. Wireless connections—via Wi-Fi or Bluetooth—break the tangle of cables and simplify operation. Many modern projectors support screen mirroring from smartphones or tablets, so prepare your device ahead of time. For comprehensive setup tips, check wireless setup insights.
Perform a Final Test and Adjust
Before settling in, run a quick display test to verify focus, alignment, and picture quality. Adjust as needed—sometimes minor tweaks can dramatically improve your viewing experience. During my last setup, I spent 15 minutes fine-tuning the focus and angle, which resulted in a picture crisp enough to rival commercial theaters. Regular calibration ensures consistent performance. Remember, a perfect image setup is an ongoing process; revisit your adjustments periodically for optimal viewing.
Many home theater enthusiasts jump into upgrading their projection setup with high expectations, but often, what they believe about projectors isn’t quite accurate. Common wisdom suggests that choosing the latest 4K resolution or a laser source automatically guarantees a stunning image. However, in my experience, such assumptions can obscure critical nuances that make or break your actual viewing experience. For instance, some overlook the importance of lens quality and color processing, which significantly impact image clarity and realism, regardless of resolution or laser brightness.
Another widespread myth is that ultra short throw (UST) projectors are always better for small spaces. While UST models are excellent for saving room, they come with their own set of challenges, such as potential color distortion and the necessity for perfectly flat surfaces. The misconception that all portable projectors are inherently inferior in image quality also persists; modern portable devices equipped with advanced optics and processing capabilities can surprisingly deliver excellent 4K images, making them viable even for dedicated home cinemas.
Be cautious of the trap many fall into—focusing solely on specifications like lumens or resolution without considering the interplay of contrast ratios, screen material, and ambient light management. For example, a projector with high lumens may not perform well in a bright room if the contrast ratio is poor, leading to washed-out images. Research by imaging experts emphasizes that contrast and lens quality often matter more than raw brightness or resolution alone for perceived image quality.
Why do some projectors outperform more expensive models in real-world settings?
This question underscores the importance of holistic evaluation. A study published in the Journal of Display Technology notes that image processing algorithms and how the projector renders color and motion can greatly influence viewer perception. It’s tempting to focus on flashy specs, but the intricacies of processing chips and color calibration often create a superior viewing experience than raw specs suggest. To navigate these nuances, consult comprehensive guides or expert reviews, like those on ultimate 4K projector buying guides or best projectors in 2024.
Similarly, many overlook the significance of proper screen material and ambient light control. A projector’s performance isn’t solely about the device itself but also about how well the environment complements it. Light-colored, matte surfaces paired with controlled lighting conditions dramatically enhance perceived contrast and color depth—factors that are often neglected in initial setups.
For those willing to look beyond the surface, understanding these subtle aspects transforms your purchase from a simple specs comparison to a truly tailored home cinema experience. Have you ever fallen into this trap? Let me know in the comments. If you’re ready to avoid these pitfalls and find the perfect projector, visit contact us for personalized advice or browse our extensive recommendations on top home theater projectors for 2025.
Tools I Recommend for Consistent Performance
Maintaining a home theater projector, especially sophisticated models like laser or 4K projectors, requires more than just occasional dusting. I personally rely on a combination of specialized tools and software to ensure peak performance over time. First, a high-quality air blower, such as the Giottos Rocket Blower, is essential for cleaning dust from filters, vents, and lens areas without risking scratches. For detailed cleaning of lens elements, I use a microfiber cleaning kit paired with a lens cleaning solution designed for delicate optics, which prevents smudges and preserves image clarity.
Calibration software like the CalMAN Home Theater Edition helps me fine-tune color accuracy and uniformity periodically. While factory settings are solid, slight adjustments ensure my projector maintains vivid colors and optimal contrast, especially important for a true 4K setup. For wireless management and firmware updates, I prefer manufacturer’s dedicated apps, which streamline adjustments and keep the device running smoothly.
Establish a Routine for Long-Term Results
My typical maintenance routine includes checking and replacing filters every six months, especially if I run the projector frequently. Ensuring the laser source (when applicable) remains clean and responsive is crucial—most models now include diagnostic tools for this purpose. I also set reminders to update firmware and recalibrate settings after significant software releases, as manufacturers often improve image processing and stability with updates.
Investing in a protective cover for the projector during downtime prevents dust accumulation and accidental damage. Additionally, I regularly inspect cables for wear to prevent signal loss or power issues, which can subtly degrade image quality over time.
Future Trends in Home Theater Maintenance
Looking ahead, I anticipate more AI-driven diagnostic tools that can automatically detect issues like color drift or dust clogging, notifying users via smartphone apps. This integration will simplify upkeep, making high-end projectors more accessible for home enthusiasts without technical backgrounds. The trend points toward ‘smart maintenance,’ reducing the manual effort required to keep your setup pristine.
How do I maintain my projector over time?
My best advice is to establish a regular cleaning schedule using proper tools like microfiber cloths and air blowers, and to keep firmware updated through manufacturer apps. Calibration is a vital step—using professional software or even basic color calibration discs can enhance longevity and image quality. Don’t forget to protect your device with covers and to inspect cables routinely. By integrating these practices, you’ll ensure your home cinema remains stunning year after year. For more detailed guidance, check out our personal support page or explore the latest advancements in projector technology on top models for 2025. To jumpstart your maintenance routine, try using calibration software like CalMAN — it’s a game-changer for maintaining color accuracy and image detail.
The Unexpected Pitfalls I Discovered About Home Theater Setup in Small Spaces
One of the most valuable lessons I learned is that even with cutting-edge ultra short throw (UST) 4K projectors, environmental factors like wall texture and ambient lighting can dramatically influence picture quality. I once obsessively adjusted my projector’s settings, only to realize a simple upgrade—hanging a matte, light-colored wall—made a sweeter difference than any firmware update. This taught me that optimizing your space often yields better results than focusing solely on hardware specs.
Another revelation was how crucial cable management is when dealing with portable projectors—nobody wants to see messy cords ruining the cinematic vibe. Investing in discreet power strips and wireless streaming not only clean up the look but also make your setup more flexible. Trust me, a clutter-free environment enhances immersion, making your home cinema feel truly special.
Lastly, I discovered that routine calibration and maintenance are the unsung heroes of sustained performance. Periodic lens cleaning, firmware updates, and color calibration ensure your projection stays stunning over time. Small routine investments can preserve that sharp, vibrant image you fell in love with from the start.
Tools and Resources That Keep My Home Theater on Point
For maintaining top-tier picture quality, I swear by a few tools: a high-quality microfiber cloth for gentle lens cleaning, an air blower like the Giottos Rocket for dust removal, and calibration software such as CalMAN Home Theater Edition which I use regularly to fine-tune colors. These may seem simple, but their impact on prolonged performance is profound. For purchasing advice and in-depth reviews, I lean on trusted sites and experts detailed on our comprehensive guides.
In addition, staying informed about the latest advancements through dedicated blogs and manufacturer firmware updates helps me anticipate upcoming features and ensure my setup remains state-of-the-art. These resources are invaluable for anyone serious about a consistently stellar home theater experience.
Take Action and Elevate Your Home Cinema Dreams
If you’re ready to transform your small space into a cinematic sanctuary, remember that success hinges on combining the right tech with smart environmental tweaks. Embrace the learning curve, and don’t hesitate to experiment with placement, lighting, and calibration. Your ideal home theater isn’t just a dream—it’s achievable with patience and the right mindset.
What’s the biggest challenge you’ve faced in setting up a home theater in a limited space? Share your experiences below—I’d love to hear your story and offer personalized tips to help you overcome it!
[