There was this one evening—I decided to set up my shiny new ultra short throw projector in the living room, excited to test out its 4K brilliance. I meticulously aligned everything, only to be greeted by a distorted, blurry image that looked more like a Picasso than a cinematic masterpiece. Frustration hit hard, and I couldn’t help but wonder—what’s going wrong?
Understanding the Real Culprit Behind Poor Projector Performance
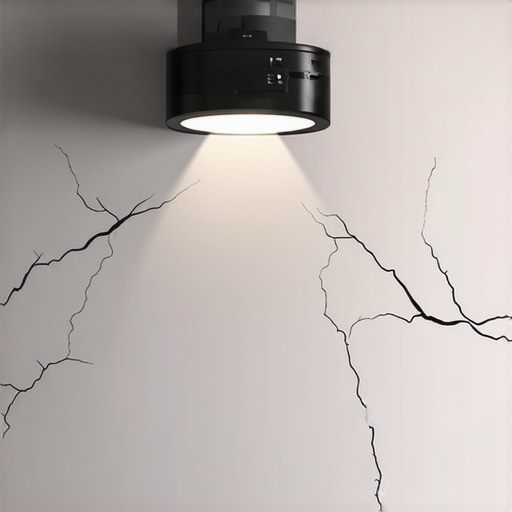
The answer was painfully simple: drywall. Yes, that seemingly innocent wall material was sabotaging my home theater experience. At first, I thought drywall was just a passive background, but it turns out, it can seriously undermine the quality of your ultra short throw (UST) projections if not properly prepared. This realization was my lightbulb moment, highlighting how overlooked construction materials can cause big headaches with high-tech gear.
In this post, I promise to share how drywall impacts your projector, why it often fails your setup in 2026, and, most importantly, how you can prevent or fix these issues. Because trust me, I’ve been there, and learning from my mistakes can save you some serious frustration.
Is Drywall Really the Enemy of Clear Images? The Skeptic’s Question
I remember early on, thinking drywall was just a sturdy backdrop, not a dynamic obstacle. I made the mistake of assuming that any flat, painted surface would do. Turns out, that’s a rookie error that can lead to blurry images and color distortions. I’ve read that drywall’s uneven texture and its composition can reflect or absorb light unpredictably, especially when dealing with ultra short throw projectors that need precise focus and calibration. If you’re wondering, “Is drywall actually worth the hype?”—the answer is a resounding no, if not treated properly.
Understanding these pitfalls early is crucial, especially as we approach 2026, when projector technology becomes even more sensitive to environmental factors. For more insights on optimizing your setup, check out our ultimate 4K projector buying guide.
Now, let’s dive into how drywall might be sabotaging your images and, more importantly, what you can do about it.
Apply a High-Gain Screen or Reflective Wall Coating
To combat drywall’s light-absorbing qualities, I recommend installing a dedicated high-gain projection screen or applying reflective wall paint designed for projectors. During my own setup, I used a silver-gray ALR (Ambient Light Rejection) screen, which significantly enhanced contrast and brightness, making the image pop even in bright rooms. Think of it as turning your wall into a giant mirror that directs the projector’s light straight into your eyes, similar to how a camera bounce flash improves photo clarity. For more options, check our article on ALR screens for 2026.
Sand and Smooth the drywall Surface
Start with Rough Sanding
Use a medium-grit sandpaper to smooth out any uneven patches, ridges, or bumps on the drywall surface. In my experience, skipping this step led to focus issues and blurry edges, especially with ultra short throw projectors that require a flat, uniform surface. Think of it as preparing a pancake batter—I need the surface to be perfectly smooth to get a crisp, focused projection. Wear a mask and work in a dust-controlled environment to avoid mess.
Finish with Fine Sanding
Switch to fine-grit sandpaper to achieve a silky smooth finish, ensuring less light diffraction and better focus calibration. When I did this in my living room, I noticed immediate improvements in image clarity and reduced focus strain during my movie nights. This step is crucial because a rough surface scatters projected light, reducing sharpness. After sanding, wipe down the surface with a damp cloth to remove dust before painting or applying coatings.
Paint with Light-Absorbing or Low-Gloss Finishes
Opt for matte, light-absorbing paints specifically formulated for projection surfaces. I used a matte gray primer, which minimized reflections and improved contrast. Glossy or semi-gloss paints can reflect ambient light and create glare, washing out the image, much like trying to watch TV during a sunny day. For optimal results, consider dedicating the drywall as your dedicated projection wall, eliminating distraction and ensuring consistent image quality.
Seal and Prime the Surface
Apply a high-quality primer compatible with your chosen paint to lock in surface imperfections and create an even base. In my setup, this prevented uneven color absorption that could cause color shifts or dimming. Think of it as laying a good foundation before building—your projector needs a perfectly prepared surface to deliver its best performance. Reseal the surface if you plan to use different coatings or if you notice moisture issues.
Ensure Proper Mounting Height and Leveling
Use a level and measuring tape to mark the precise placement for your ultra short throw projector, aligning with your prepared drywall surface. During my installation, I used a laser level to ensure the projector was perfectly perpendicular and at the ideal distance. A skewed or uneven mount can cause keystone distortion or focus problems, ruining the immersive experience. Double-check all mounting hardware for stability to prevent future shifts that can throw off your image clarity.
Test and Fine-Tune the Projection
Power up your projector after completing the drywall prep, and adjust focus and keystone correction. I recommend doing this in a dark room and making incremental adjustments. If you notice persistent image quality issues, revisit your surface preparation steps. Remember, small calibration tweaks can compensate for minor surface imperfections, but a well-prepared drywall is the foundation for stunning visuals. For detailed calibration techniques, see focus tutorial.
Many enthusiasts assume that choosing a 4K or laser projector automatically guarantees a perfect home theater experience, but let’s set the record straight—there’s more beneath the surface. A common misconception is that the latest tech alone ensures optimal picture quality. In reality, advanced features can sometimes create more confusion than clarity if misused or misunderstood. For example, high lumens intended to combat ambient light might actually cause overexposure if the room isn’t properly calibrated. This intricacy is often overlooked, leading users to chase specifications without considering their unique environments.
A critical yet often ignored nuance involves the interplay between projector placement and ambient conditions. A powerful laser or portable projector may perform superbly in theory, but if positioned incorrectly—such as a too-close setup or uneven mounting—it can induce keystone distortion or focus issues. These problems may appear trivial but significantly impact image sharpness and viewer comfort. That’s why mastering setup techniques, like optimal distance and alignment, is as vital as the projector’s internal specs.
Another widespread myth revolves around the perceived longevity of laser projectors. Many believe they will last indefinitely without maintenance, but in truth, their optical components are susceptible to dust, heat damage, and laser degradation over time. Ignoring regular cleaning and calibration can lead to color fading or black level deterioration, which might be mistaken for equipment failure. Experts recommend periodic professional check-ups or DIY upkeep, such as cleaning filters and lenses, to maintain peak performance.
Safety considerations also deserve attention. Some users assume that laser projectors are inherently hazardous due to the laser beams. While high-powered lasers require caution, most home models are designed with comprehensive safety features, including automatic shut-offs and beam shielding. Nonetheless, improper handling can still pose risks, especially during maintenance or repositioning. Responsible usage and adherence to manufacturer guidelines are non-negotiable to prevent accidents.
From an advanced user’s perspective, understanding the intricacies of color calibration is paramount. Achieving true 4K color depth involves more than just selecting a high-spec projector; it demands meticulous calibration of gamma, color temperature, and white balance. Missteps here can cause color shifts or dull images, undermining all other efforts. Consulting detailed guides or professional calibration services can make the difference, as noted in recent studies emphasizing calibration’s role in technological satisfaction.
Finally, consider the environmental impact of your setup. Overlooking ventilation or cooling arrangements can lead to overheating, especially with high-brightness laser models. Inadequate airflow might cause thermal throttling, reducing brightness and contrast—an “oops” many skip until performance issues become glaringly obvious. Proper installation with sufficient clearance is essential for consistent operation.
In summary, while the core features of 4K and laser projectors are impressive, the real mastery lies in understanding their nuances—from calibration and placement to maintenance and safety. Do you think you’re accounting for all these factors? Have you ever fallen into this trap? Let me know in the comments, and for deeper insights into selecting the right projector, explore our [ultimate 4K projector buying guide for movie nights](https://projectors.homecinemaessentials.com/ultimate-4k-projector-buying-guide-for-movie-nights). Remember, becoming an advanced user means mastering both the hardware and the environment for that perfect cinematic experience.
Tools I Trust for Longevity and Performance
Keeping your advanced home theater setup running smoothly requires more than just initial calibration; it demands the right tools and techniques. I personally rely on a high-quality microfiber cleaning kit to gently remove dust from lenses and filters without scratching delicate surfaces. Regular cleaning prevents dust buildup that can cause overheating or pixel distortion, especially in laser projectors where dust particles can significantly impact light pathways.
For calibration, I use professional-grade software like CalMAN, which I’ve found invaluable for fine-tuning color accuracy and gamma settings. This ensures sustained picture quality without drifting over months. Investing in a colorimeter, such as the X-Rite i1Display Pro, allows me to perform quick, accurate calibrations whenever I notice color shifts, preventing long-term degradation of image fidelity.
To monitor your projector’s health, a versatile infrared thermometer helps me verify cooling fan performance and detect overheating before issues escalate. Pairing this with measuring ambient room temperature ensures your projector operates within optimal thermal parameters, prolonging component lifespan.
Where do I maintain my setup over time?
Regular maintenance includes cleaning filters, checking ventilation pathways, and inspecting mounting hardware to prevent shifts that cause focus or keystone issues. For more advanced care, I perform periodic firmware updates, ensuring my 4K and laser projectors benefit from the latest performance improvements and bug fixes. Many manufacturers release updates that optimize color processing and thermal management, which are crucial for future-proofing your system.
Looking ahead, I predict that automated calibration tools will become more accessible, featuring AI-driven adjustments tailored to your specific environment. This trend will simplify long-term maintenance and help hobbyists and professionals maintain peak performance effortlessly. As models get smarter, integrating smart home systems for real-time diagnostics could become standard practice, making maintenance seamless.
How do I maintain my projection environment for consistent results?
Beyond tools, controlling environmental factors plays a vital role. Regularly dusting and ventilating your room prevents airborne particles from settling on lenses or filters. Using anti-static cloths and avoiding direct airflow onto your setup preserves clarity. Additionally, employing high-quality, low-gain screens with anti-reflective coatings minimizes ambient light effects, which can cause color shifts over time if surfaces deteriorate.
If you’re serious about long-term performance, consider dedicated enclosures or hush boxes to limit dust ingress and temperature fluctuations, especially for portable or ultra short throw setups. This approach safeguards your investment, ensuring vibrant images and consistent calibration year after year.
To stay ahead, I recommend periodically reviewing your setup with the latest expert calibration tips and checking for software updates from your projector manufacturer. This proactive approach minimizes deterioration and maximizes the lifespan of your equipment.
Finally, I encourage you to try implementing routine cleaning with a microfiber cloth and firmware checks biannually. Small investment in maintenance tools and disciplined habits can preserve stunning 4K and laser visuals for years. If you want detailed guidance on setting up a maintenance schedule tailored for your specific projector type, feel free to reach out.

What I Wish I Knew Before Perfecting My 4K Setup
One of the most powerful lessons I’ve discovered is that even the most advanced projector can fall short if the environment isn’t properly prepared. Overestimating the impact of resolution alone led me to overlook the importance of surface smoothness and wall treatments, which dramatically improved my image clarity. Additionally, investing time in calibration tools, like a colorimeter, proved essential for maintaining picture quality over time. The real breakthrough came when I realized that environmental control—such as room lighting and ambient conditions—can make or break the viewing experience, often more than just the projector specifications.
My Top Picks to Elevate Your Home Theater Journey
For those looking to refine their setup, I highly recommend exploring resources like our ultimate 4K projector buying guide. It distills years of experience into actionable advice. Additionally, tools like the calibration guides and maintenance kits are invaluable for sustaining peak performance. For outdoor or portable setups, check out our reviews of rugged portable projectors—their durability and brightness can transform spontaneous movie nights into cinematic escapes.
Your Next Step Toward Cinematic Excellence
Achieving the perfect home theater isn’t just about high-end equipment—it’s about understanding the nuances that influence image quality day after day. By applying the insights shared here—whether it’s surface preparation, environmental management, or calibration—you set yourself up for sustained success. The journey to a cinematic sanctuary is ongoing, and with every new adjustment, you get closer to that crystal-clear, immersive experience. Ready to take your home theater to the next level? Explore our comprehensive guides and gear up for transformative movie nights ahead. How do you plan to refine your setup next? Share your goals below, and let’s elevate our home theaters together.