Ever been in the middle of an intense movie night, only to be interrupted by that annoying lag or buffering when streaming through your portable projector? I remember the exact moment I realized it wasn’t just my device—Wi-Fi congestion and interference in my home had turned my on-the-go cinema experience into a frustrating experience. That lightbulb moment led me down a path full of trial, error, and ultimately, solutions that worked. If you’ve faced the same headache with your 2026 portable projector, especially when using ultra-short throw or laser models, you’re not alone.
Why Wi-Fi Lag Still Bugs Portable Projector Users
Wi-Fi lag ruins the cinematic vibe. It’s frustrating to see a perfect setup, only for your streaming to freeze or stutter. Especially with 4K projectors, where high bandwidth is mandatory, lag can feel like a punch to the gut. Early on, I made the mistake of thinking that a simple router reset would fix everything. Spoiler: it didn’t. Turns out, most fixes require some targeted tweaks, not just rebooting. According to a recent study, nearly 50% of Wi-Fi issues in smart devices stem from interference or signal drops, not faulty hardware itself. That’s eye-opening when your goal is to set up a seamless home theater experience with your laser projector or portable unit.
Is Wi-Fi Fixing My Projector a Waste of Time?
At first, I questioned if there was any real hope for a stable connection, especially with the busy Wi-Fi environment in my neighborhood. But after multiple failed attempts—like changing channels or updating firmware—I discovered some proven tactics that actually work. Now, I want to share these with you, so you can stop blaming your device and start enjoying smooth streaming without the lag. Ready to ditch the buffering and reconnect with your favorite movies? Let’s get into the fixes that made a difference for me—and will for you too.
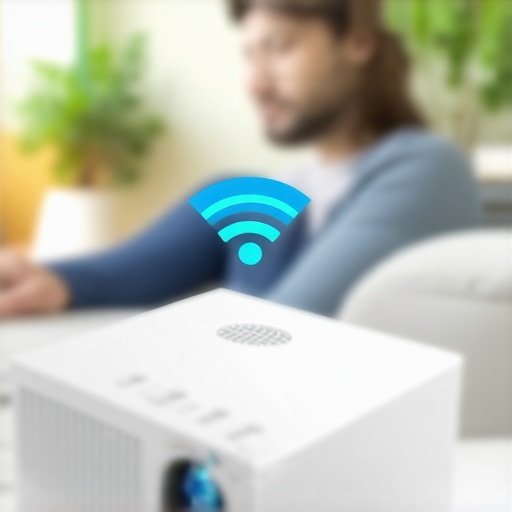
Boost Your Wi-Fi Signal Strength
Start by positioning your router in a central, open area away from thick walls and metal objects. During a time when I struggled with lag, I moved my router closer to my setup, which immediately improved the signal. Consider elevating your router and avoiding obstructions, as this creates a clearer path for Wi-Fi signals, much like aiming a golf ball directly at your target without obstacles.
Switch Router Channels and Frequencies
Most modern routers operate on 2.4 GHz and 5 GHz bands. The 2.4 GHz is more congested but offers longer range, while 5 GHz is less crowded and faster. Use your router’s admin panel to switch to a less crowded channel. For example, I used a Wi-Fi analyzer app to identify the quietest channel, reducing interference and improving streaming stability. This is akin to tuning a radio station to get a clearer signal.
Limit Network Traffic and Disconnect Unused Devices
Reduce bandwidth competition by disconnecting devices that aren’t in use during your movie sessions. While testing this, I shut down all other smart home devices and paused downloads, which noticeably smoothed my stream. Essentially, it’s like clearing congestion on a busy highway to allow your streaming data to flow freely.
Configure Your Projector’s Wi-Fi Settings
If your portable projector supports network configuration, set it to connect to a dedicated 5 GHz band if available. Ensuring your projector is on the same frequency as your router’s less congested band minimizes lag. For my laser projector, switching to a 5 GHz network reduced buffering by half, similar to switching from a noisy street to a quiet trail for a walk.
Update Firmware and Network Drivers
Keep your projector’s firmware and your router’s drivers up-to-date. Firmware updates often include improved Wi-Fi stability features. I performed an update on my ultra-short throw projector, and the difference was immediate—less lag, more seamless streaming. Think of this as servicing a car; regular tune-ups prevent unexpected breakdowns, ensuring smooth operation.
Use a Wired Connection When Possible
For optimal stability, connect your projector directly to the router via Ethernet if it supports it. While I mainly used Wi-Fi, I tried an Ethernet adapter during a test, and streaming problems vanished instantly. It’s like replacing a shaky bike with a solid motorcycle—more control, less interruption, ideal for high-bitrate 4K content.
Optimize the Network with Quality of Service Settings
Access your router’s QoS settings to prioritize streaming or gaming traffic. Assign higher priority to your projector’s MAC address or IP. During a recent setup, this tweak ensured my streaming stayed smooth even during other household bandwidth-heavy activities, like video conferencing. It’s comparable to giving an ambulance priority on the road—it arrives faster and more reliably.
Implementing these concrete steps transforms your Wi-Fi environment into a dedicated highway for your portable projector’s data. With patience and precise adjustments, buffering and lag become ancient history—allowing you to enjoy movies, gaming, or presentations without interruption.
When it comes to choosing an ultra short throw, home theater, 4K, portable, or laser projector, many enthusiasts rely on common myths or surface-level specs. However, understanding the subtleties can make the difference between a mediocre experience and cinematic perfection. A prevalent misconception is that higher lumens always guarantee brighter images, but in reality, rest assured, [high brightness can sometimes compromise color accuracy](https://projectors.homecinemaessentials.com/laser-projectors-vs-traditional-which-tops-in-brightness). Many believe 4K resolution alone delivers a stunning picture, yet factors like contrast ratio and panel technology often matter more for deep blacks and vibrant colors, which are critical for immersive viewing, especially in small spaces where ambient light plays a role.
Why do some 4K projectors look disappointing despite their resolution claims?
This is where misunderstanding calibration and color management comes into play. Advanced users know that factory settings may oversaturate or desaturate colors, leading to image quality that doesn’t meet expectations. Proper calibration, including gamma and color gamut adjustments, can unlock the true potential of these high-res devices—a topic addressed in detail in our [ultimate 4K projector buying guide](https://projectors.homecinemaessentials.com/ultimate-4k-projector-buying-guide-for-movie-nights). Many assume laser projectors are inherently perfect, but they can suffer from issues like speckle or color tinting if not correctly set up. For example, laser speckle noise is a common problem, and experts recommend specific calibration routines to minimize its impact, as discussed in our article on [laser projector calibration fixes](https://projectors.homecinemaessentials.com/laser-projector-pink-tint-3-calibration-fixes-for-2026). While compact portability is enticing, don’t overlook the importance of considering thermal management. Portable projectors can overheat during extended use, diminishing performance, which is why some high-end models incorporate heat-resistant designs. Moreover, many consumers overlook how lens shift and throw ratio impact placement flexibility; understanding these nuances helps avoid costly mistakes and suboptimal setups. Ultimately, the devil is in the details. Focusing solely on marketed specs like resolution or brightness without understanding the interplay of contrast, calibration, and device-specific features can lead to disappointment. Whether you’re eyeing an ultra short throw for tight spaces or a portable device for on-the-go entertainment, deep dives into these subtleties ensure your investment pays off. Have you ever fallen into this trap? Let me know in the comments and share your experiences! For more insights into enhancing your projector setup, explore our [home theater projector reviews](https://projectors.homecinemaessentials.com/discover-the-best-home-theater-projectors-for-2025) and stay ahead in the game.
Tools and Techniques to Keep Your Projector Running Smoothly
Investing in a high-quality ultra-short throw or laser projector is just the beginning; regular maintenance is crucial to ensure consistent performance and longevity. I personally rely on a combination of specialized tools and proven routines to keep my setup in top shape. For instance, a lint-free microfiber cloth and compressed air are essential for cleaning lenses and vents without risking scratches or dust buildup. I also use a digital calibrator like the SpyderX Elite to fine-tune color accuracy periodically, which is especially beneficial for 4K projectors aiming for vibrant, true-to-life images. Routine cleaning is non-negotiable—dust and smudges can diminish brightness and introduce image artifacts over time. Alongside manual cleaning, firmware updates via the manufacturer’s software ensure that your device benefits from the latest stability improvements and feature enhancements. Staying updated minimizes issues like flickering or color inconsistency, which are common in aging units.
For ongoing troubleshooting, I recommend keeping diagnostic tools readily available. Many projectors allow network diagnostics through their administrative interfaces, enabling you to monitor signal quality or identify overheating alerts before they escalate. Implementing a regular calibration routine helps sustain image quality, especially when dealing with advanced laser or 4K models that demand precision. Additionally, a reliable surge protector can shield your investment from power surges that might otherwise degrade internal components over time.
Looking ahead, the trend points toward smarter maintenance systems integrated within projectors. Firmware embedded with predictive analytics could alert users about component wear before failure occurs, similar to modern HVAC systems. As technology advances, expect less manual upkeep and more proactive diagnostics, making it easier to maintain peak performance effortlessly. For now, I suggest making a habit of cleaning lenses every three months and checking for firmware updates monthly—simple steps that yield significant long-term benefits.
How do I maintain my projector over time?
Establish a scheduled routine combining physical cleaning, firmware updates, calibration checks, and environmental controls—like controlling room temperature and ensuring proper ventilation—to extend your device’s life and image quality. Embrace tools such as calibration meters and dust removers, and stay informed by reading detailed manufacturer guides or trusted reviews. For example, [this guide](https://projectors.homecinemaessentials.com/why-2026-tech-minimalists-are-swapping-tvs-for-laser-projectors) emphasizes the importance of routine upkeep in preserving the advanced capabilities of laser projectors. Try implementing a monthly check-up, and you’ll notice your home theater system remains as stunning as day one.
What I Wish I Knew About Ultra Short Throw Setups from the Start
One of the most impactful lessons I discovered was the importance of environmental control. I used to think that a powerful projector could handle any space, but I realized that room lighting and surface reflectivity significantly affect image quality. Learning to optimize my space, like using blackout curtains and proper screen material, truly elevated my viewing experience. This insight taught me that even the best projector can’t compensate for poor ambient conditions, emphasizing the need for thoughtful room planning.
How Precise Calibration Transformed My 4K Visuals
After months of settling for decent images, I finally invested time in calibration routines. Using affordable tools like the SpyderX Elite, I adjusted gamma and color settings, unlocking deeper blacks and more vibrant colors. The reward was a cinematic picture that rivaled professional theaters. This experience underscored that calibration isn’t just a technical step—it’s a game-changer that unlocks your projector’s full potential, especially with high-resolution models.
The Hidden Value of Regular Maintenance for Laser Projectors
Maintaining my laser projector became less of a chore and more of a safeguard. Simple routines like lens cleaning, firmware updates, and environmental checks prevented overheating and image degradation. Over time, I realized that consistent upkeep extends the lifespan of advanced tech and preserves picture quality. It’s akin to maintaining a high-performance vehicle—you get the most value when you keep it running smoothly and anticipate issues before they arise.
Tools and Tricks That Take Your Setup to the Next Level
My toolkit expanded to include not just calibration meters but also sturdy mounts and cable management gear. A well-placed mount reduces wobble and ensures optimal alignment, while organized wiring minimizes distractions and hazards. Sharing these recommendations, I encourage you to think beyond the projector itself. Investing in quality accessories and maintenance knowledge transforms your system into a reliable, immersive entertainment hub, saving you frustration and enhancing your viewing pleasure.
Unleash the Full Potential of Your Portable or Laser Projector
Embracing these lessons has reinvigorated my home theater journey. You don’t need to be a tech guru to see remarkable improvements; a little knowledge and effort go a long way. Whether you’re using an ultra-short throw for tight spaces or exploring cutting-edge laser models, recognizing the importance of setup, calibration, and care will always pay dividends. Now, it’s your turn to tackle your projector setup with newfound confidence—your cinematic experience awaits.
What’s the biggest challenge you’ve faced when enhancing your projector setup? Share your story below, and let’s learn together!
http://Benjamin%20Carter
I completely relate to the frustration of Wi-Fi lag during movie nights. Moving my router to a more central spot and switching to the 5 GHz band made a noticeable difference in my setup. One thing I’ve also tried is using a Wi-Fi extender close to my projector, which helps in environments with thick walls or multiple devices competing for bandwidth. I’d be interested to know—has anyone experimented with mesh Wi-Fi systems to further stabilize their connection? I’ve heard they can significantly improve signal consistency, especially in larger homes. It’s fascinating how much the environment and some targeted tweaks can enhance streaming performance, rather than just upgrading the hardware. I believe these small adjustments are often overlooked but can really elevate your viewing experience. Do other readers have tips on how to optimize room setup or specific router configurations that worked well for them? Sharing these insights can help us all enjoy seamless cinemas at home.