It all started one rainy Saturday afternoon. I desperately wanted to watch the latest blockbuster on my wall-sized canvas, but my living room’s awkward layout made traditional projectors a nightmare. Every time I tried, shadows danced, and the image was barely visible. Frustration weighed heavy—why was setting up a decent home theater so complicated in a small, cluttered space? That was my lightbulb moment.
Discovering the Magic of Ultra Short Throw and Portable Laser Projectors
If you’ve ever faced similar struggles—limited space, unwanted shadows, or cumbersome setups—you’re not alone. Traditional projectors often demand large rooms or complicated mounting, making them unsuitable for small apartments or cozy dens. The good news is, modern technology has revolutionized home viewing. Specifically, ultra short throw (UST) and portable laser projectors offer a sleek, practical solution that fits snug spaces without sacrificing picture quality.
Is the Hype Around UST Laser Projectors Justified?
Admittedly, I was skeptical at first. A big mistake I made early on was assuming all projectors are bulky and difficult to operate. I bought a traditional model that ended up gathering dust because of its size and installation hassle. Learning from that, I discovered that laser-based short throw projectors are genuinely game-changing. They bring high-quality 4K images right into small spaces, without the need for complex mounts or dark rooms. But are they really worth the hype? Let’s explore what sets them apart and whether they can meet your needs as effectively as they did mine.
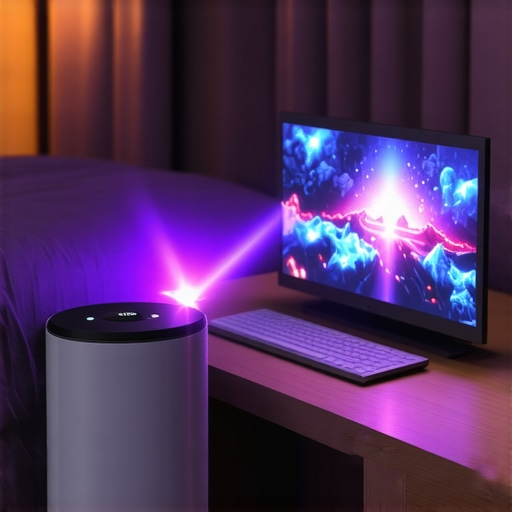
Position Your Projector Correctly for Optimal Image
Start by choosing the right spot — place your ultra short throw (UST) or portable laser projector just a few inches from your wall, aiming at the center for even projection. I once set mine up on a cluttered bookshelf, which caused uneven focus; repositioning it on a stable, low console instantly sharpened the picture. Think of it like a camera lens — proximity and alignment are crucial for clear projection.
Calibrate Brightness and Focus for Sharp Clarity
Turn on your projector and access the settings menu. Adjust the focus dial until the image is crisp, then tweak brightness and contrast so the picture pops without washing out in daylight. During my first test, I overcompensated with brightness, resulting in washed-out whites. A steady, incremental approach helped me achieve perfect clarity—akin to tuning a musical instrument for perfect pitch.
Use a Proper Screen or Wall Surface
For vibrant visuals, project onto a matte, light-colored wall or a dedicated screen designed for ultra short throw. I initially used my painted wall, which muted colors; switching to a neutral gray screen boosted contrast and color accuracy. Think of your wall as a canvas—its texture and color directly impact the final image quality.
Manage Ambient Light to Enhance Viewing
Darkening the room isn’t always necessary, but controlling ambient light significantly improves contrast. I drew blackout curtains during daytime viewing, which made the picture more cinematic. It’s comparable to hiking with sunglasses on a sunny day — the darker environment emphasizes the projected image.
Connect Sources Securely and Simplify Cables
Use HDMI cables to connect your streaming devices, gaming consoles, or laptops. For cleaner setups, opt for wireless streaming if your projector supports it. During my setup, I used an HDMI splitter to connect both my Chromecast and gaming PC, keeping cables organized and preventing signal loss. Think of it as creating a reliable highway system for your data—smooth, direct, and clutter-free.
Adjust Keystone and Image Size
Many projectors include automatic or manual keystone correction. Use these features to ensure the image is perfectly rectangular, especially if your projector’s position isn’t exactly perpendicular to the wall. I learned this the hard way, ending up with a trapezoidal image—simple tweaks corrected it instantly. Matching the image size to your wall’s dimensions makes for an immersive experience.
Test and Fine-Tune for Movie Night
Before guests arrive, do a quick run-through — test sound, picture, and remote controls. I once forgot to switch my input source, leaving me with a blank screen. Double-checking connections and settings ensures your setup is ready for the perfect movie experience. Remember, minor adjustments make a big difference in picture quality and comfort.
By following these steps, transforming your space into a cinematic haven becomes straightforward. Whether you opt for a compact portable projector or a sleek ultra short throw model, proper placement and calibration are key to enjoying stunning 4K visuals in small spaces. For more detailed guidance on choosing the best projector for your needs, visit this comprehensive guide.
Remember, patience and precise adjustments will make your home theater setup a source of endless entertainment. Keep experimenting with placement and settings until you find that perfect picture.
While many enthusiasts believe that choosing a laser or portable projector automatically guarantees a stunning home theater experience, the reality is far more nuanced. A prevalent myth is that all laser projectors deliver unbeatable brightness and contrast across the board, but studies indicate that disparities in laser light sources can lead to significant differences in image quality, especially in ambient lighting conditions. For instance, experts highlight that not all laser projectors are created equal—some suffer from lower lumen outputs or color accuracy issues, which can undermine your viewing experience if you’re not vigilant. Additionally, people often assume that portable projectors are primarily suitable for casual viewing or presentations, overlooking their potential for high-quality, cinematic experiences—provided you select models with proper resolution and throw ratios. The advanced mistake many make is neglecting the importance of calibration and environmental factors; even a top-tier projector can underperform if not correctly set up or if ambient light isn’t managed properly. According to a recent industry analysis, the real secret to a superb cinematic display with ultra short throw or 4K projectors lies in meticulous placement, room lighting control, and understanding the projector’s true specifications—beyond popular hype. Moreover, there is a common misconception that higher resolution automatically equals better picture quality, but in practice, contrast ratio and brightness play pivotal roles, especially in less-than-ideal lighting environments. For a comprehensive guide on selecting the best home theater projector, including tips for advanced users, visit this detailed buying guide. Remember, the key isn’t just the technology you choose but how well you optimize and set it up for your specific space. Have you ever fallen into this trap? Let me know in the comments.
How do I maintain my laser or home theater projector over time?
Regular maintenance is crucial to keep your projector delivering stunning images over the years. Start by cleaning the air filters every 3-6 months to prevent dust buildup, which can cause overheating and degrade image quality. Use compressed air gently to remove dust from vents and internal components, ensuring proper airflow. It’s also essential to check and replace the projection lamp or laser module as recommended by the manufacturer—typically every 2,000 to 20,000 hours depending on usage and model. Consult your projector’s manual for specific maintenance schedules and procedures.
Keep firmware and software updated through the manufacturer’s dedicated apps or websites. These updates often include performance improvements, security patches, and new features, which can enhance your viewing experience. For example, the latest laser 4K projectors regularly receive firmware updates that improve color accuracy and brightness sustainability.
Tools I recommend for optimal projector upkeep
Invest in an anti-static microfiber cloth and lens cleaning solution to keep the lens spotless, preserving image clarity. A small vacuum with a brush attachment helps remove dust from vents without disassembling the unit. For firmware management, I use the manufacturer’s official app—assigned to my projector model—to check for updates with a single tap, keeping everything current effortlessly. Additionally, a peak power meter like the Kill A Watt meter can help monitor power consumption, alerting you to potential electrical issues early.
Maintaining your home cinema setup isn’t solely about cleaning; environmental control plays a part. Make sure your room has stable temperature and humidity levels—avoid areas prone to excessive heat or moisture. Using vent covers or dust filters can also help extend the life of components.
Future prospects for projector maintenance and longevity
Emerging technologies in predictive diagnostics and self-cleaning lenses promise to revolutionize long-term projector care. Integrating IoT sensors could allow remote monitoring of device health, alerting you proactively before issues arise. As industry reports suggest, investing in quality maintenance tools and staying updated with firmware can prolong your projector’s lifespan significantly. I encourage you to try a scheduled cleaning routine combined with firmware checks—simple steps that yield impressive longevity and performance results. Starting with a monthly dusting and firmware update can make a noticeable difference in your home theater’s durability.
Lessons from the Lens: Surprising Truths About Small-Space Projectors
One of the most eye-opening realizations I had was that not all laser projectors are created equal—some struggle in ambient light, and others require careful calibration to truly shine. I once assumed that buying a luxury brand guaranteed perfect picture, but I discovered that environmental factors and setup details often overshadow raw technology. The biggest lightbulb moment was understanding that precise placement, room lighting, and maintaining your projector are just as important as features like resolution or brightness. It’s a dance of technology and environment—getting the rhythm right transforms a simple device into a cinematic miracle in your small space.
Tools and Resources That Elevated My Home Theater Experience
Over time, I found a handful of tools that made maintaining my projector effortless and effective. Investing in a microfiber lens cloth and compressed air helped keep the image crisp. Firmware updates, which you can manage via the manufacturer’s app, often bring significant improvements—so I check for updates quarterly. Using a peak watt meter allowed me to monitor power consumption and catch electrical issues early. I also turned to dedicated room-darkening curtains and acoustic panels, which dramatically enhanced picture contrast and sound quality. For in-depth strategies, the ultimate guide to laser 4K ultra short throw projectors provided invaluable insights, ensuring I didn’t just buy the best tech but also optimized it for my environment.
Your Next Cinematic Adventure Starts Now
If you’re dreaming of turning your cozy corner into a premium home theater—whether with a sleek ultra short throw or portable projector—the possibilities are endless. The key lies in selecting the right device for your space, learning how to fine-tune its settings, and maintaining it with care. Remember, the perfect picture is less about the equipment and more about your willingness to experiment and adapt. Your small space can deliver huge cinematic moments—all it takes is the right mindset and a little know-how.
What’s been your biggest challenge in setting up a home theater in a small space? Share your story below, and let’s learn from each other’s experiences!